Trekking in Peru: My Complete Guide to the Salkantay Trek, Cusco, Machu Picchu, and Rainbow Mountain
Some adventures are too incredible to pass up. Peru was one of them.
When my friend Meredith invited me to join her trip as a photographer and do the 5-day Salkantay Trek to Machu Picchu, my immediate instinct was to say yes. But almost as quickly, those butterflies set in…did I just agree to do something CRAZY?! I had never been to South America, never traveled for a group before, and never hiked above 15,000 feet. It felt exciting and intimidating in equal measure — which, in my experience, is usually a sign that something epic is about to happen.
When my plane touched down in Cusco, I knew this would be incredibly different from the type of travel I was used to. I had only ever been to major European cities and countries, and Peru felt so much more rugged and wild. From the cobblestone streets of Cusco to the high mountain passes of the Andes, this trip was better than I ever could have imagined. We spent time acclimating in Cusco, hiked the Salkantay Trek to Machu Picchu, explored local markets, took a Peruvian cooking class, soaked in hot springs, and ended the trip with an ATV adventure to Rainbow Mountain.
If you’re planning a trekking trip to Peru, this is my complete guide based on everything I did there in May 2024 — including what to do in Cusco, how to prepare for altitude, what surprised me most, where we stayed on the trek, and practical tips I’d absolutely want to know before going.
Itinerary Overview
This itinerary covers 10 total days in Peru, not including travel days. I spent time acclimating in Cusco before hiking the 5-day Salkantay Trek to Machu Picchu, then added a couple of extra experiences afterward, including a cooking class and a day trip to Rainbow Mountain.
Here’s what I did at a glance:
3 nights in Cusco
4 nights / 5 days on the Salkantay Trek
1 night in Aguas Calientes
2 additional days in Cusco with a cooking class and Rainbow Mountain excursion
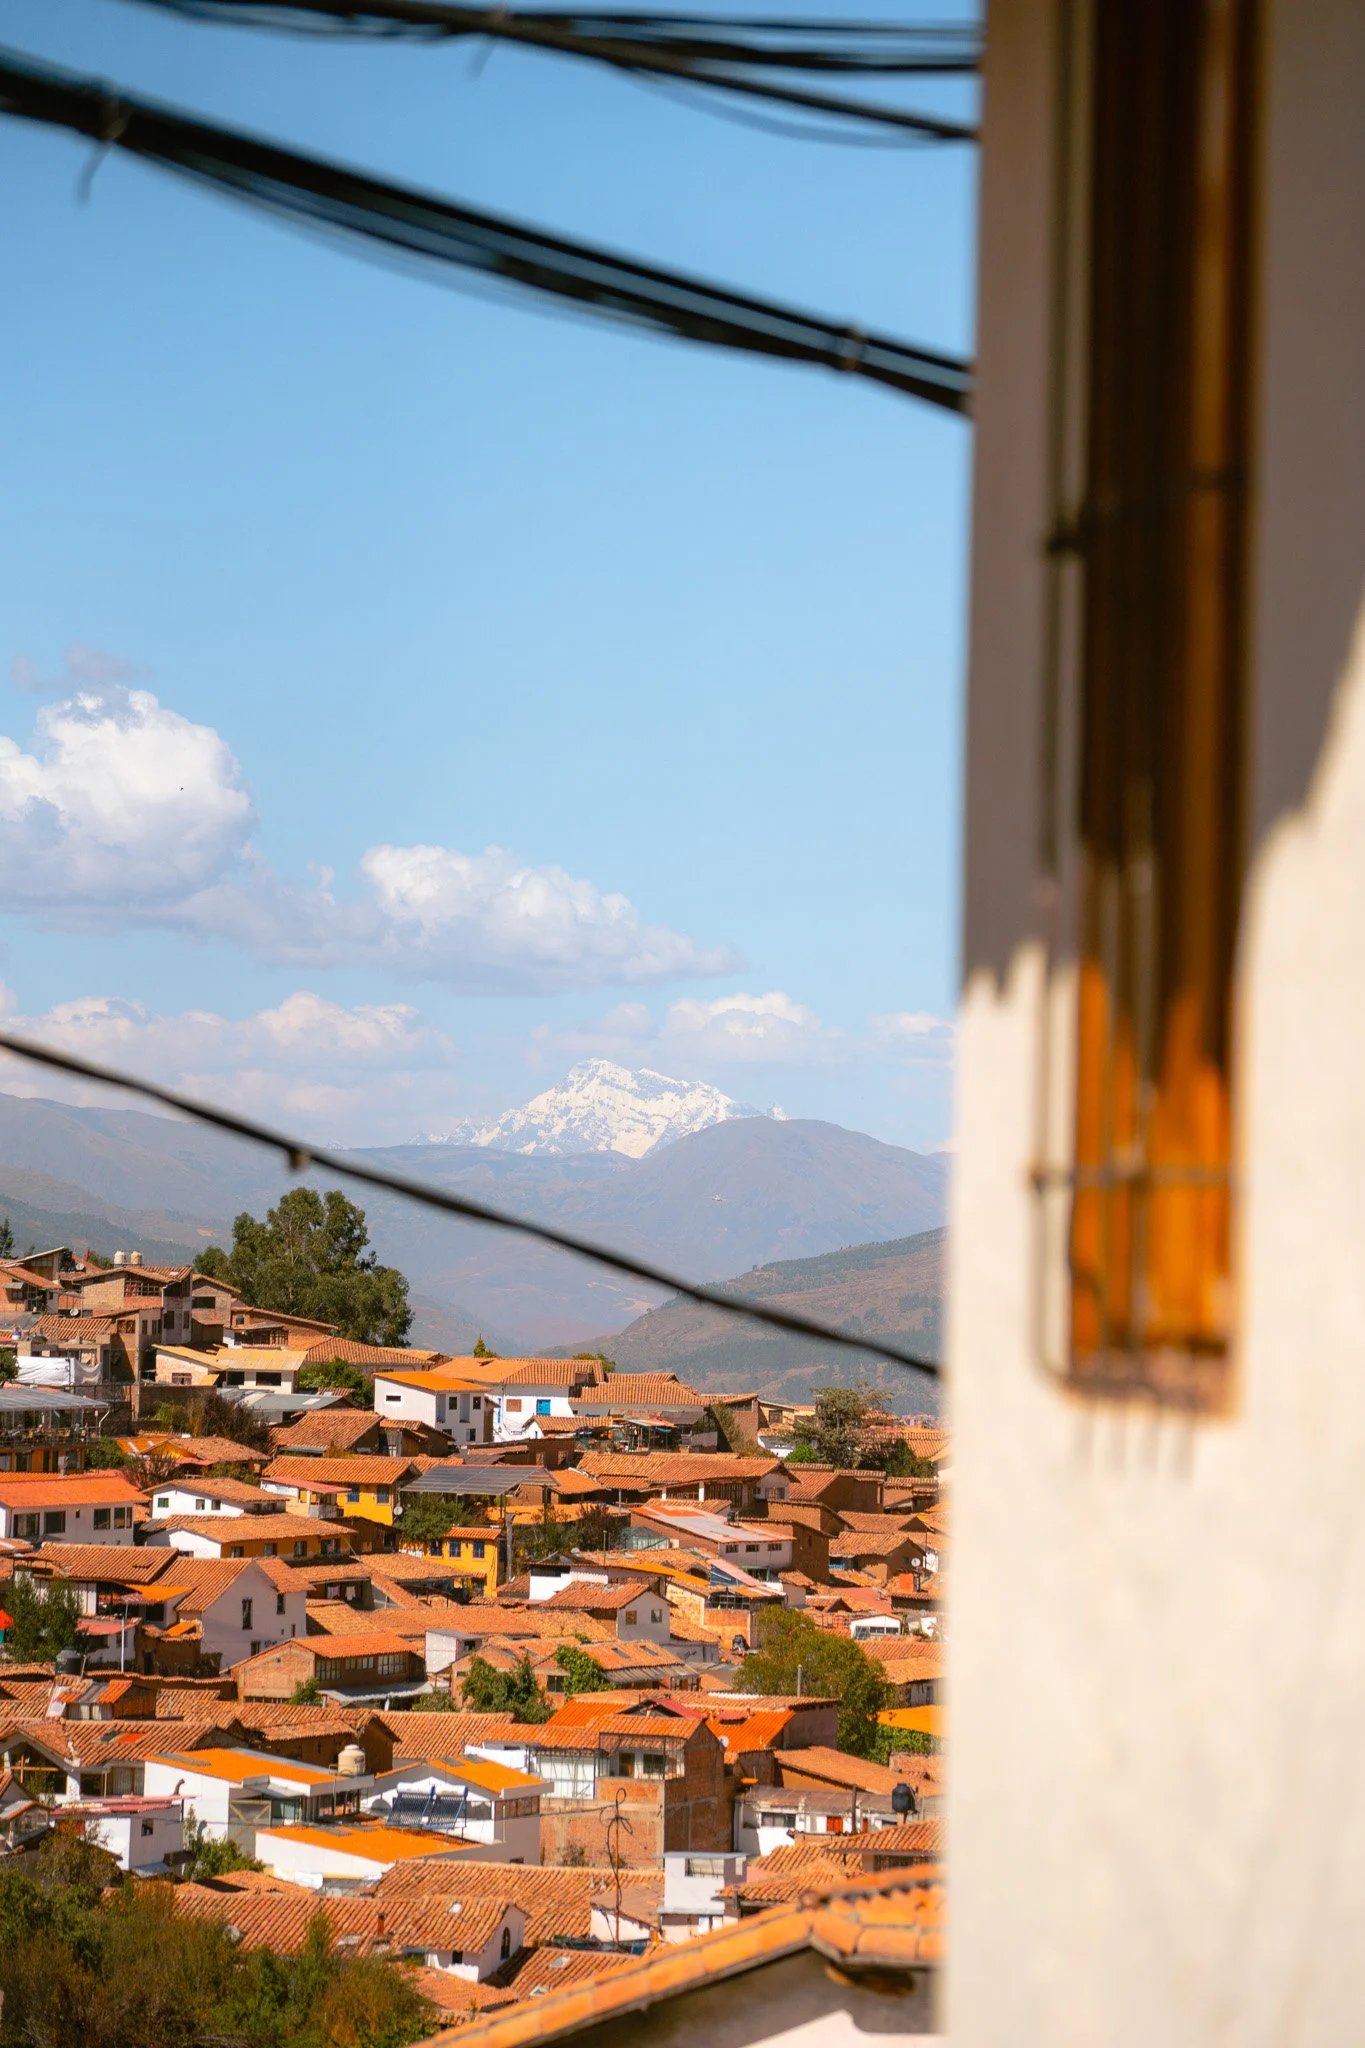
Cusco
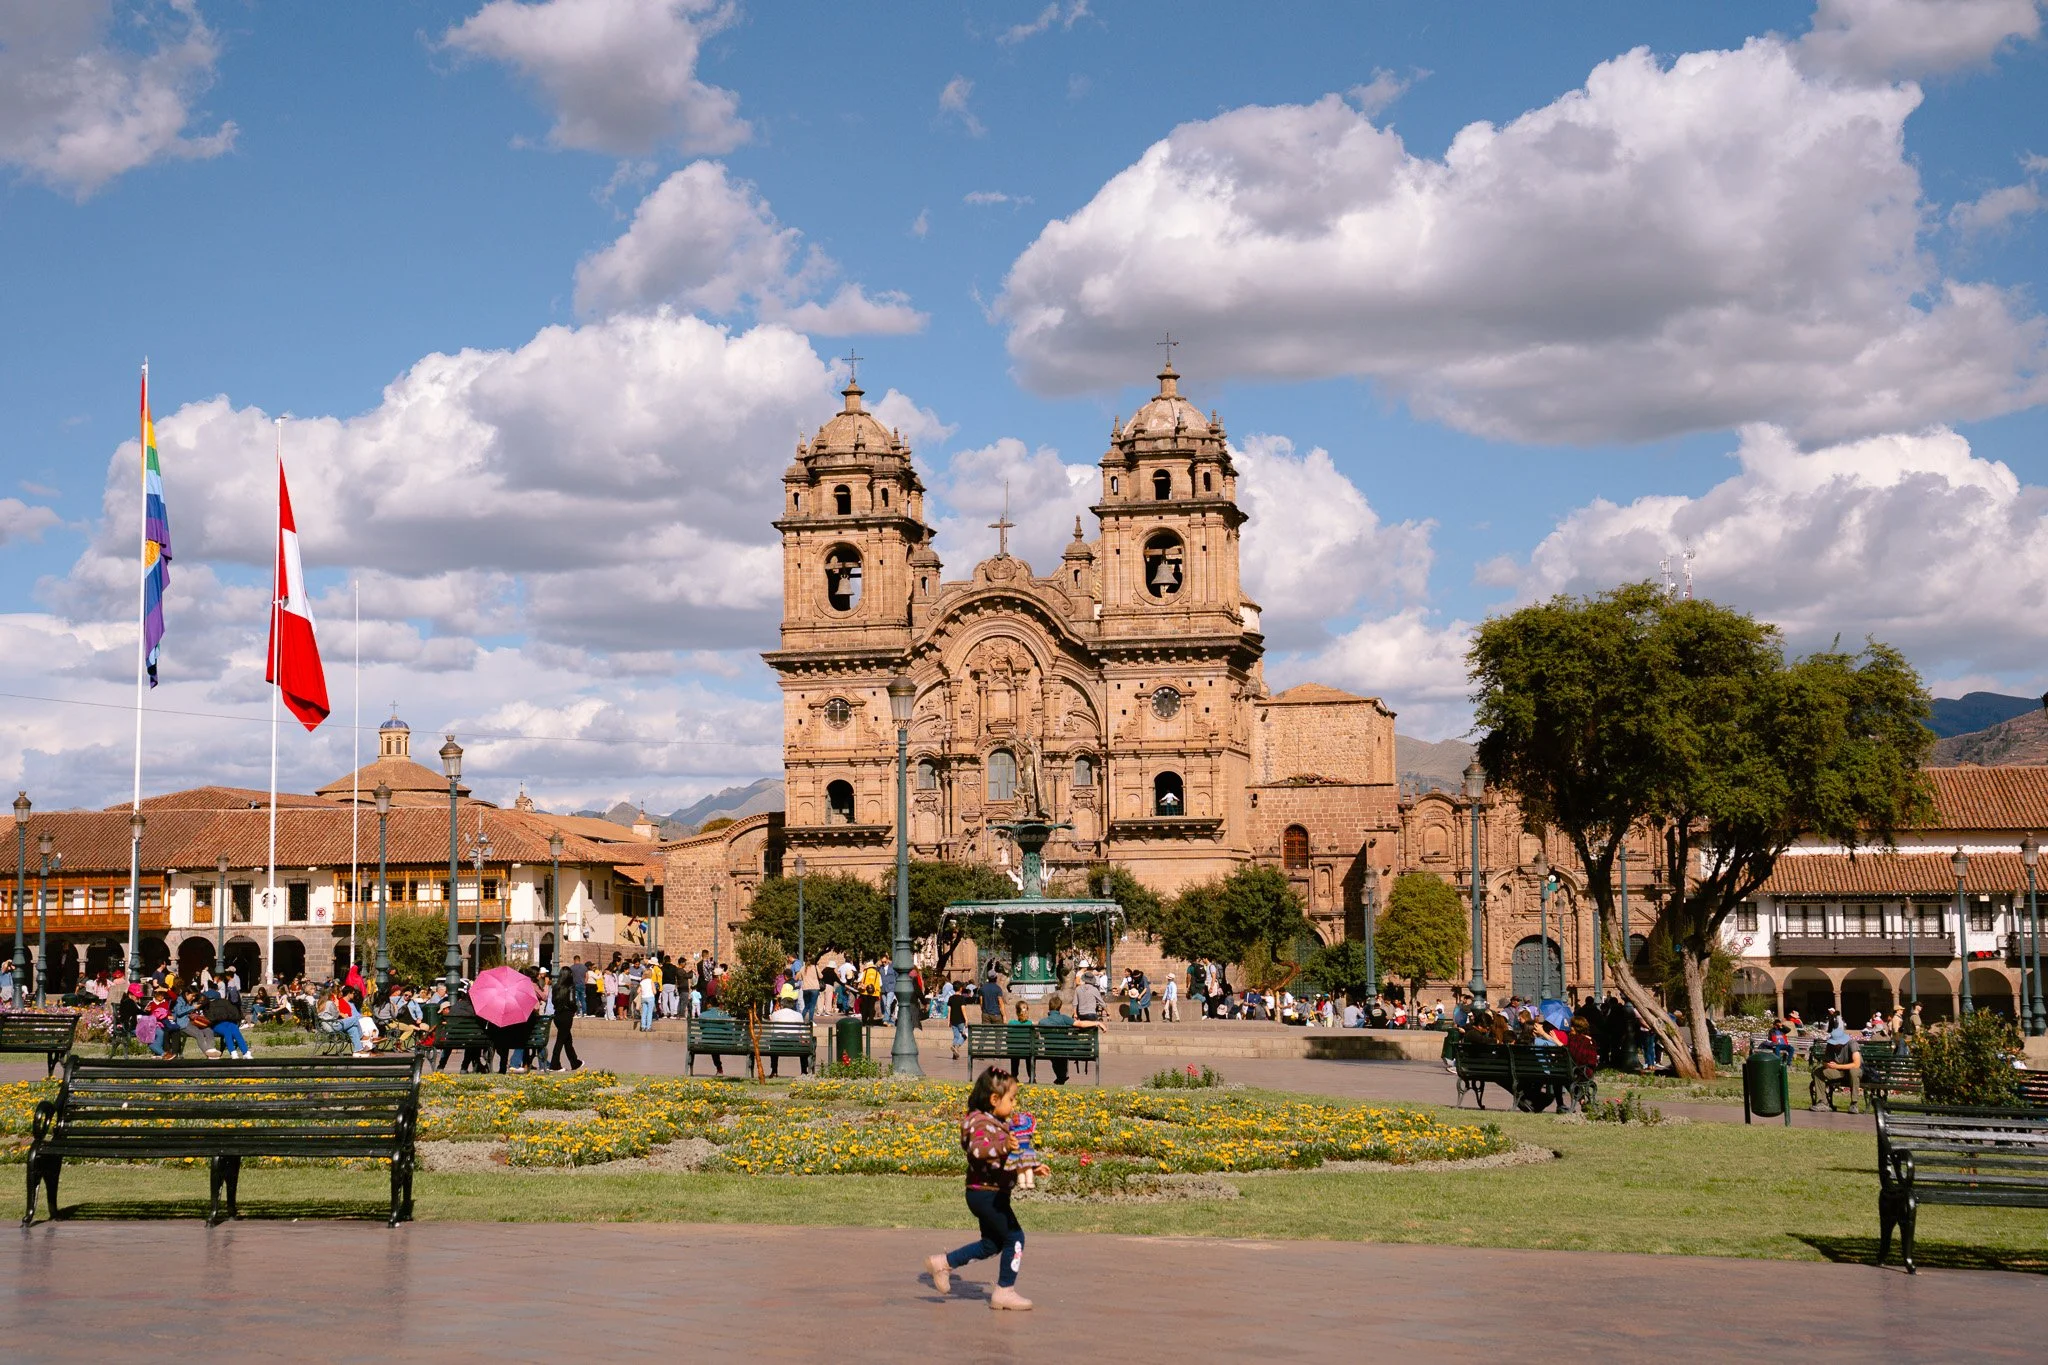
Cusco is a city in the Peruvian Andes that sits at 11,152 feet, and for most people, it’s the main jumping-off point for Machu Picchu, Rainbow Mountain, the Salkantay Trek, and many other adventures. And even if you’re coming from somewhere with elevation (I live in Colorado at ~5,280 feet) it can still hit you harder than you expect.
I really think spending 2 to 3 days in Cusco before doing any major trekking is one of the smartest things you can do. The city itself is beautiful and full of history, so “acclimating” here doesn’t feel like a chore — it’s truly a non-negotiable part of your adventure. If you can, I’d also spend 1-2 days here after the Salkantay Trek to wind down and go on a few more adventures (like Rainbow Mountain) once you’re more acclimated.
The biggest goal during those first couple of days is simple: relax, hydrate, and do not overdo it. Walk slowly, drink tons of water with electrolytes, eat some great food, and just let your body catch up.
Where to Stay in Cusco
My group and I stayed at Hotel Rumi Punku, and we absolutely loved it. It had a beautiful courtyard, a spa room, massages, and one of the best continental breakfasts I had on the trip with fresh fruit, avocado, eggs, toast, baked goods, and excellent coffee. It was also in a really convenient location in Cusco: central enough to walk to everything, but still peaceful and quiet at night. When you’re adjusting to altitude and having trouble falling asleep, that quiet matters so much. The hotel also safely stored our luggage for us when we left Cusco to do the Salkantay Trek.
My Favorite Things to Do in Cusco
Cusco is definitely not just the place you pass through on your way to somewhere else. Here are some of my favorite things I did there:
Walk around San Blas
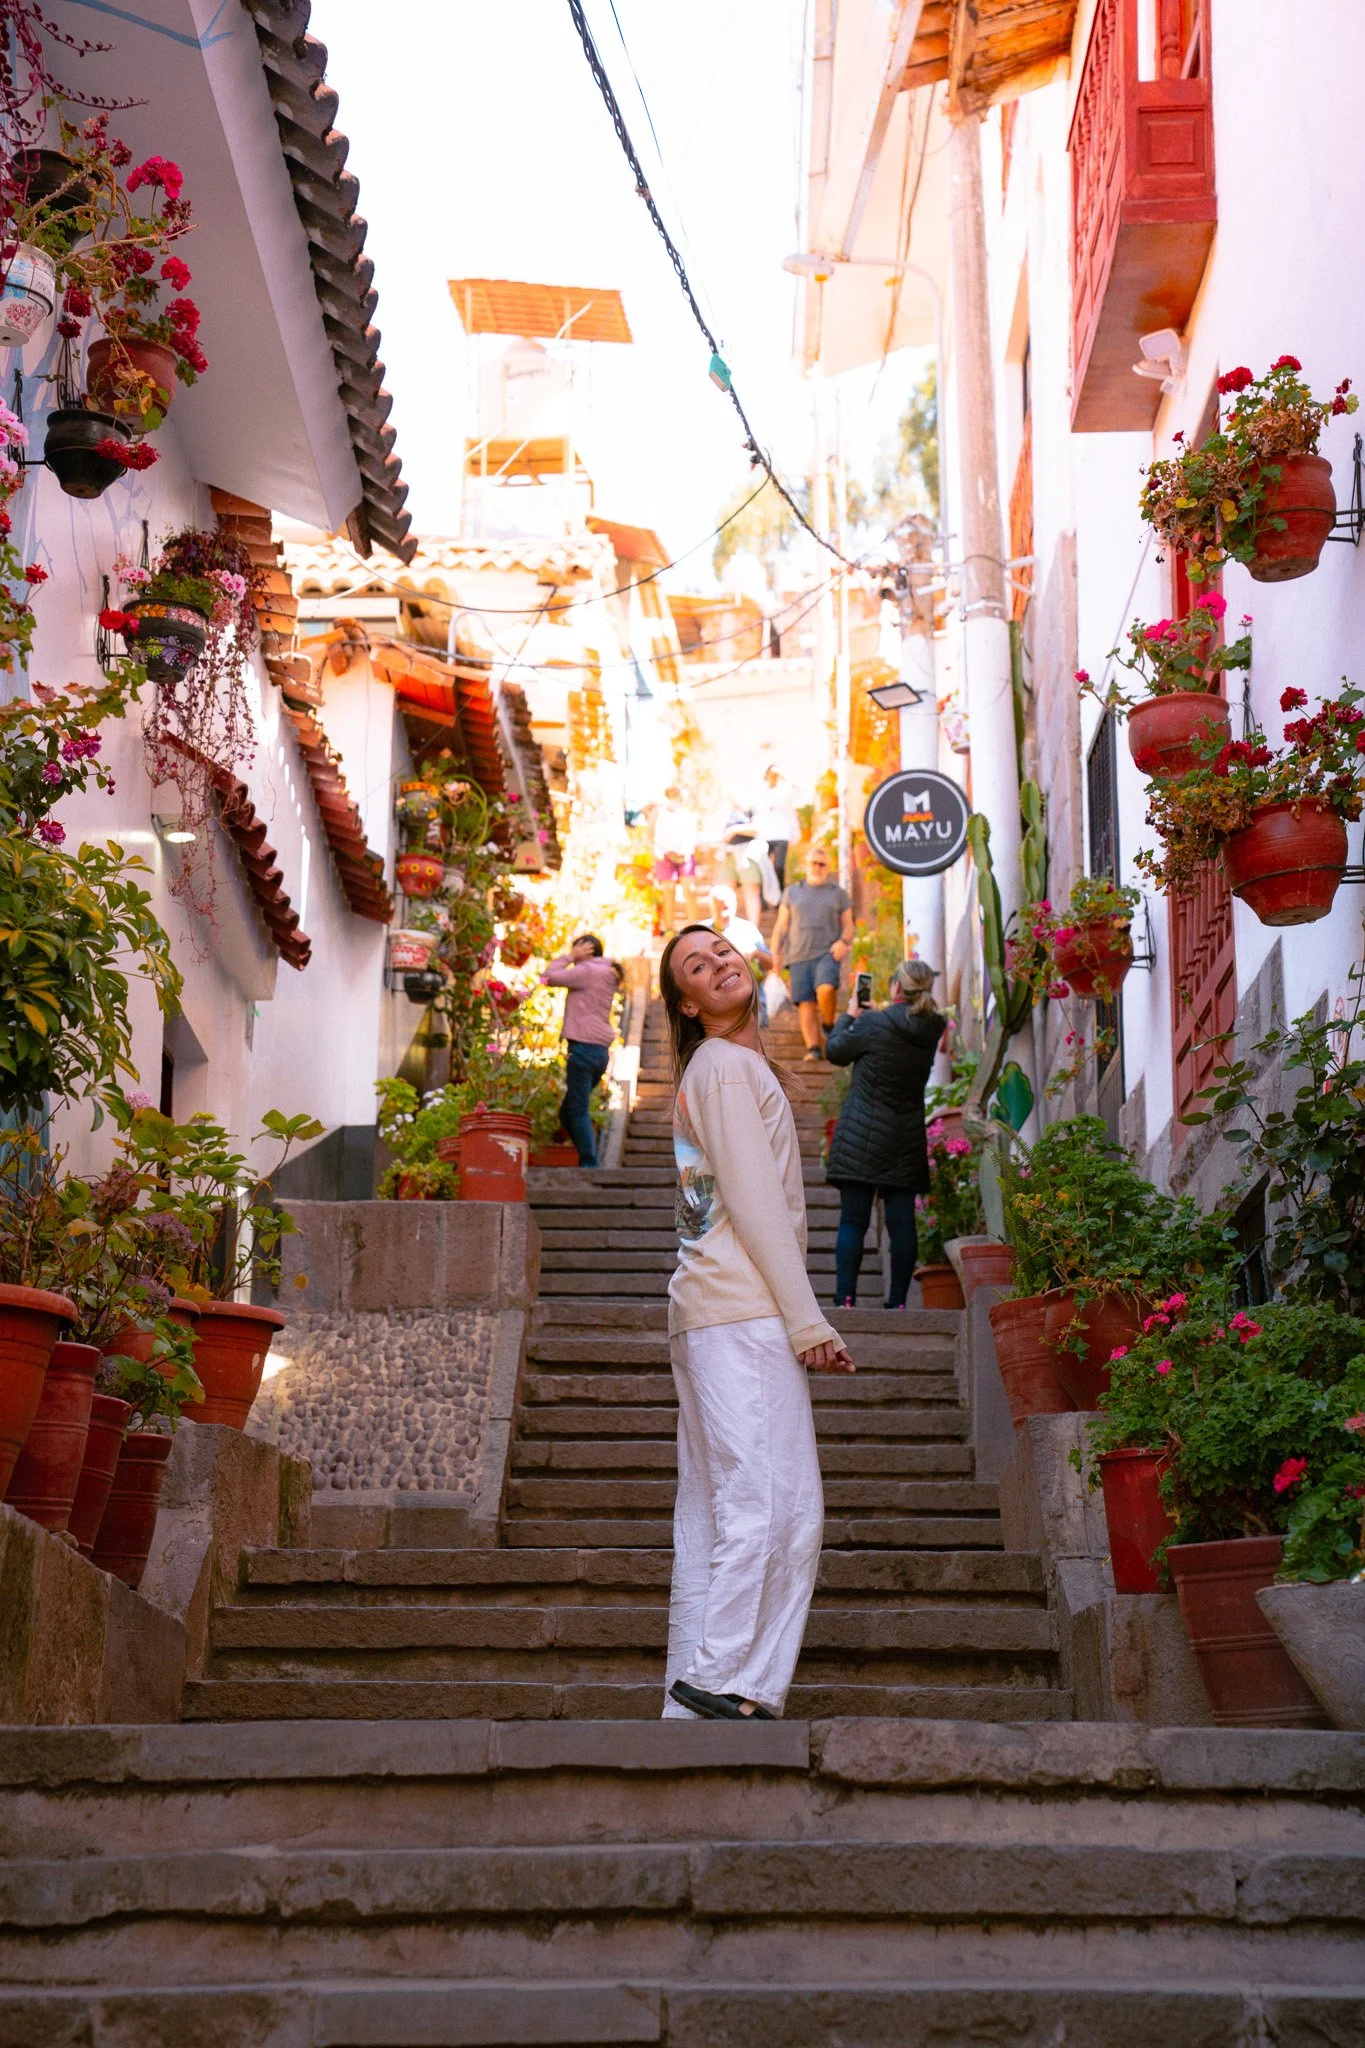
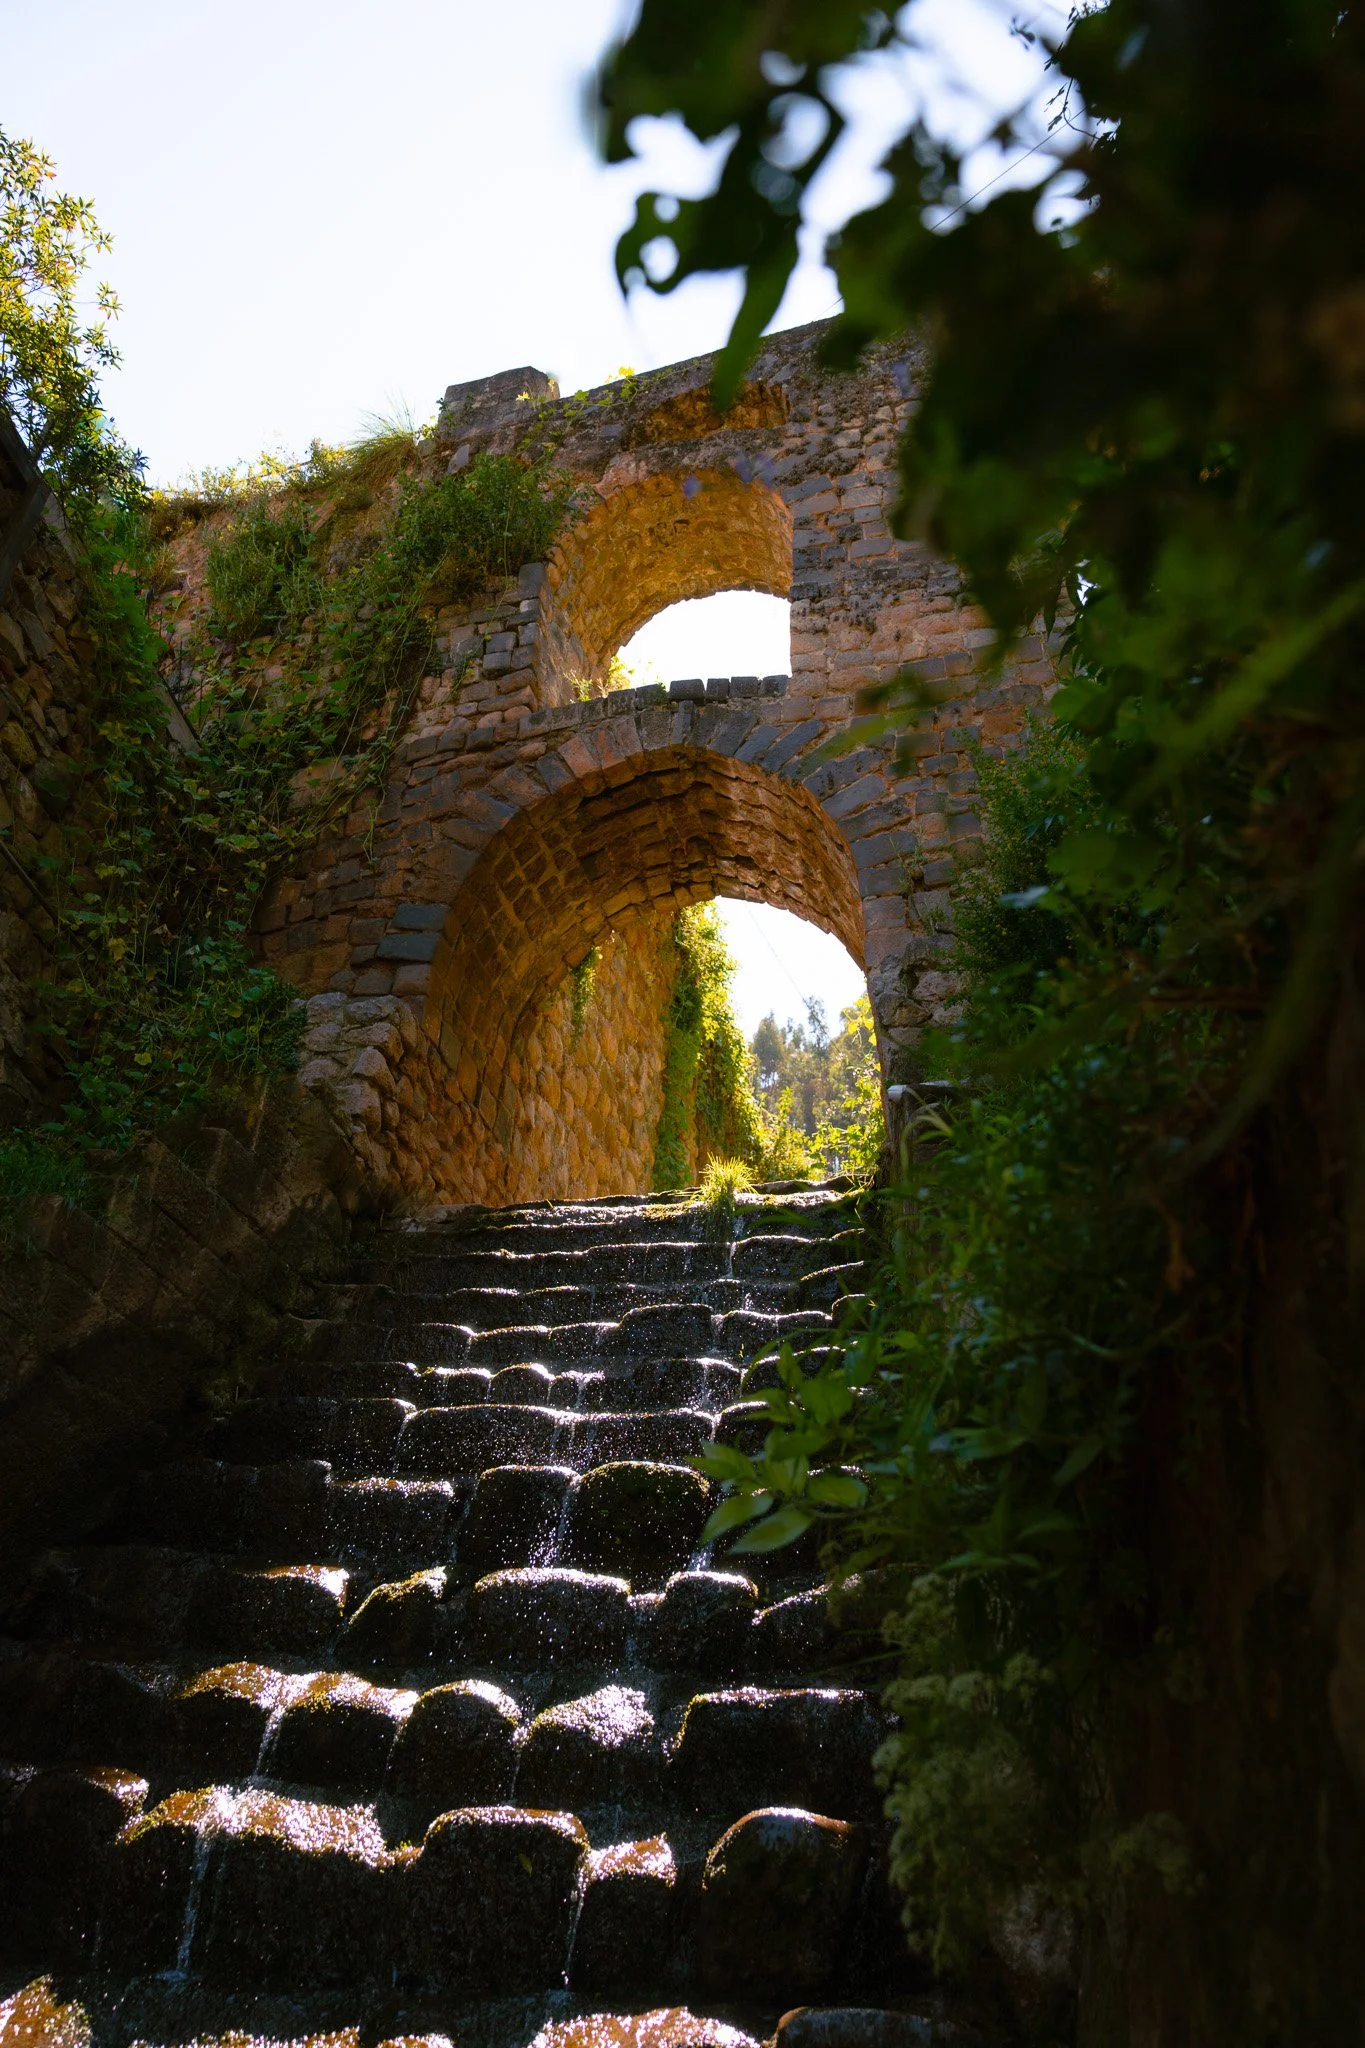
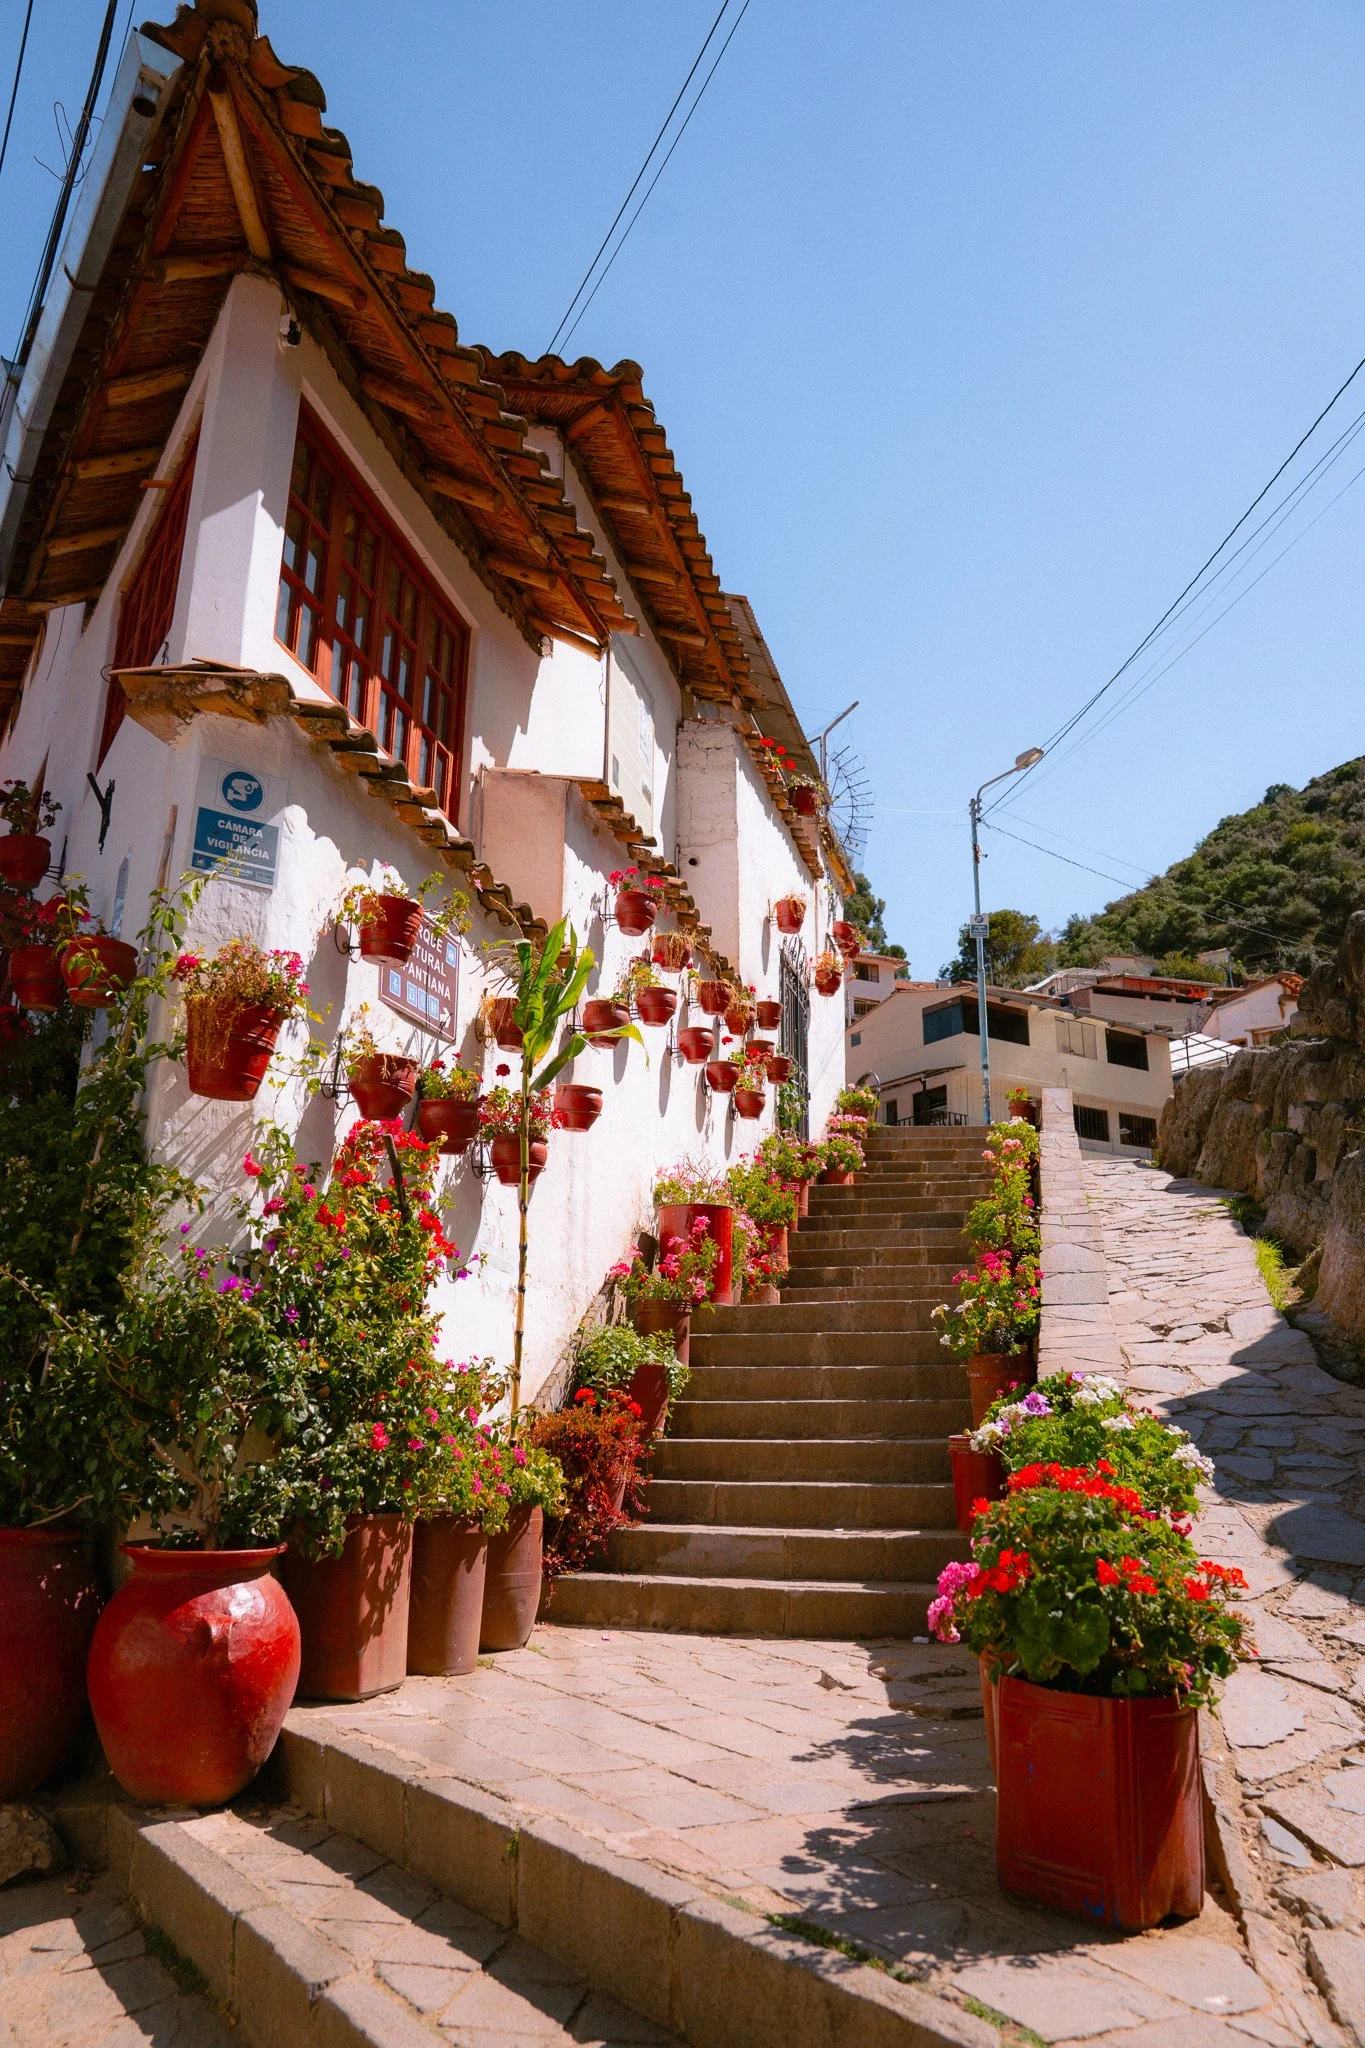
As a photographer, San Blas was one of my favorite parts of Cusco. It’s colorful, artsy, floral, and full of charm. There are little shops, cafes, staircases, textured walls, and corners that are so aesthetic. Be prepared for hills and steps, but it’s worth it!
Shop at San Pedro Market
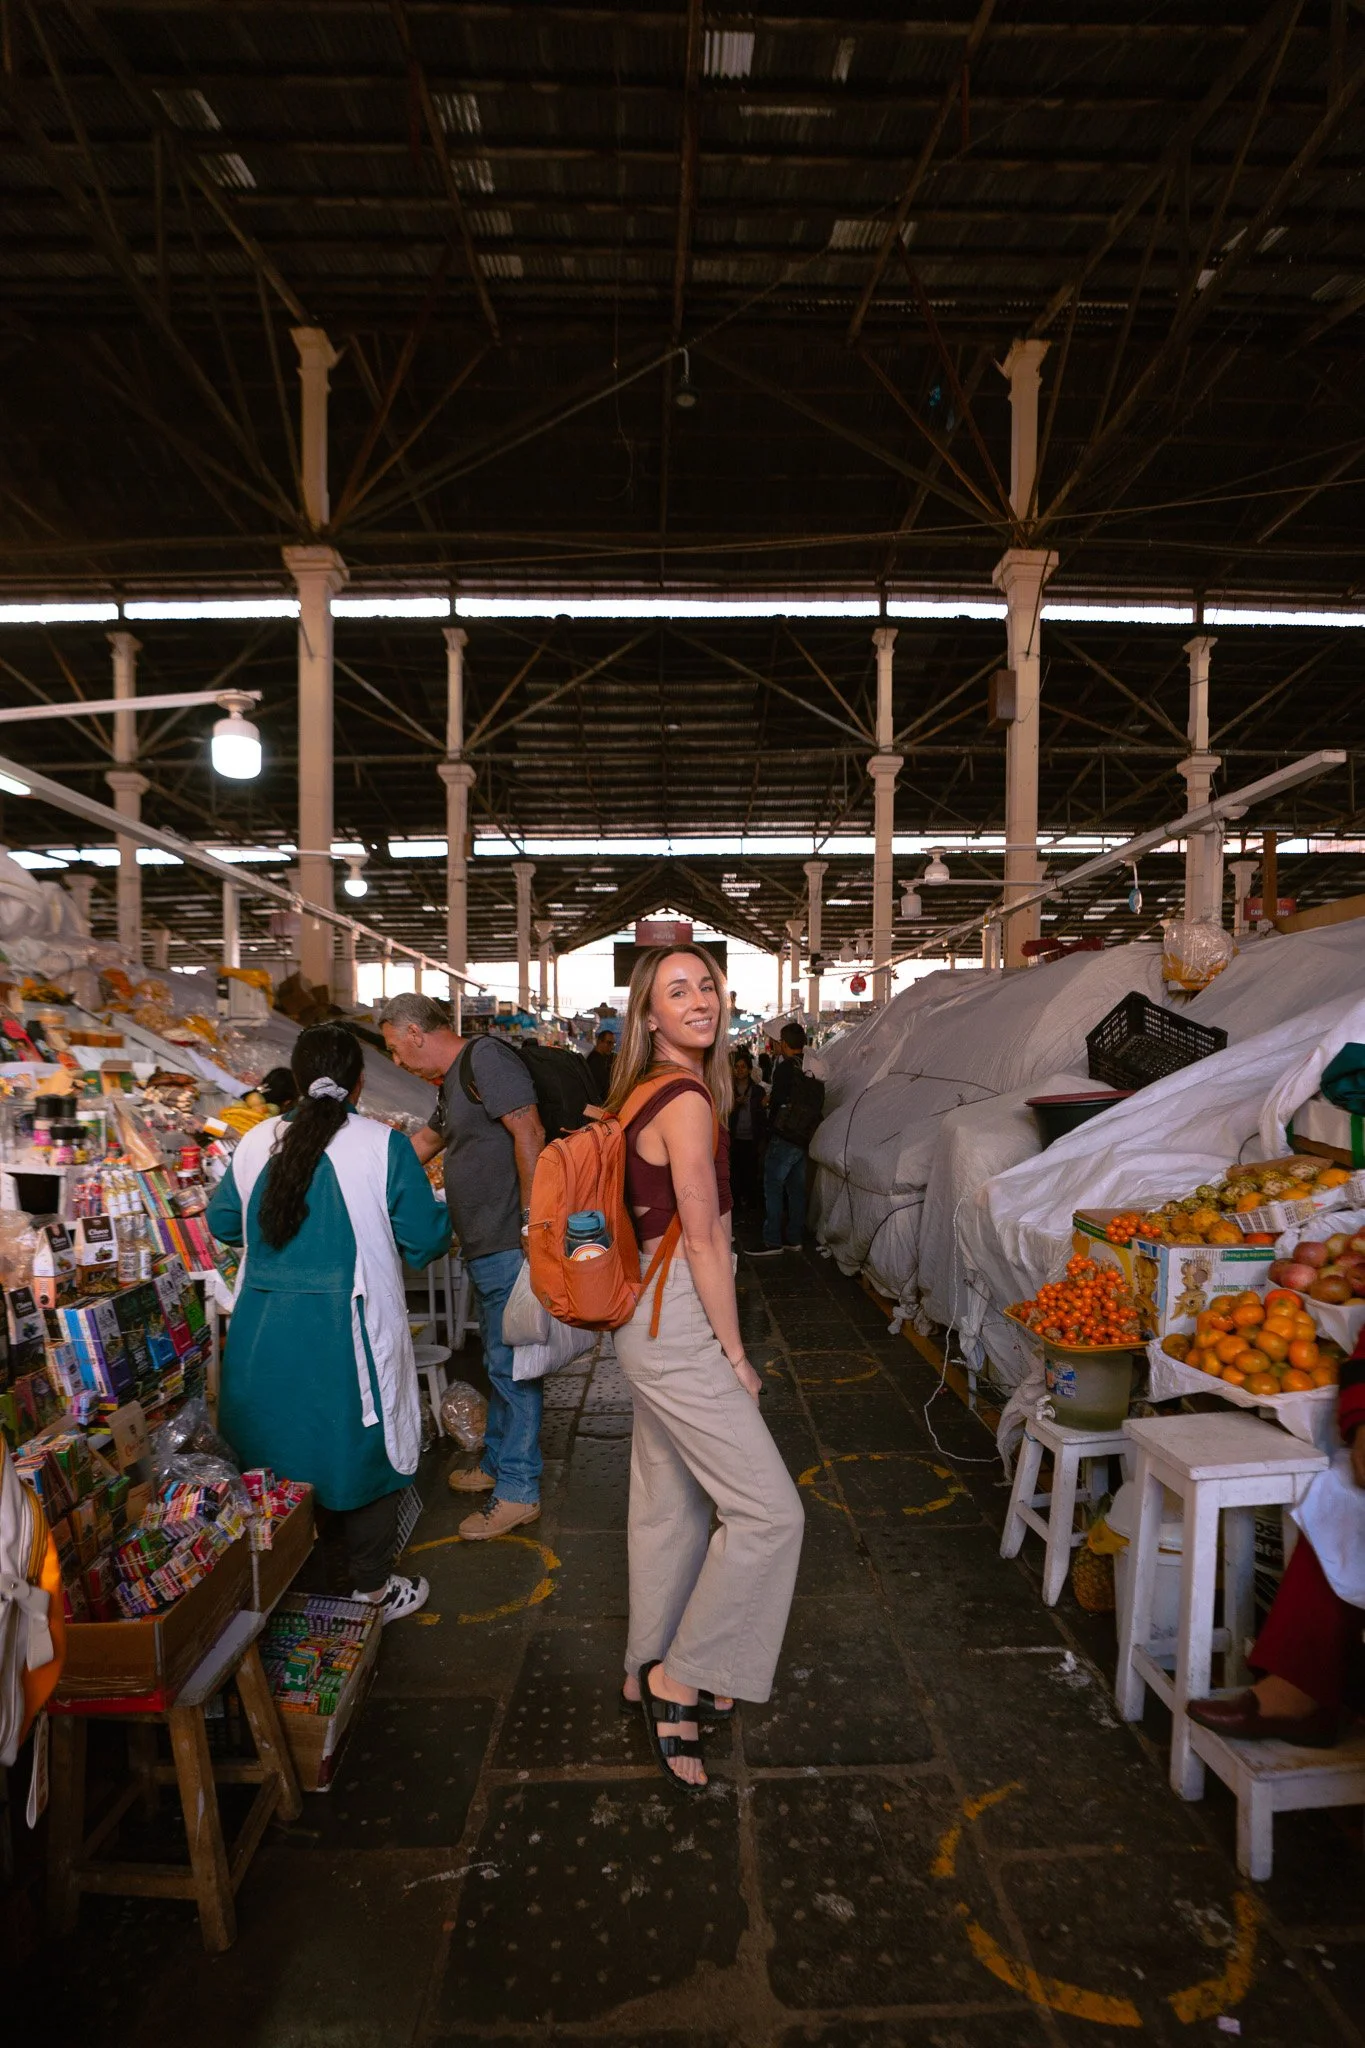
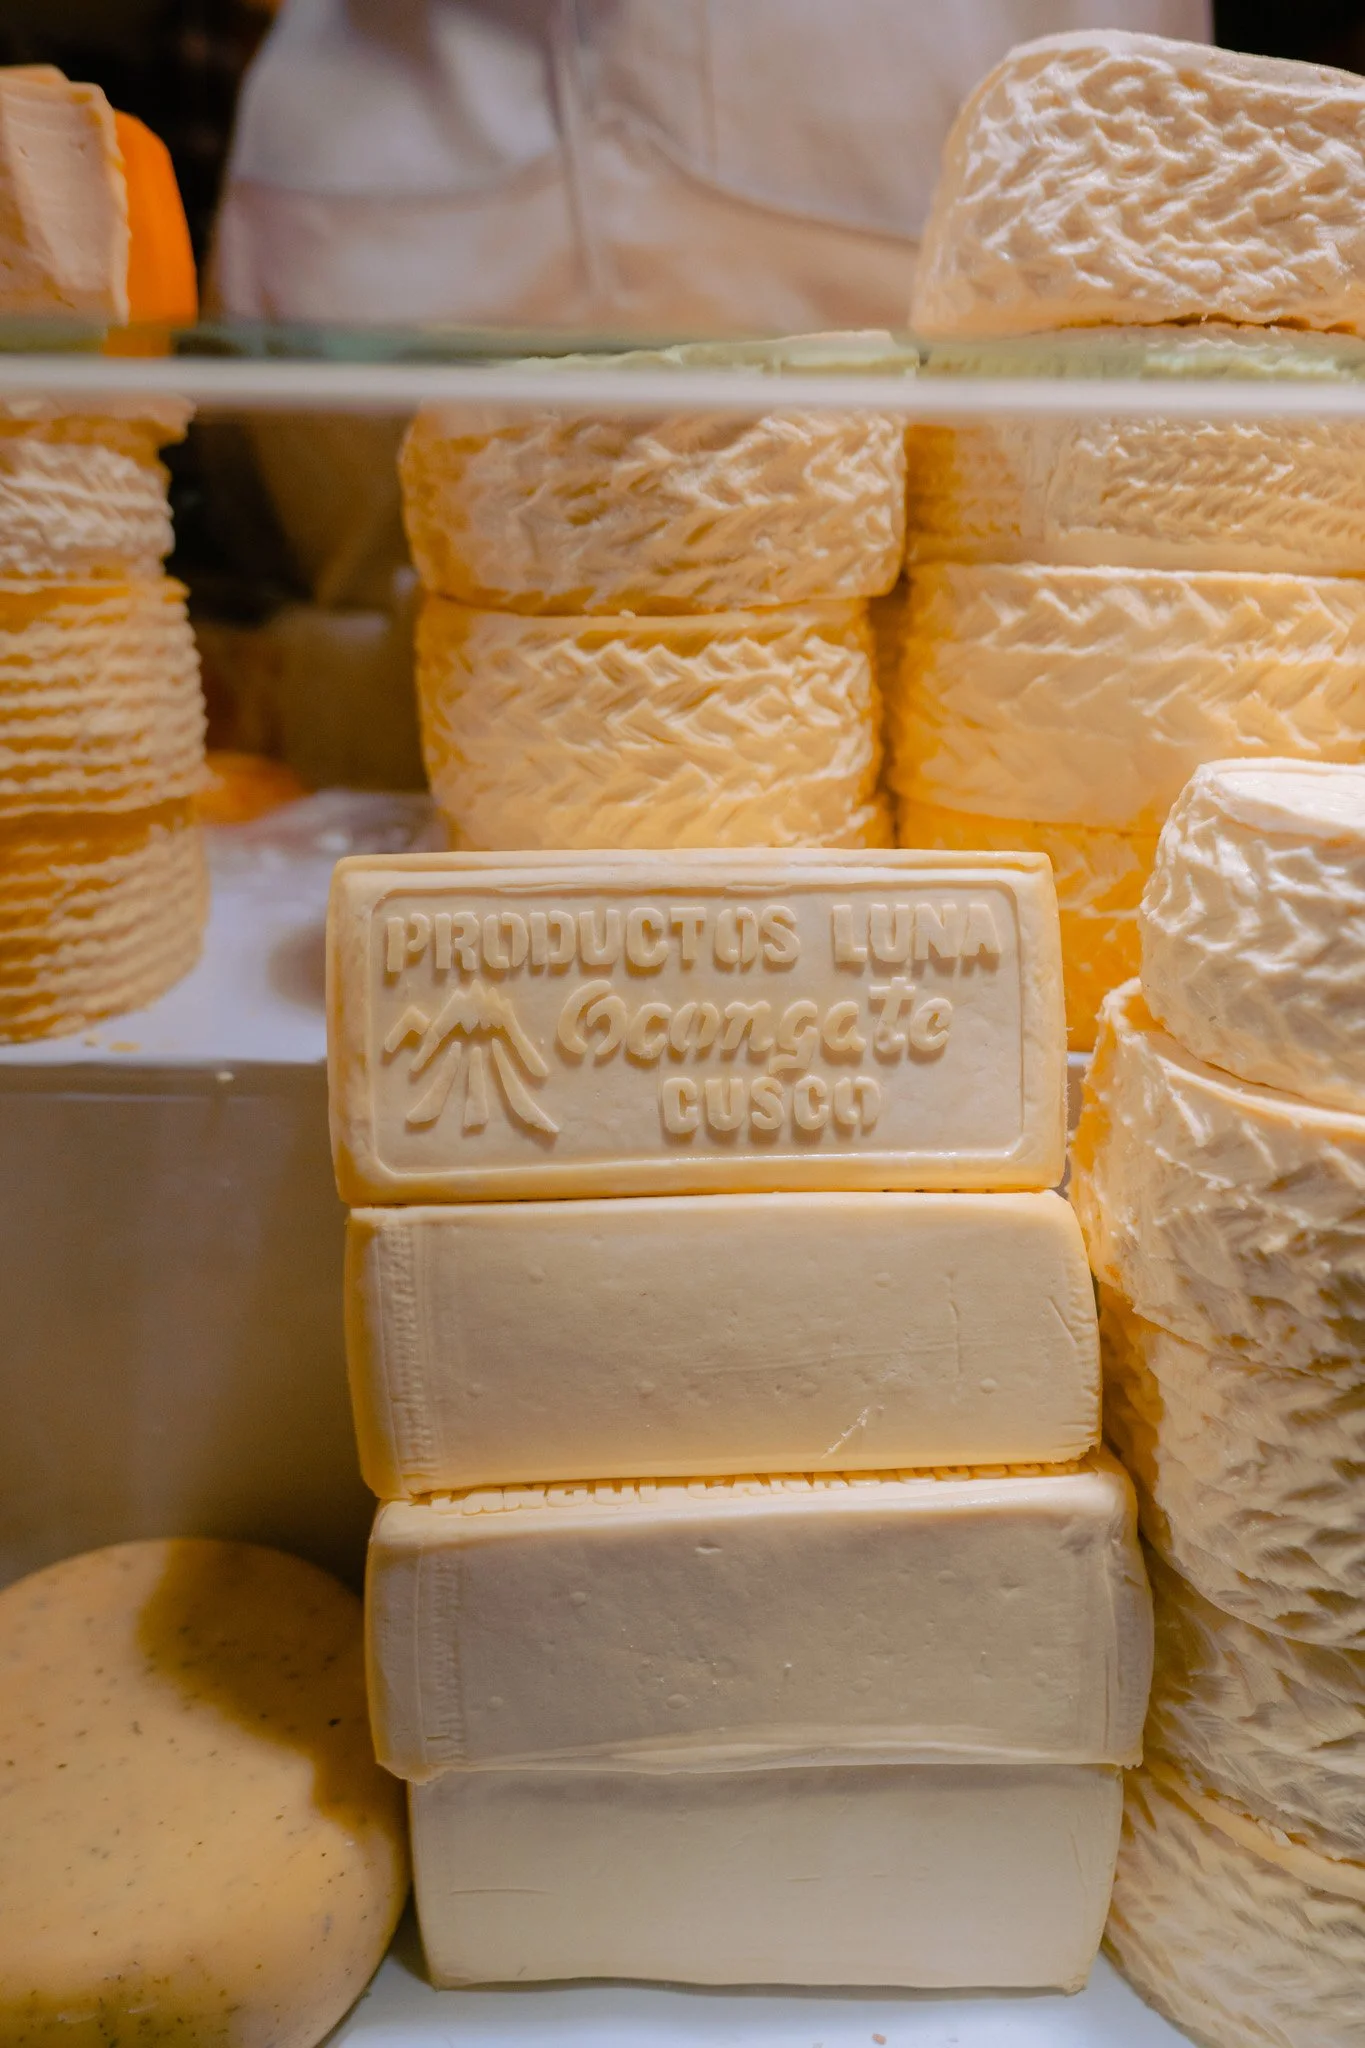
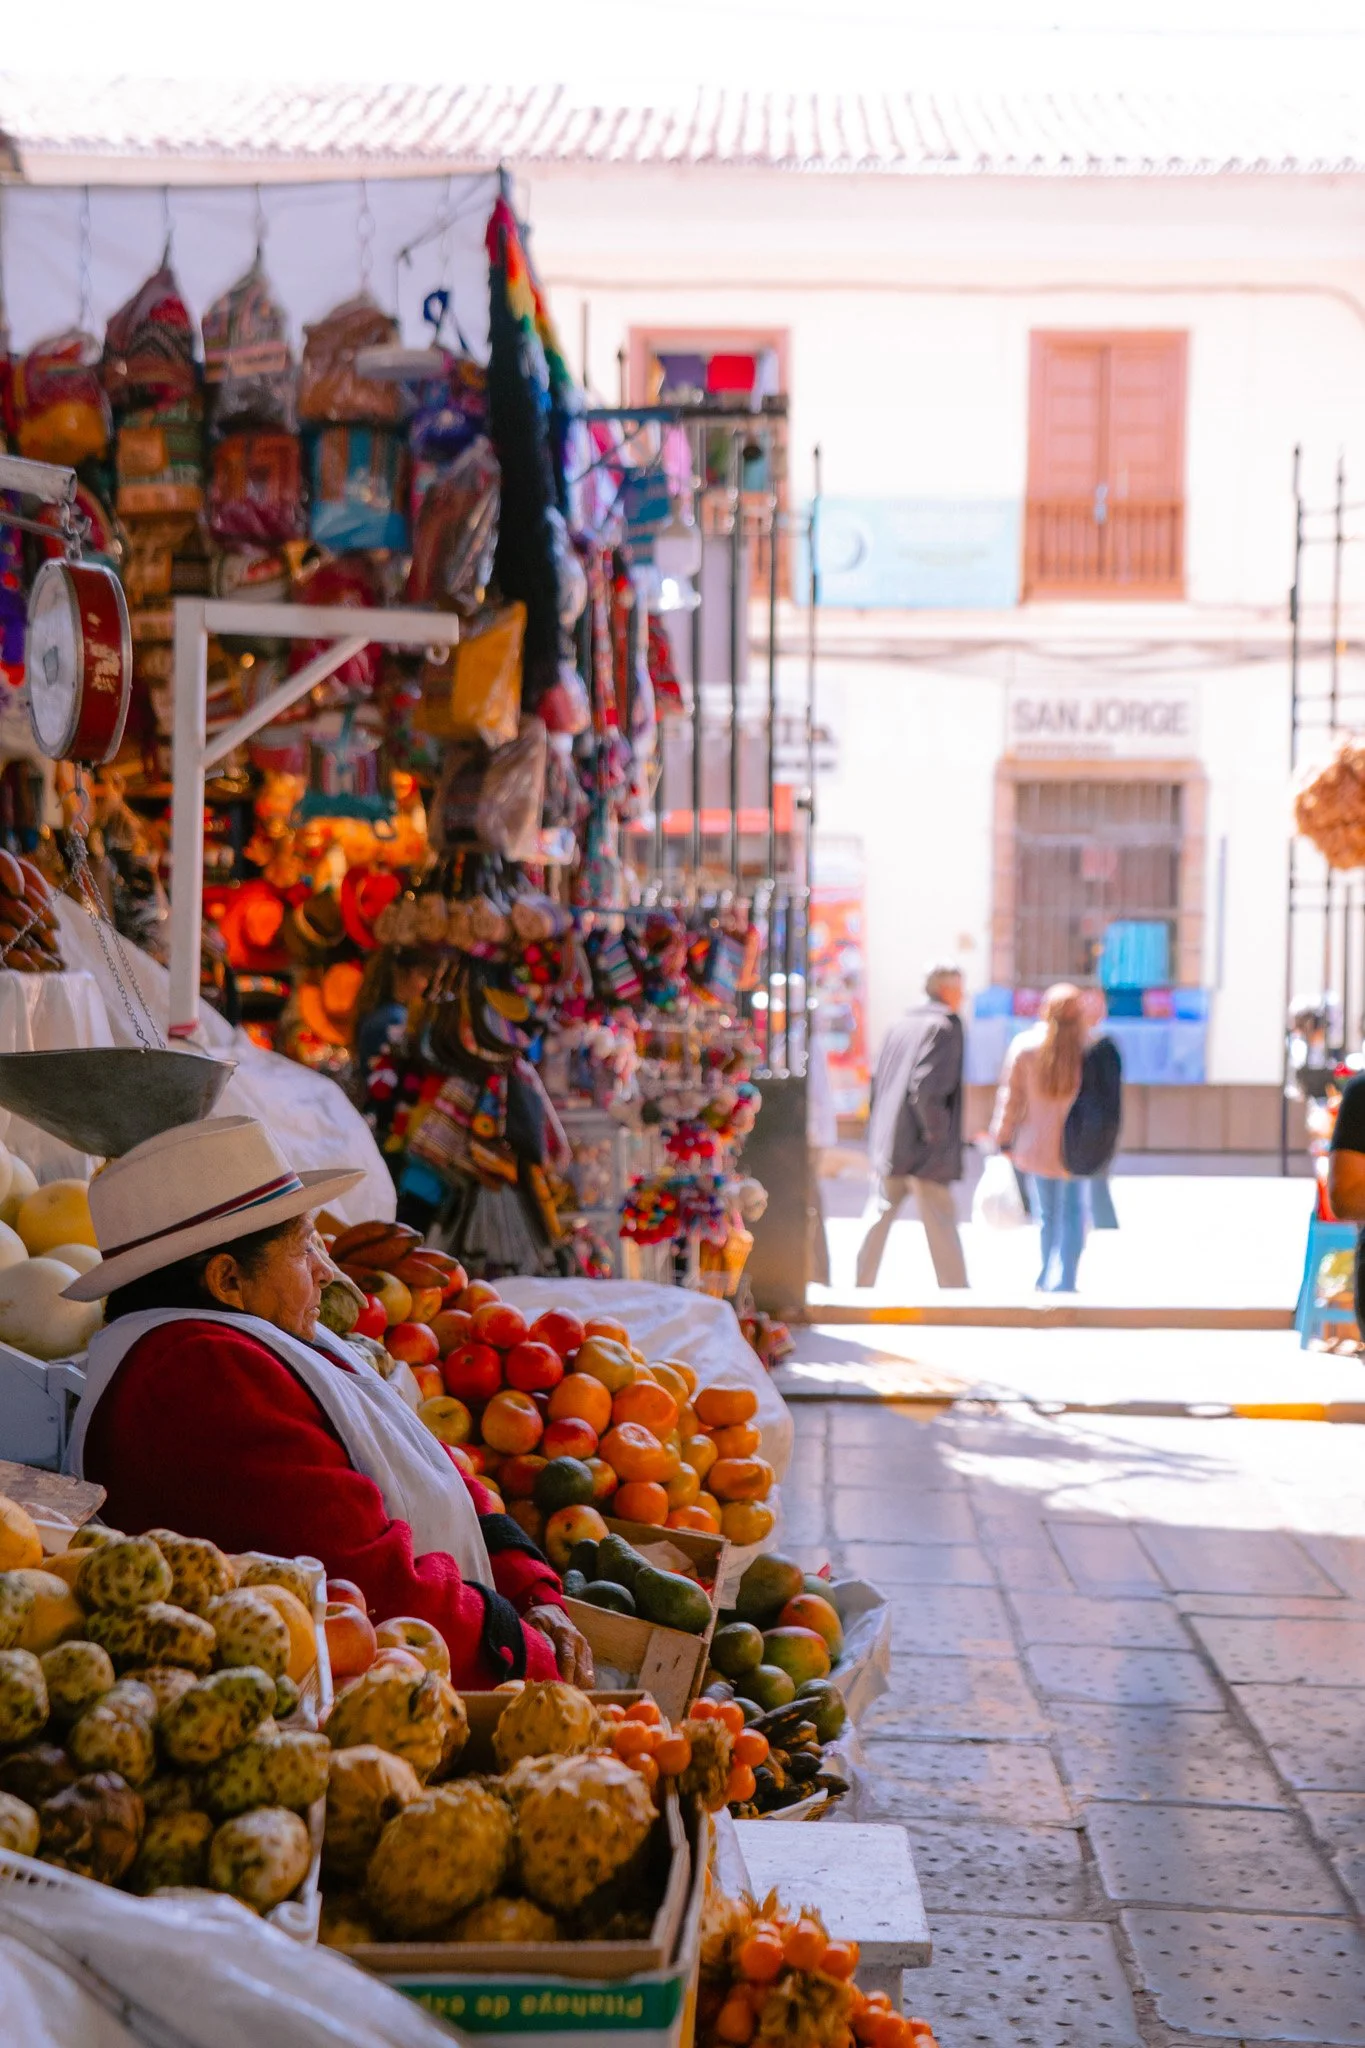
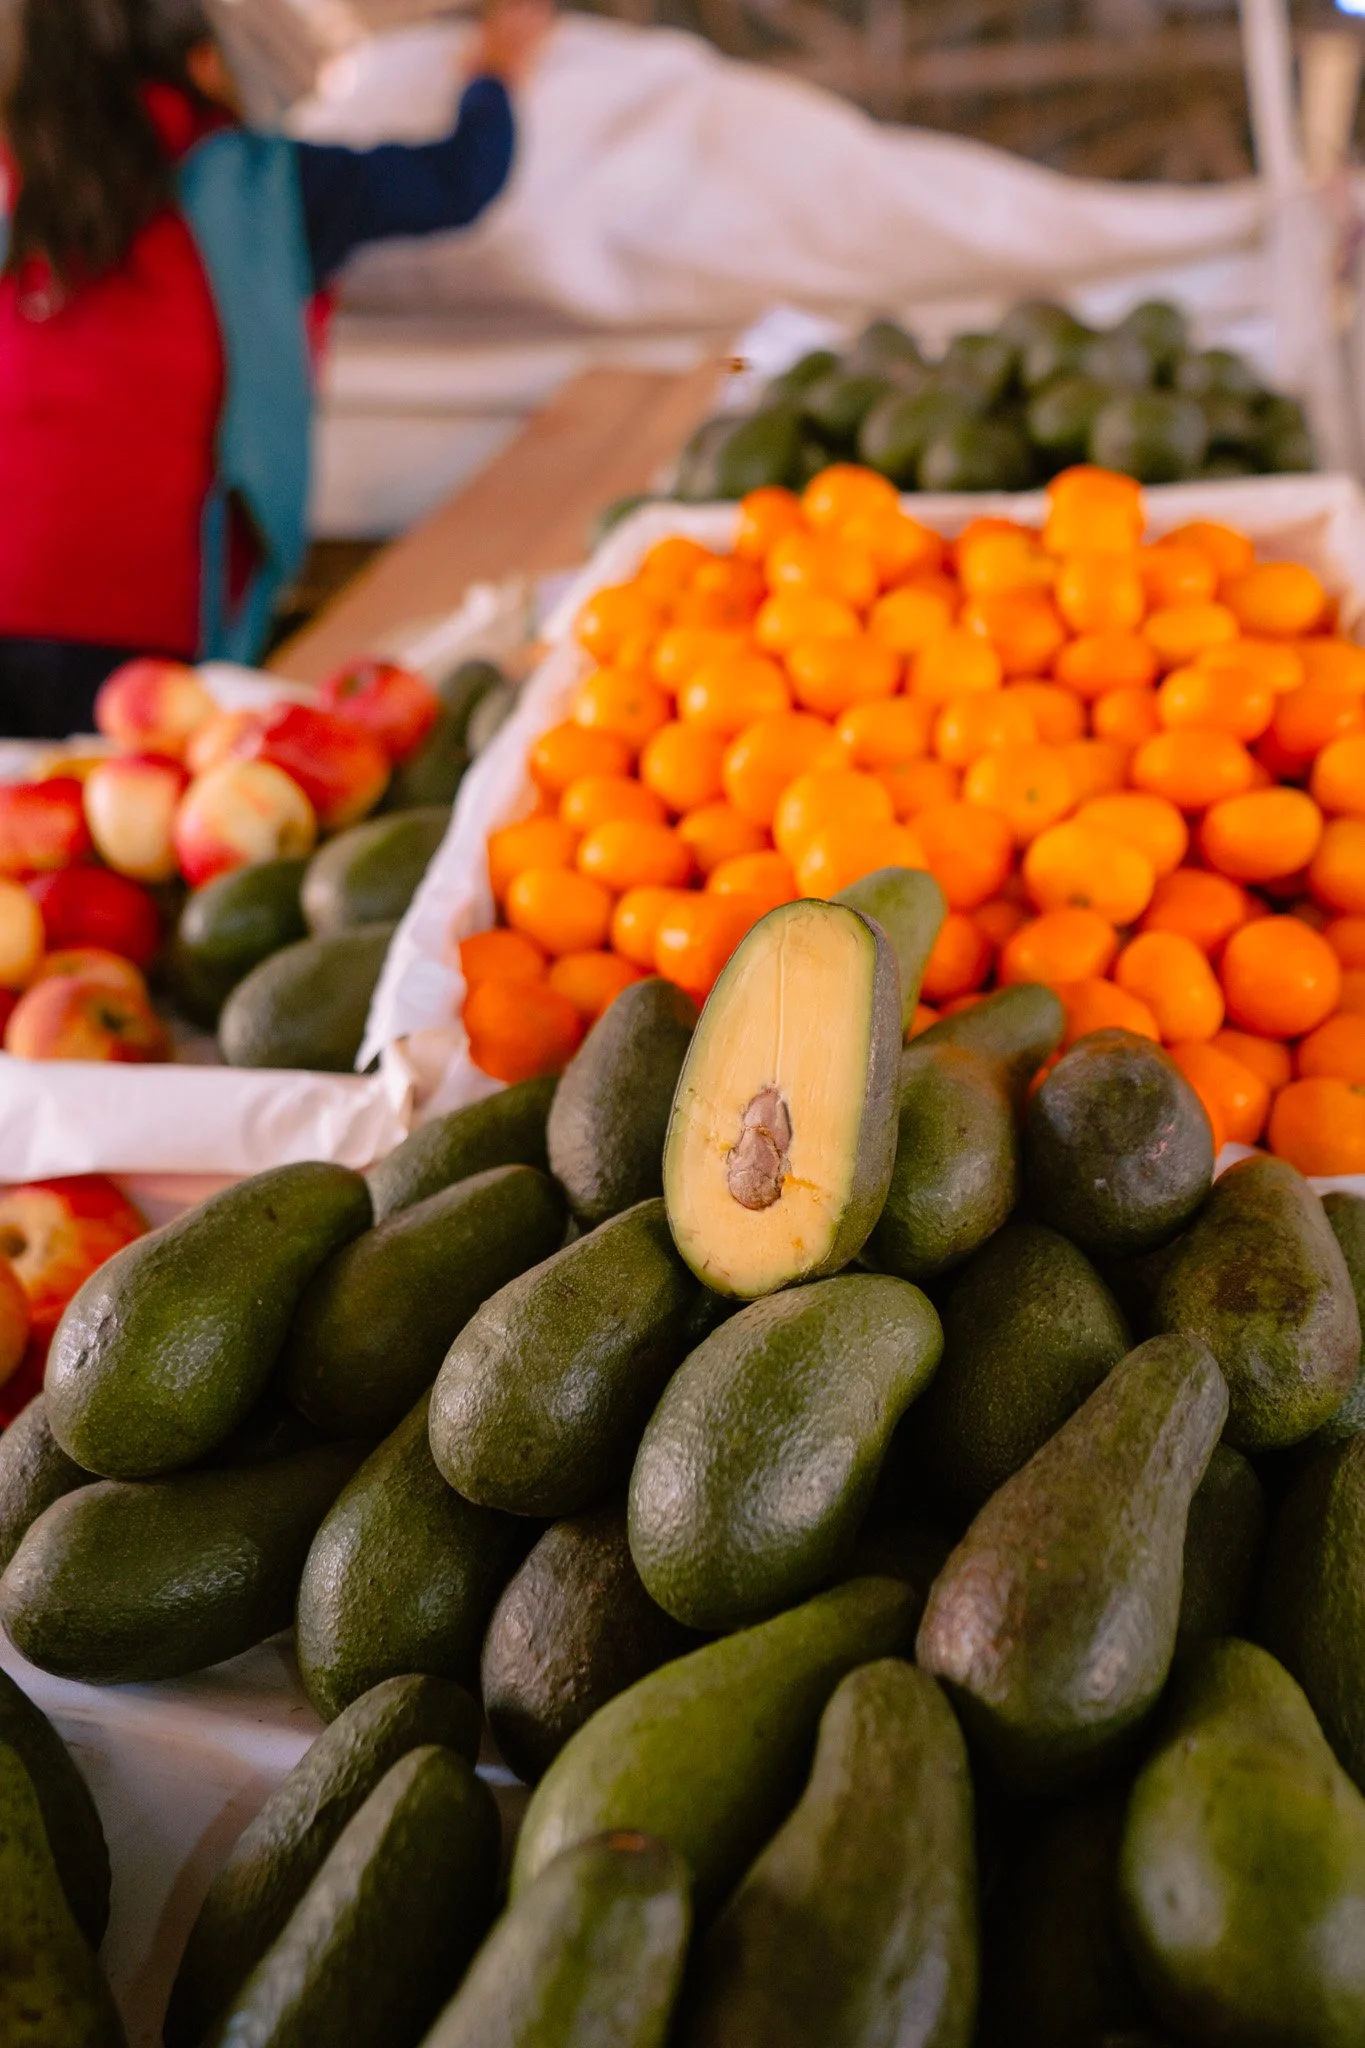
San Pedro Market is the main food market in Cusco and just a short walk from Plaza de Armas. There were stalls overflowing with fresh fruit, vegetables, cheese, chocolate, tea, meat, and prepared meals, plus vendors selling wooden crafts and souvenirs. It’s a great place to browse, snack, and pick up gifts. If you want a more local, sensory experience of Cusco, put this on your list.
Visit Sacsayhuamán
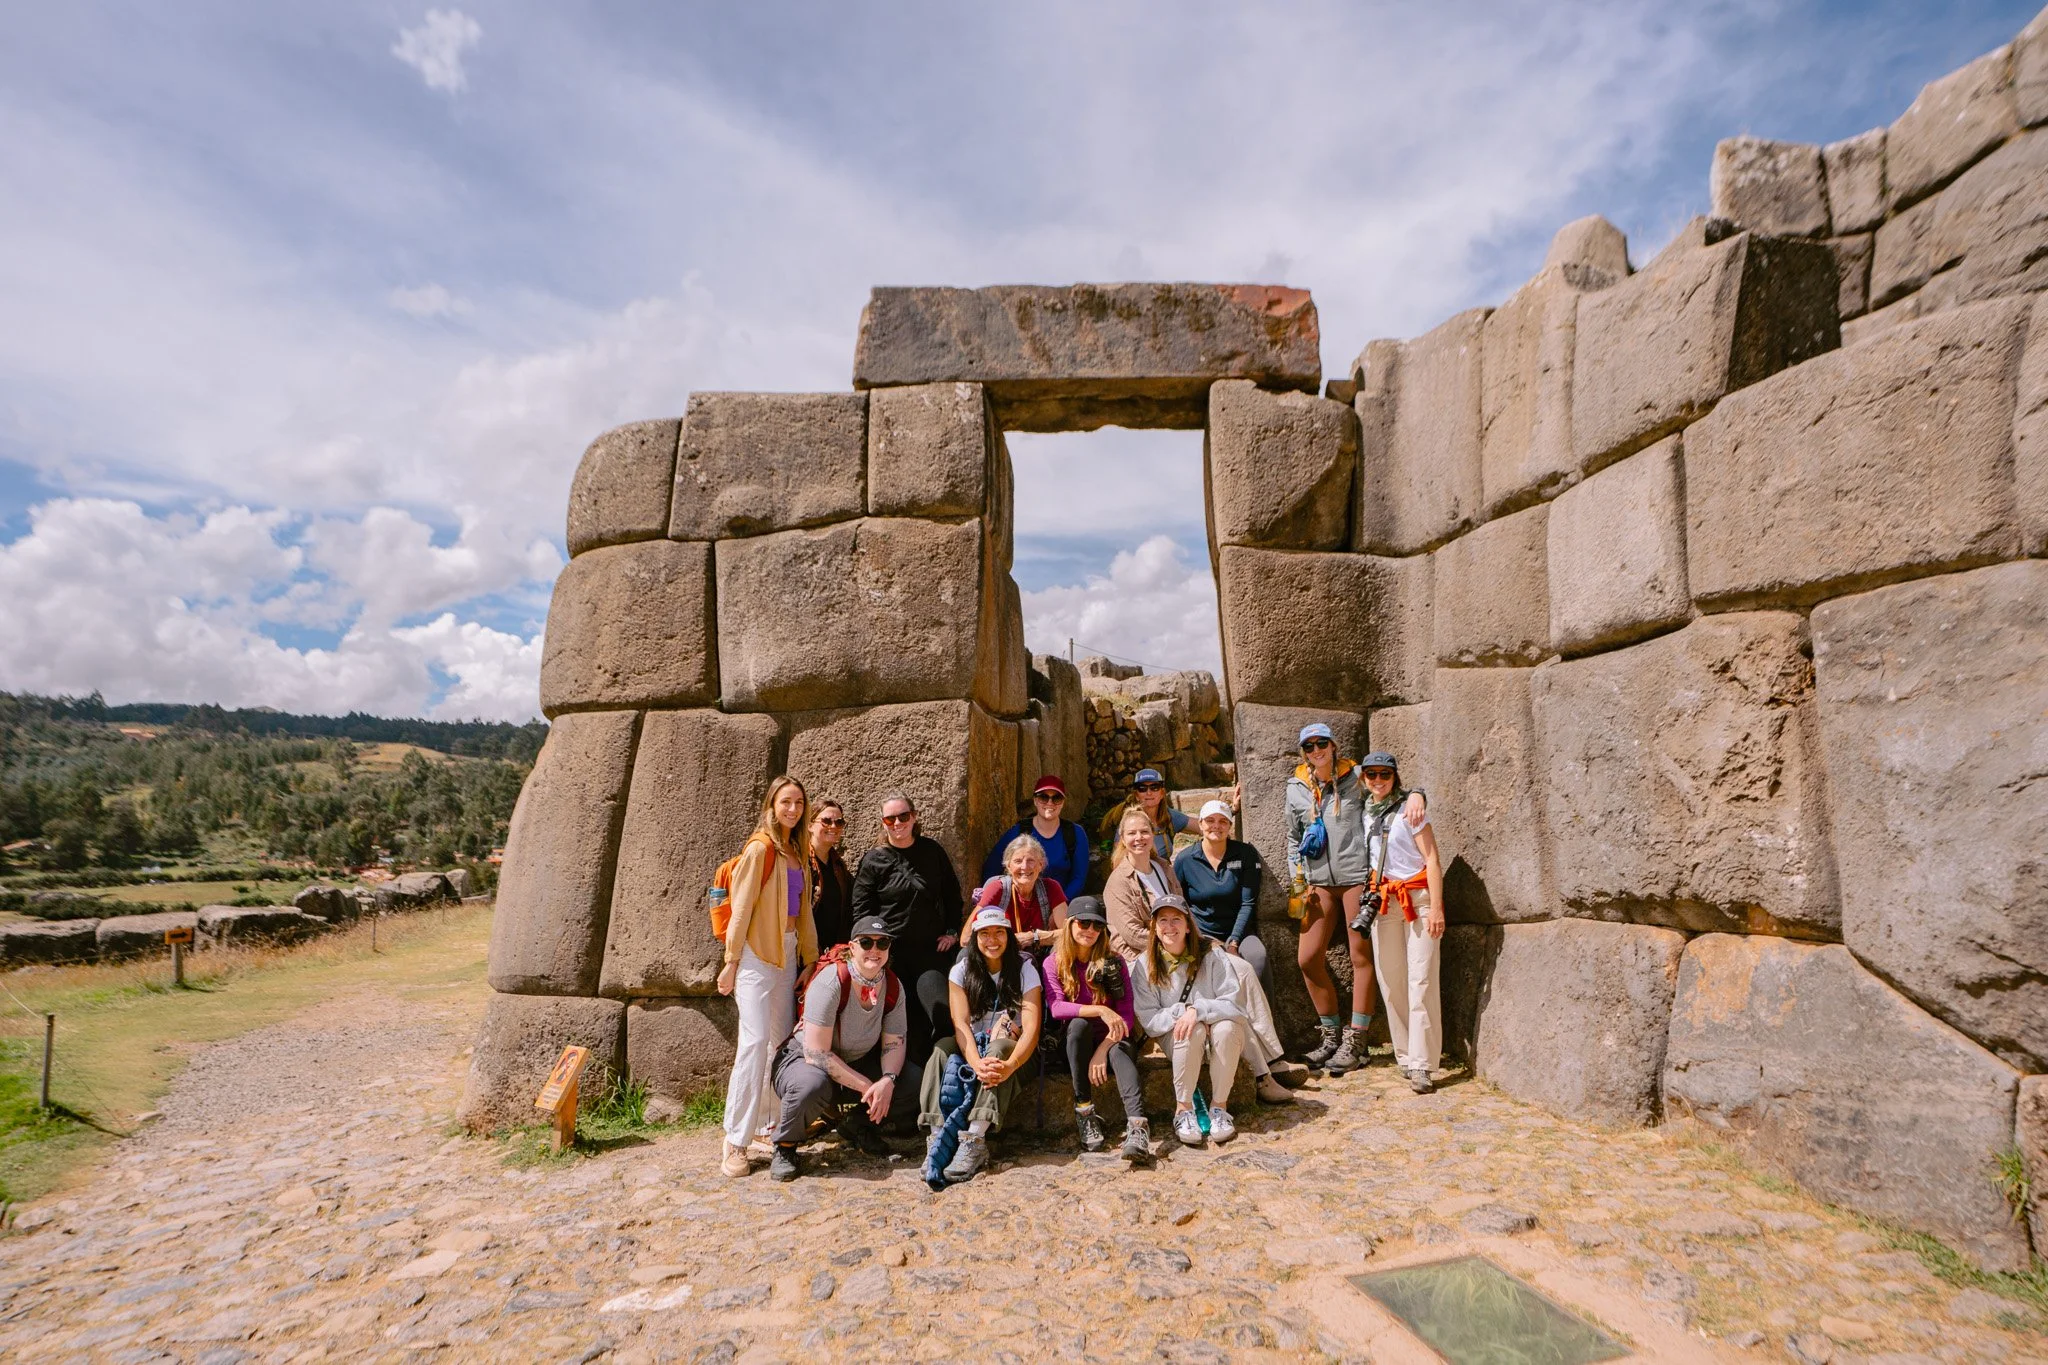
Sacsayhuamán was one of the most impressive places I visited in Cusco.
This 15th-century Inca archaeological site sits above the city and offers incredible views. The scale of the stonework is kind of hard to comprehend in person. The massive rocks fit together so precisely that it still feels mind-boggling centuries later.
It’s a short drive from the city center, or about a 40-minute uphill walk if you want the extra challenge.
Tour Cusco’s museums and historic sites
If you love history, there’s plenty to do in Cusco by just walking around. We did a walking tour that included the Cusco Cathedral, Sacsayhuamán and other Inca sites. I loved being able to learn more from a local guide versus trying to read and figure everything out on our own.
I’d recommend:
Cusco Cathedral
Qorikancha
The Pre-Columbian Art Museum
The Inca Museum
The museums add so much context to what you’re seeing throughout the trip, especially before visiting Machu Picchu and other archaeological sites.
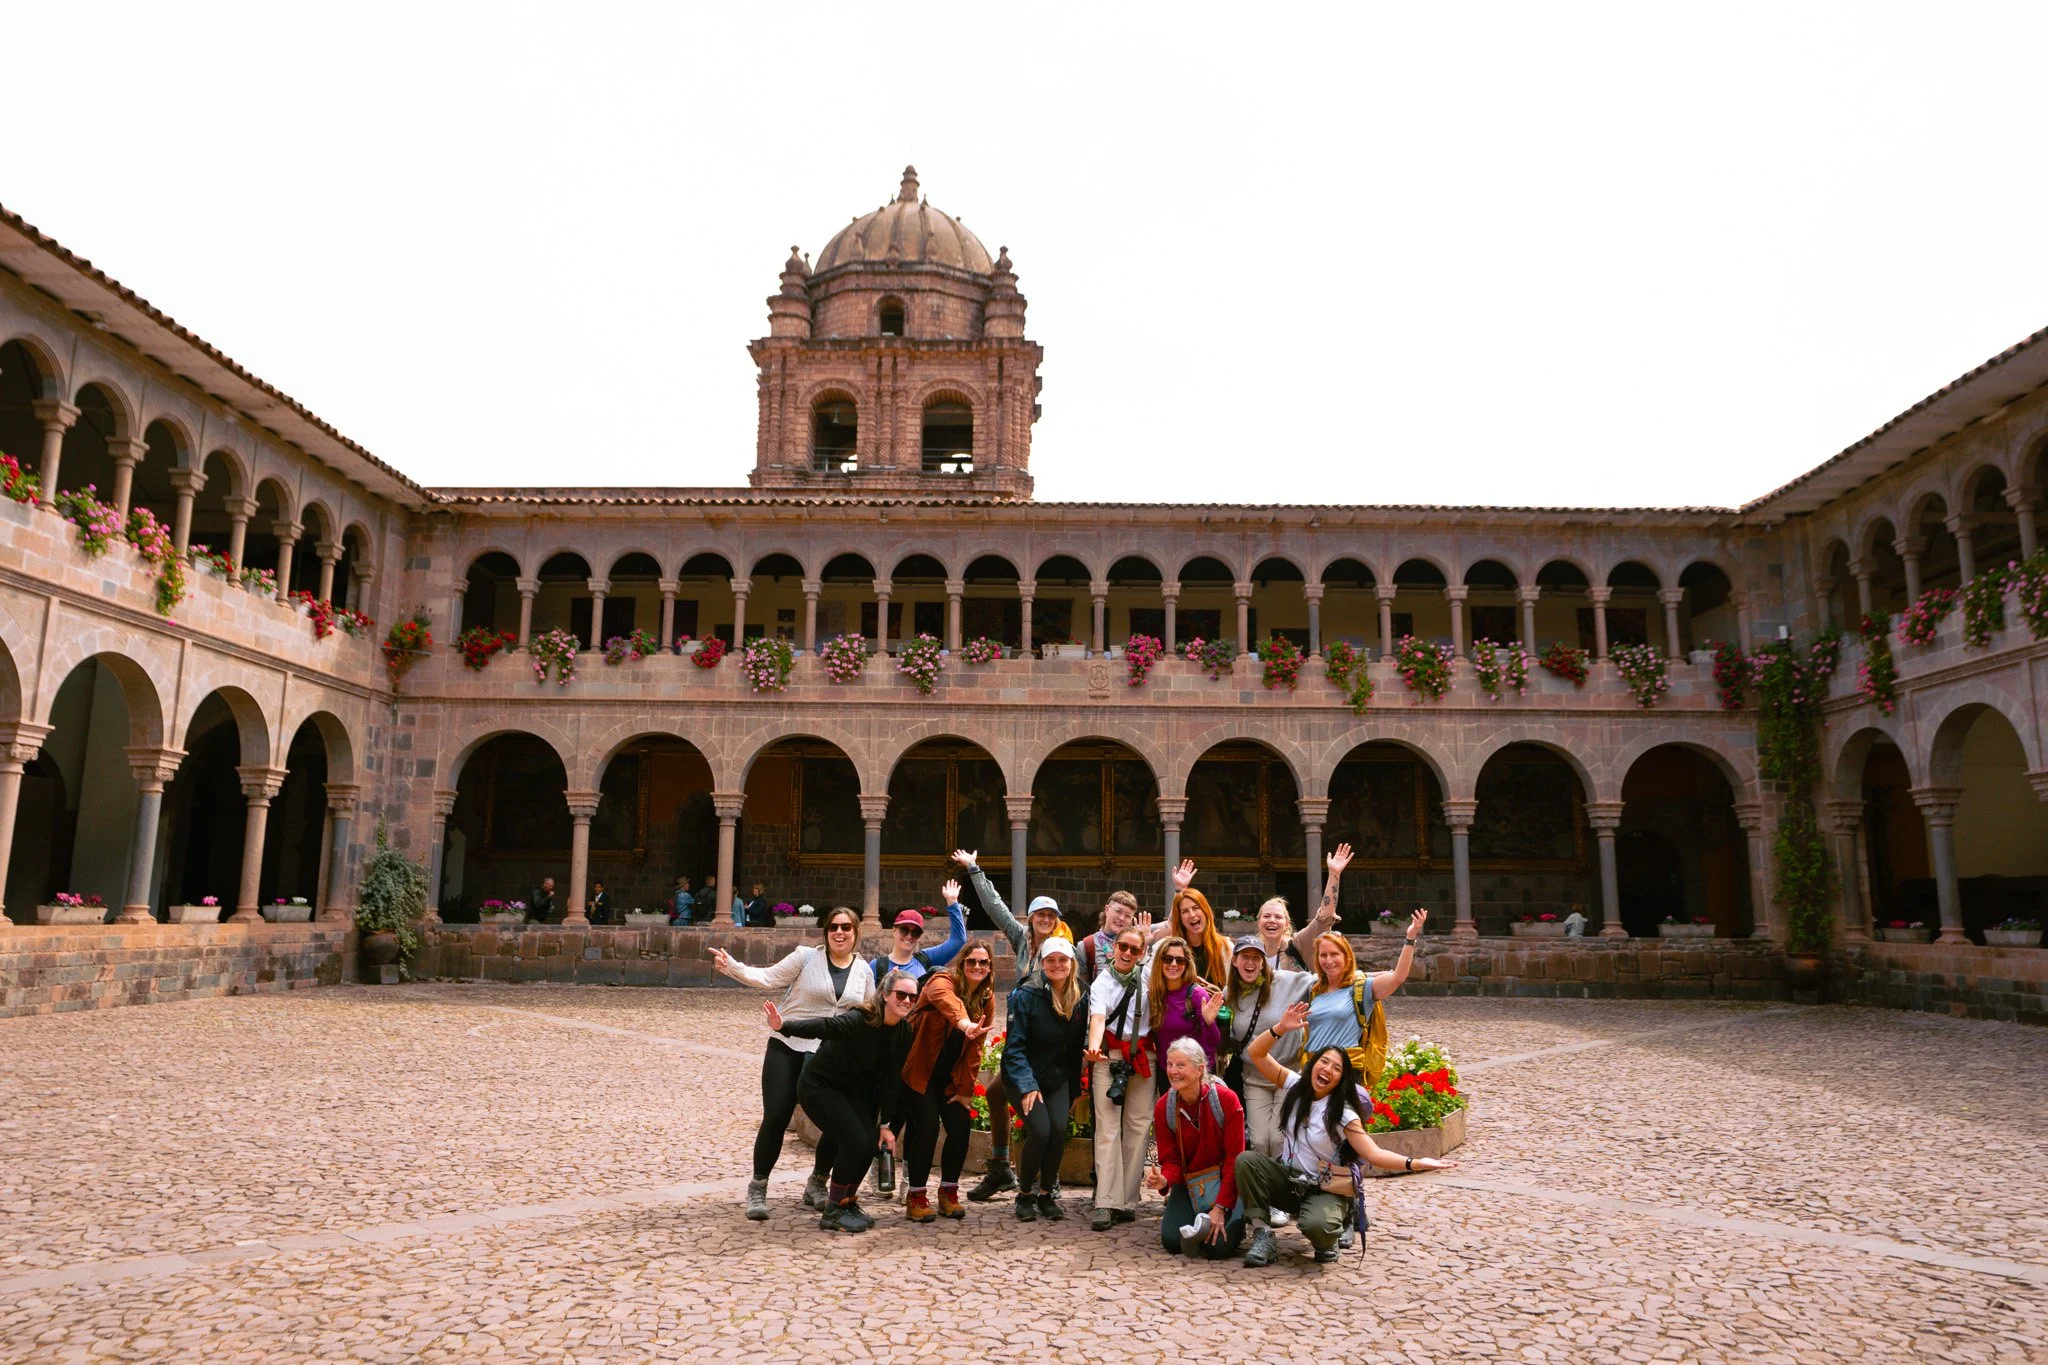
Take a Peruvian cooking class
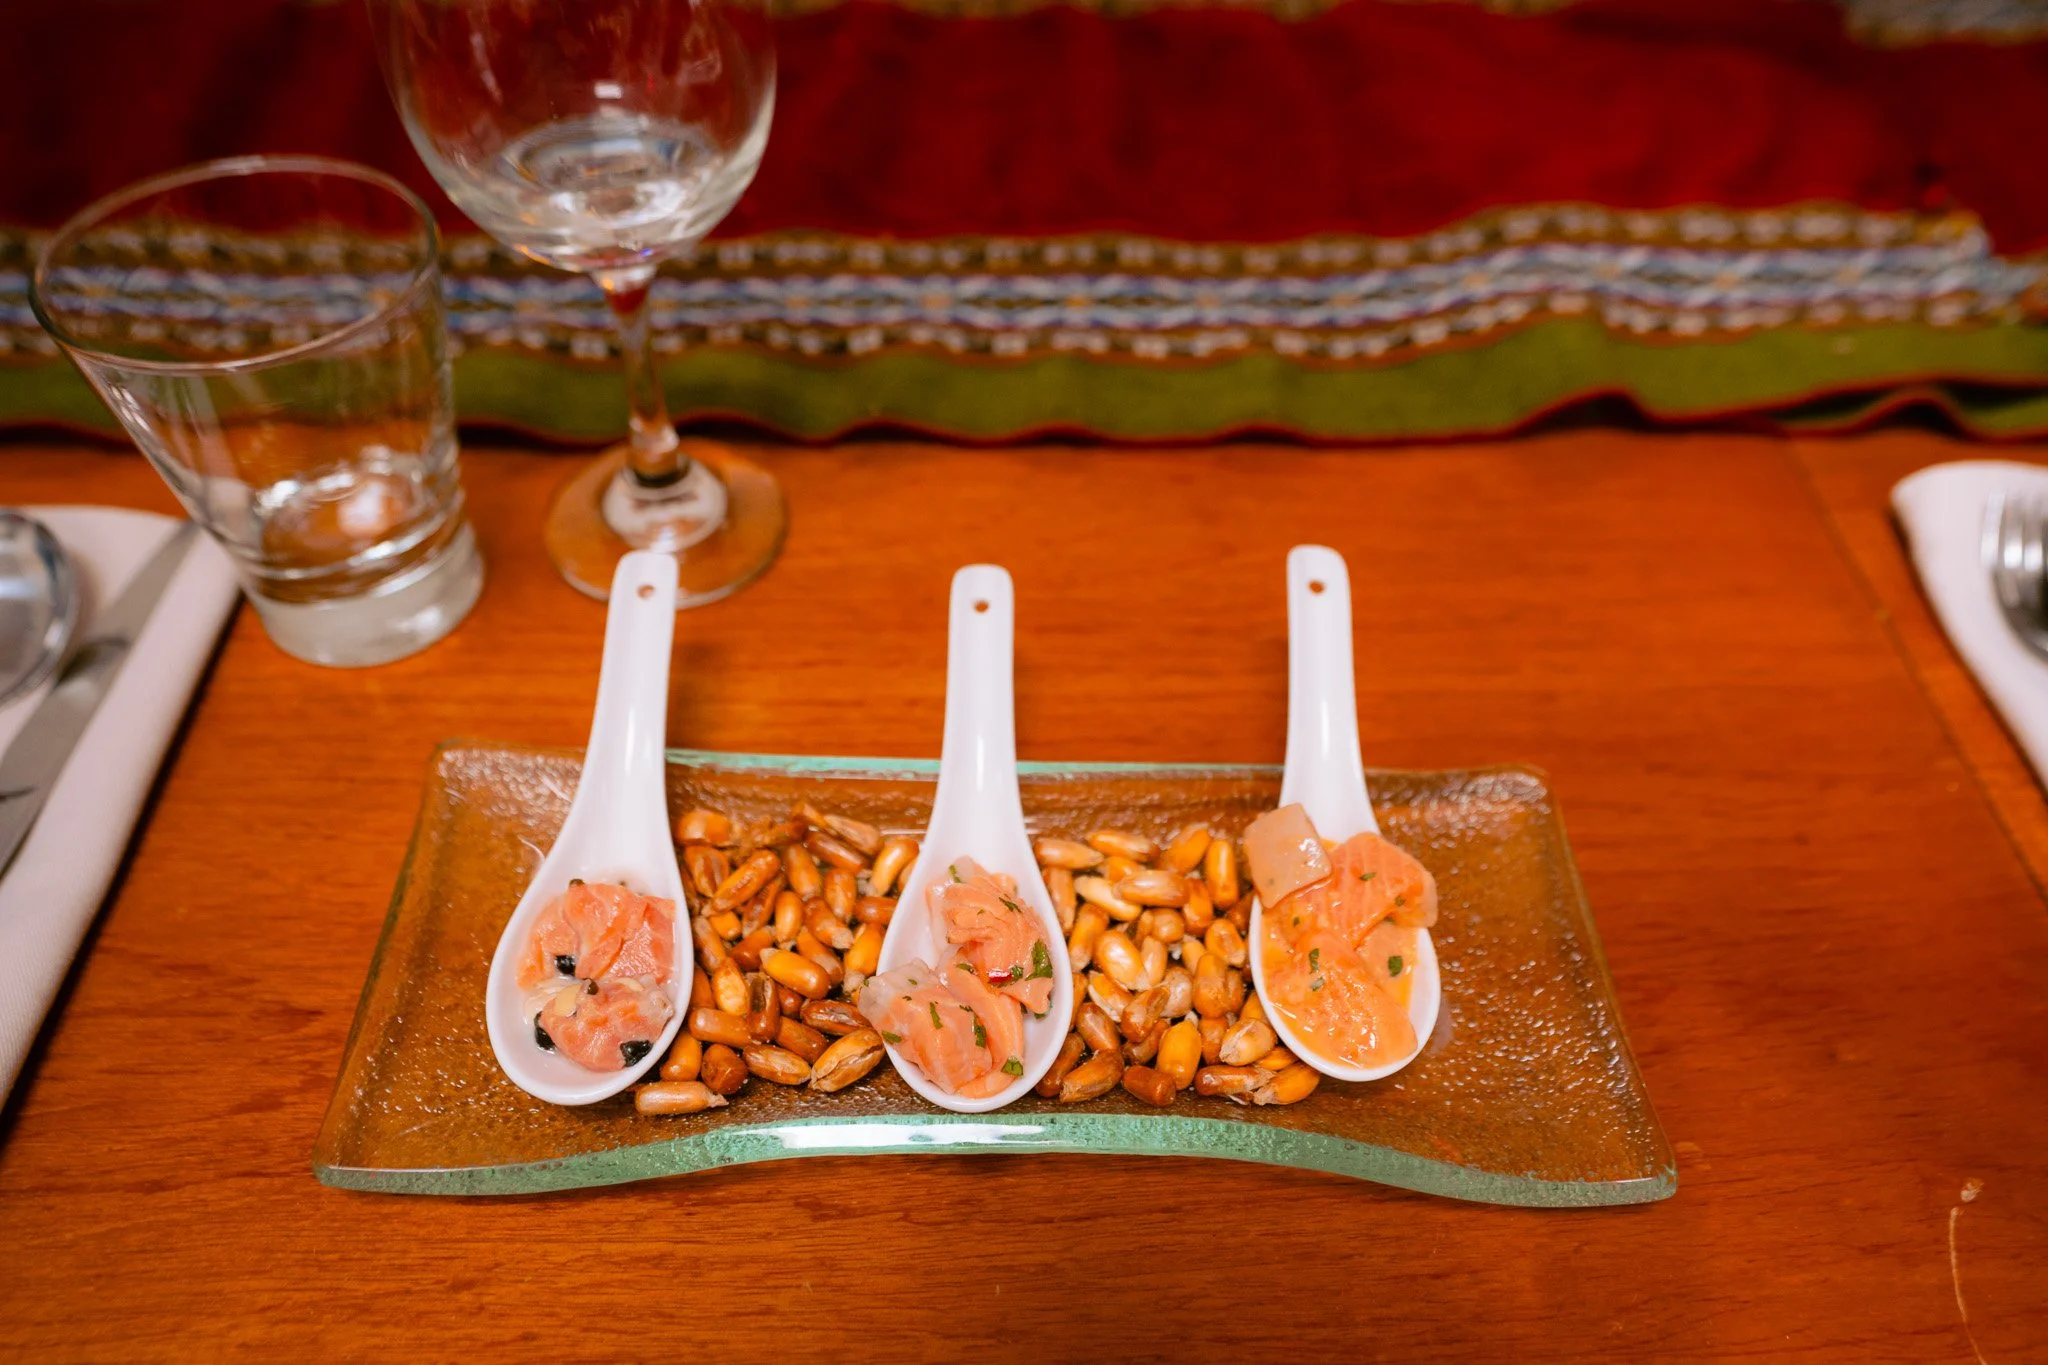
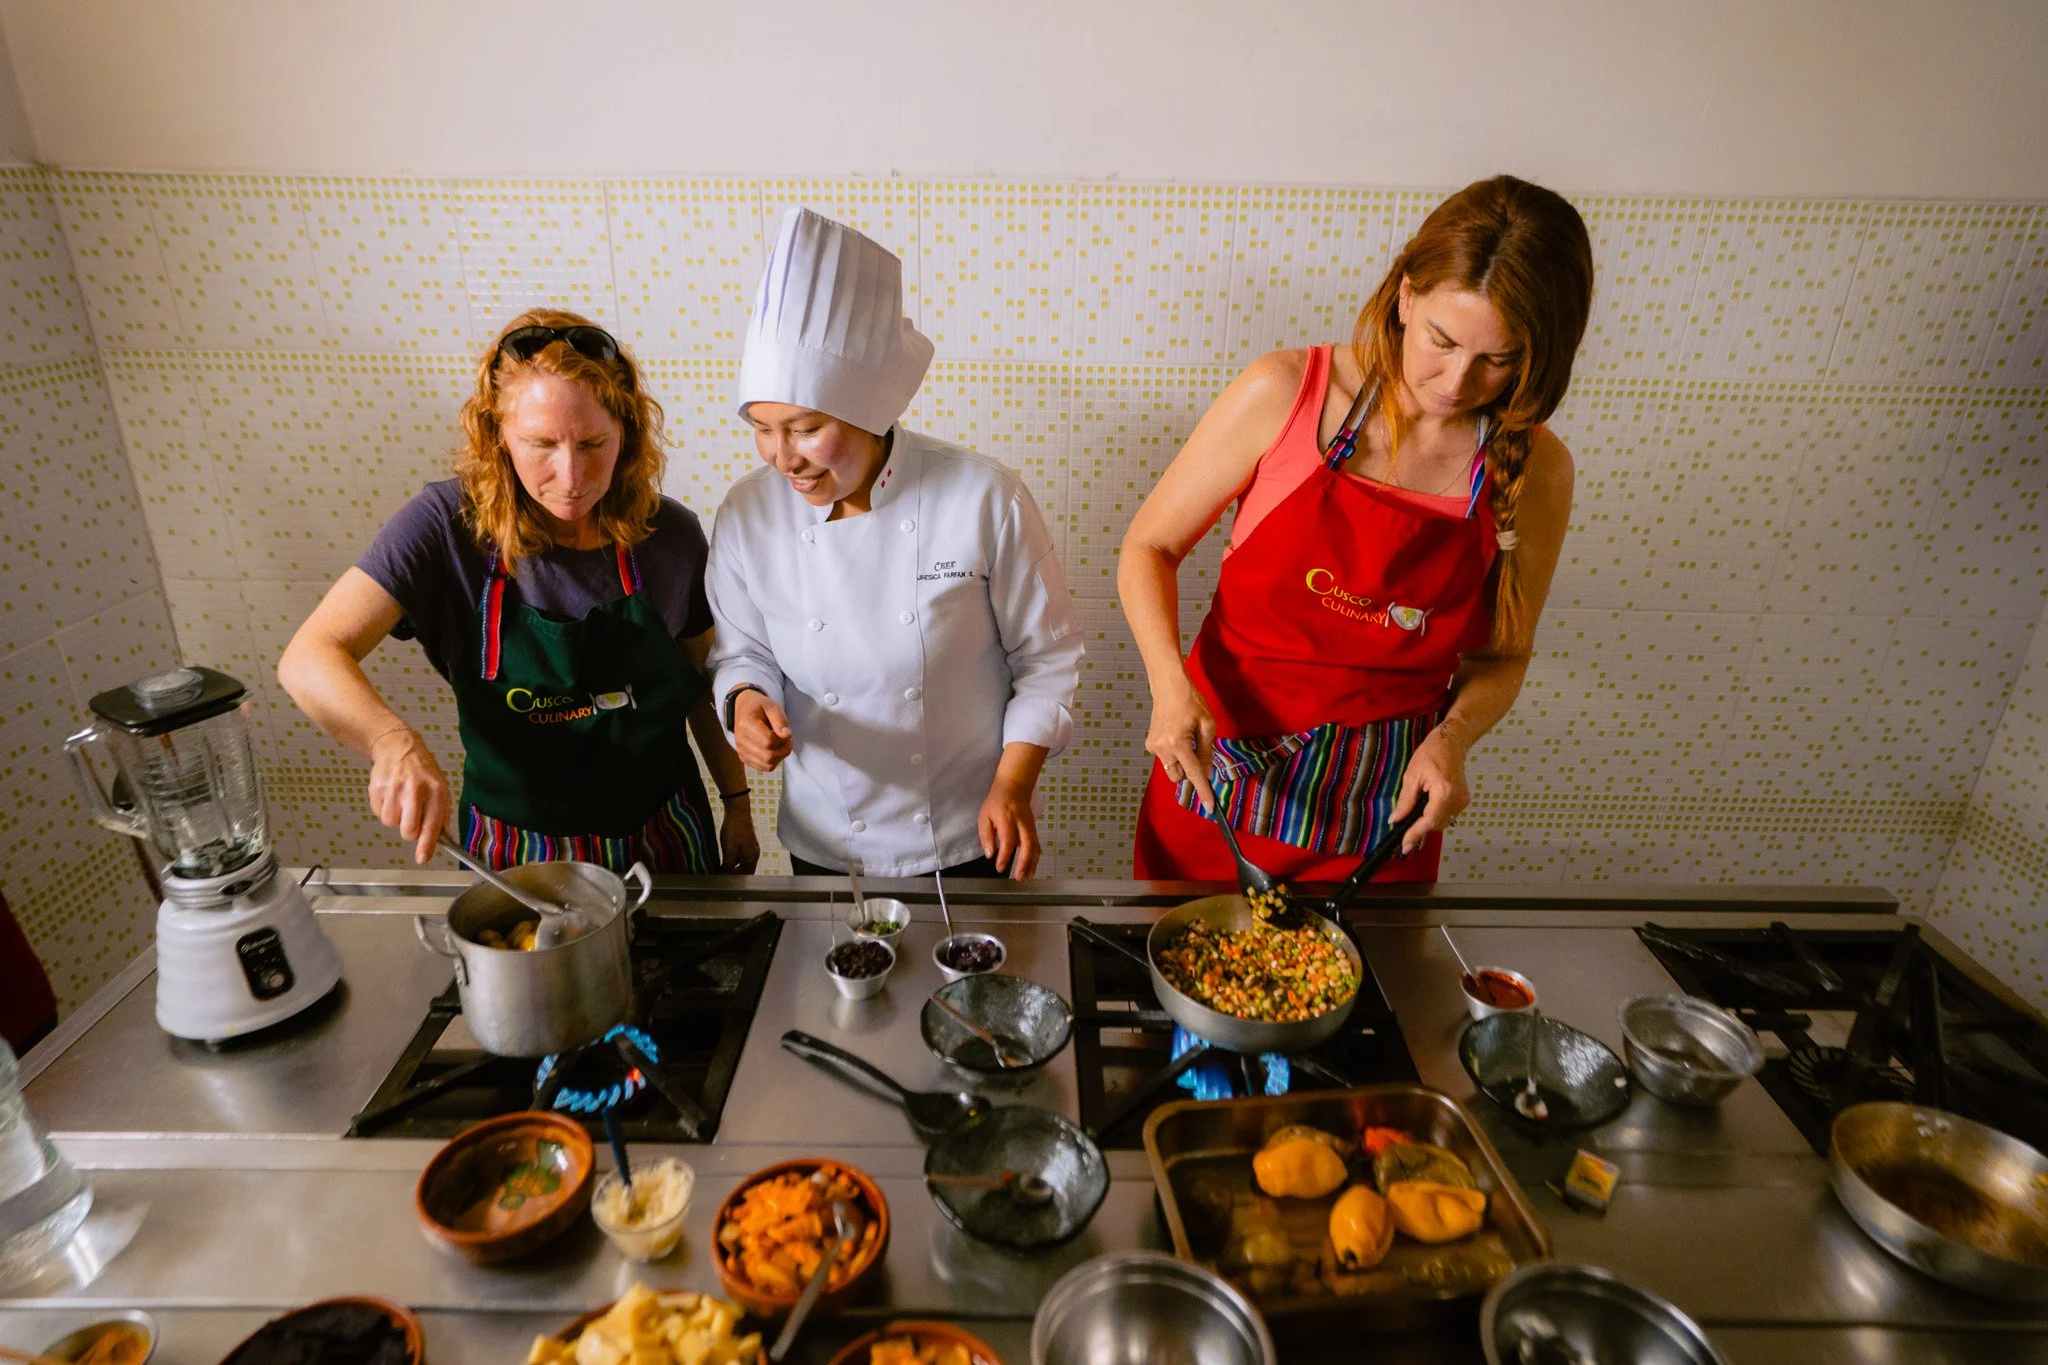
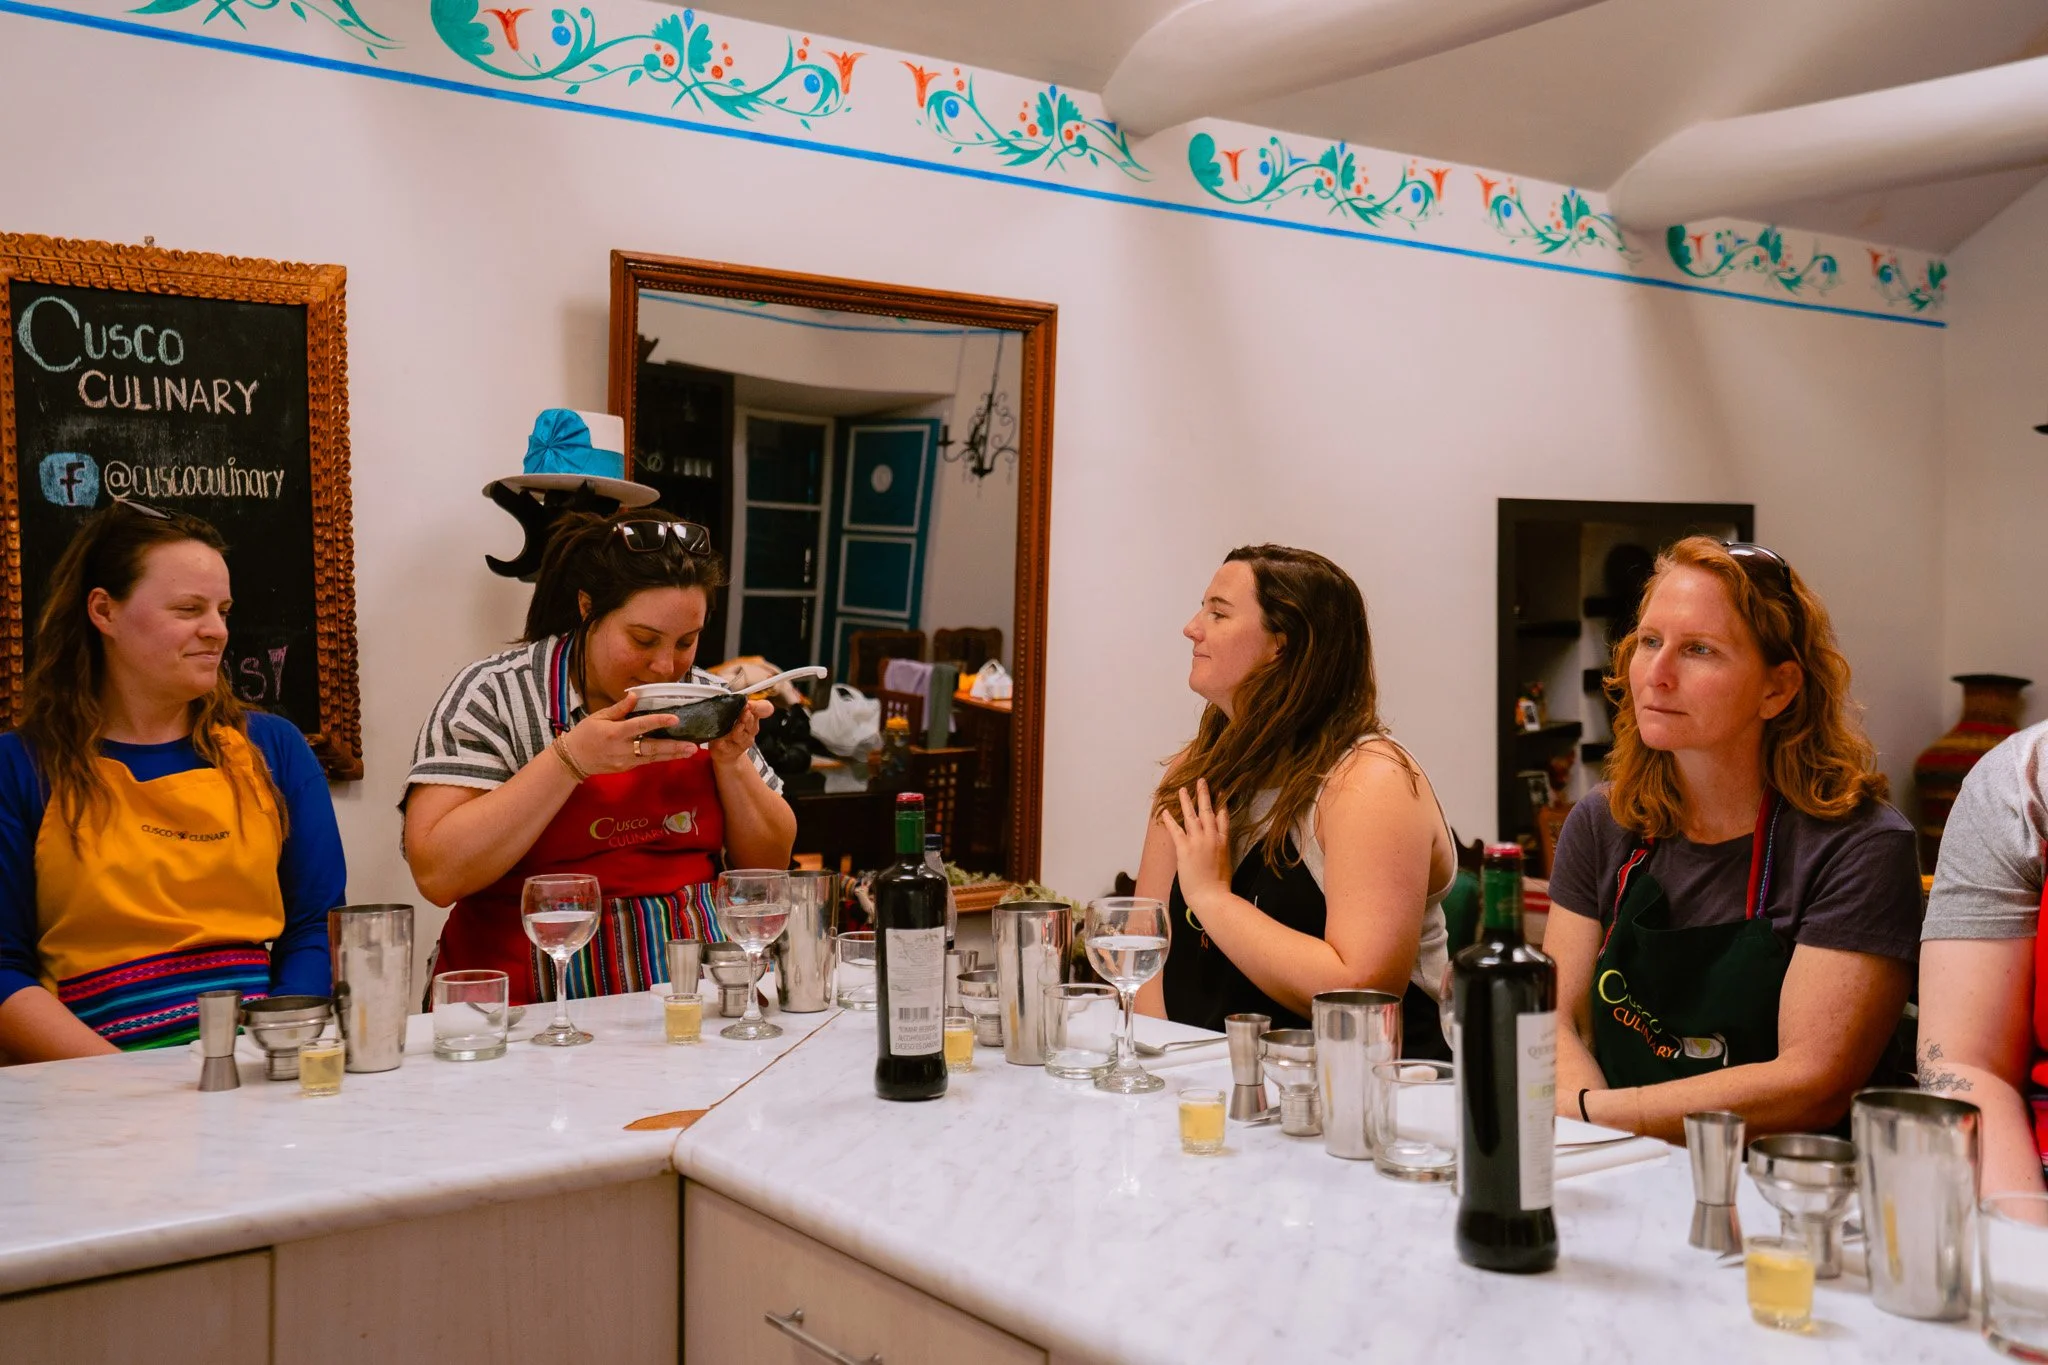
This ended up being one of the most memorable non-trekking experiences of the trip!
We visited San Pedro Market first, then headed to a cooking studio where we learned to make Peruvian dishes like ceviche and of course, Pisco Sours. It was such a fun way to engage with the culture, and after several days of hiking later in the trip, I appreciated that even more.
I recommend booking this class because I love that it includes the San Pedro Market tour (not to mention actually watching our guide source local and fresh ingredients from the market) there are many options in the area!
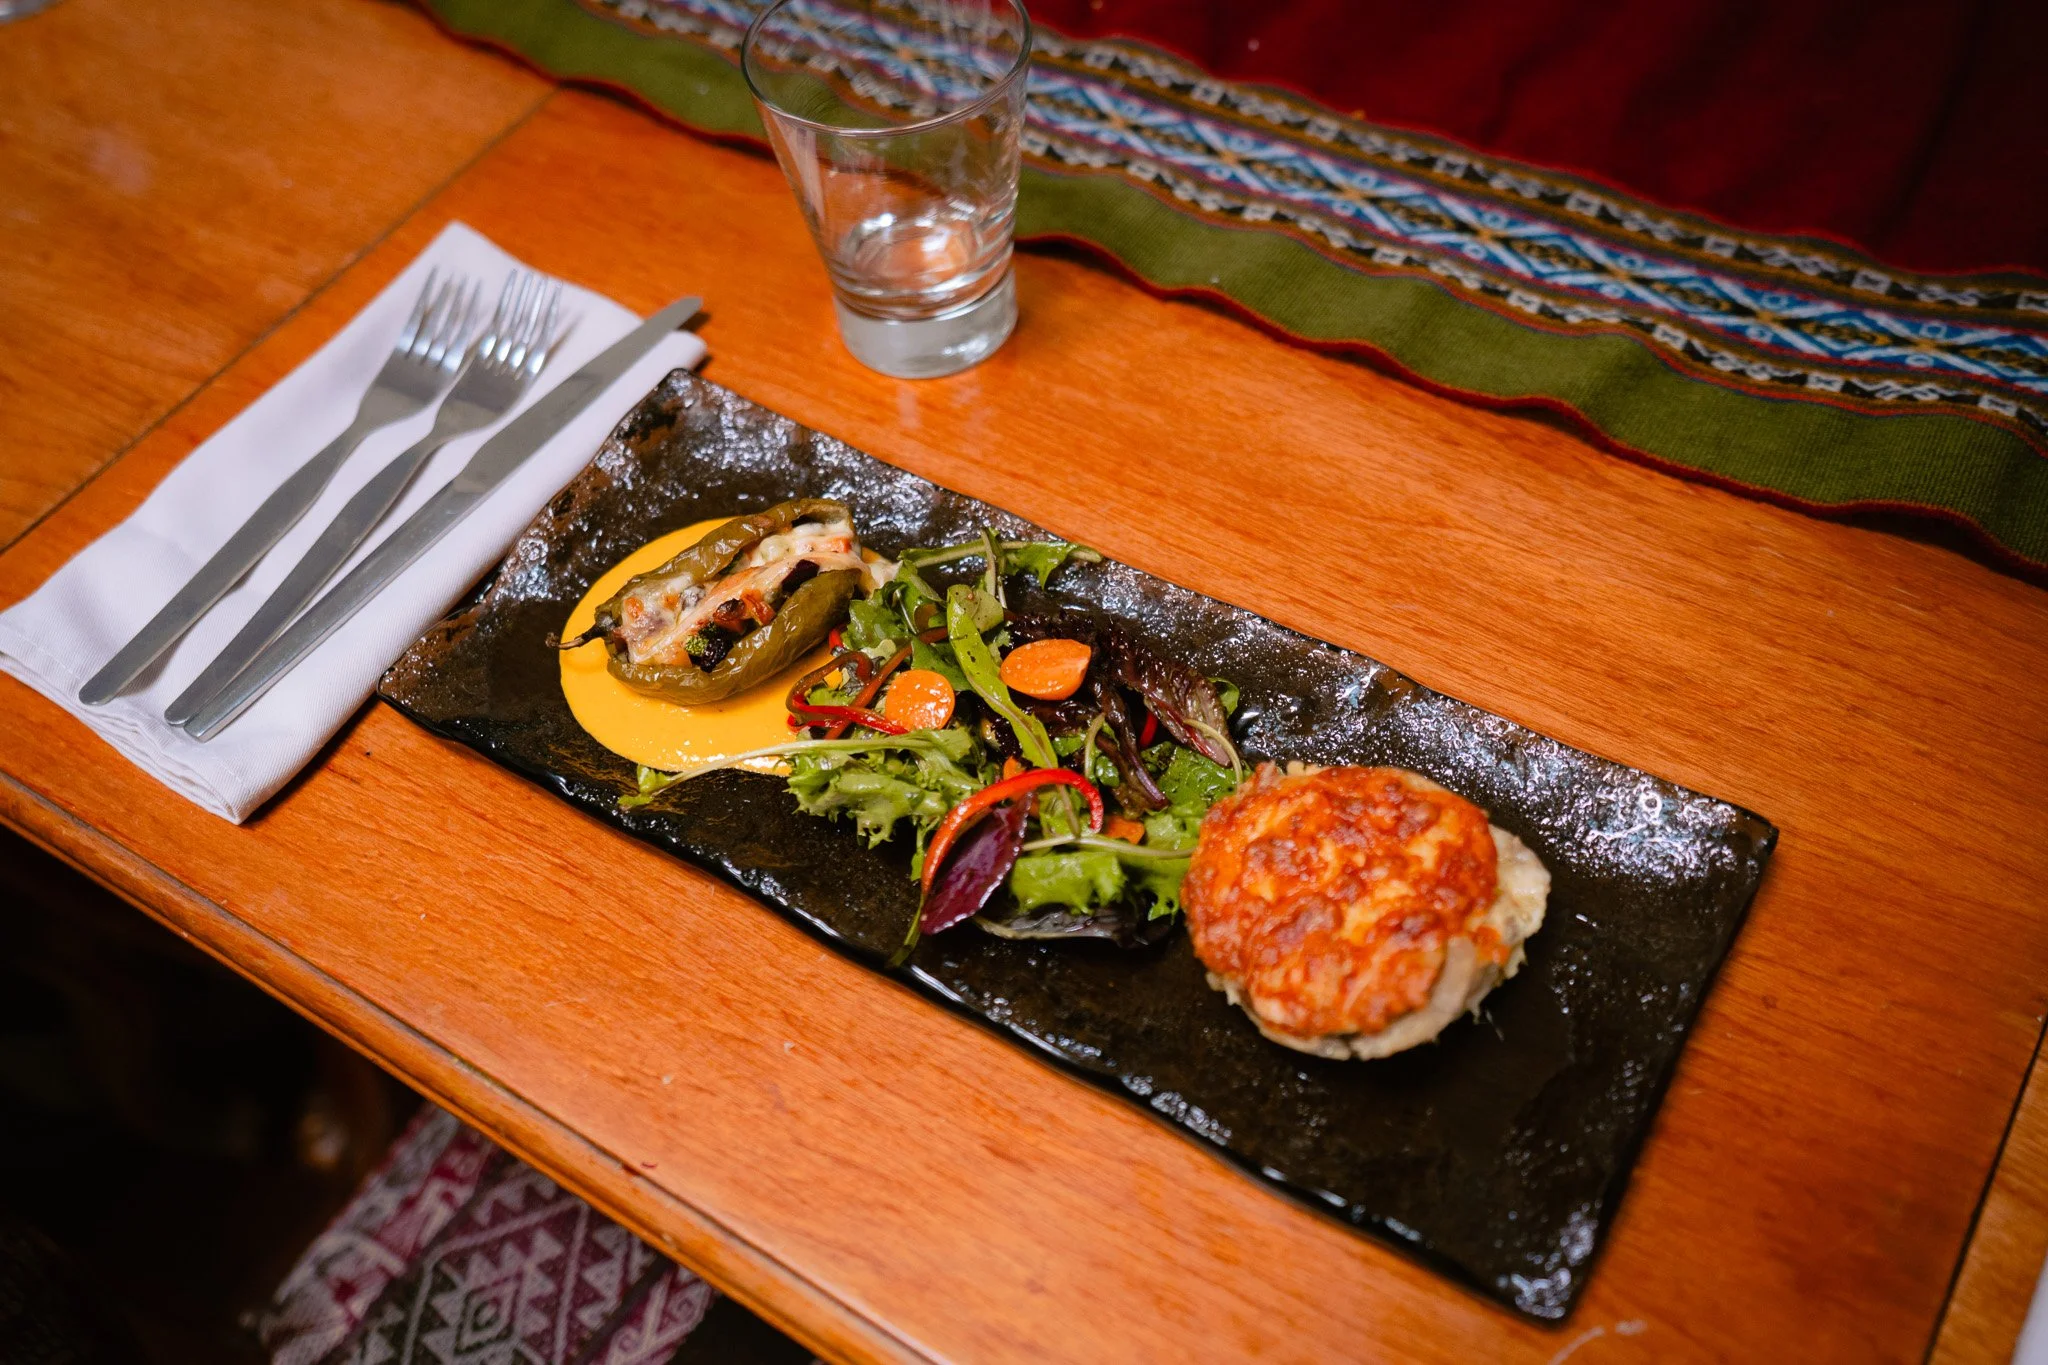
Eat amazing local food
I had some very good meals in Cusco, and a few places stood out enough that I’d absolutely recommend them:
Organika Restaurant
Organika Bakery & Coffee
Kusykay Peruvian Craft Food
Inkazuela
Yaku Restaurant
Pachapapa
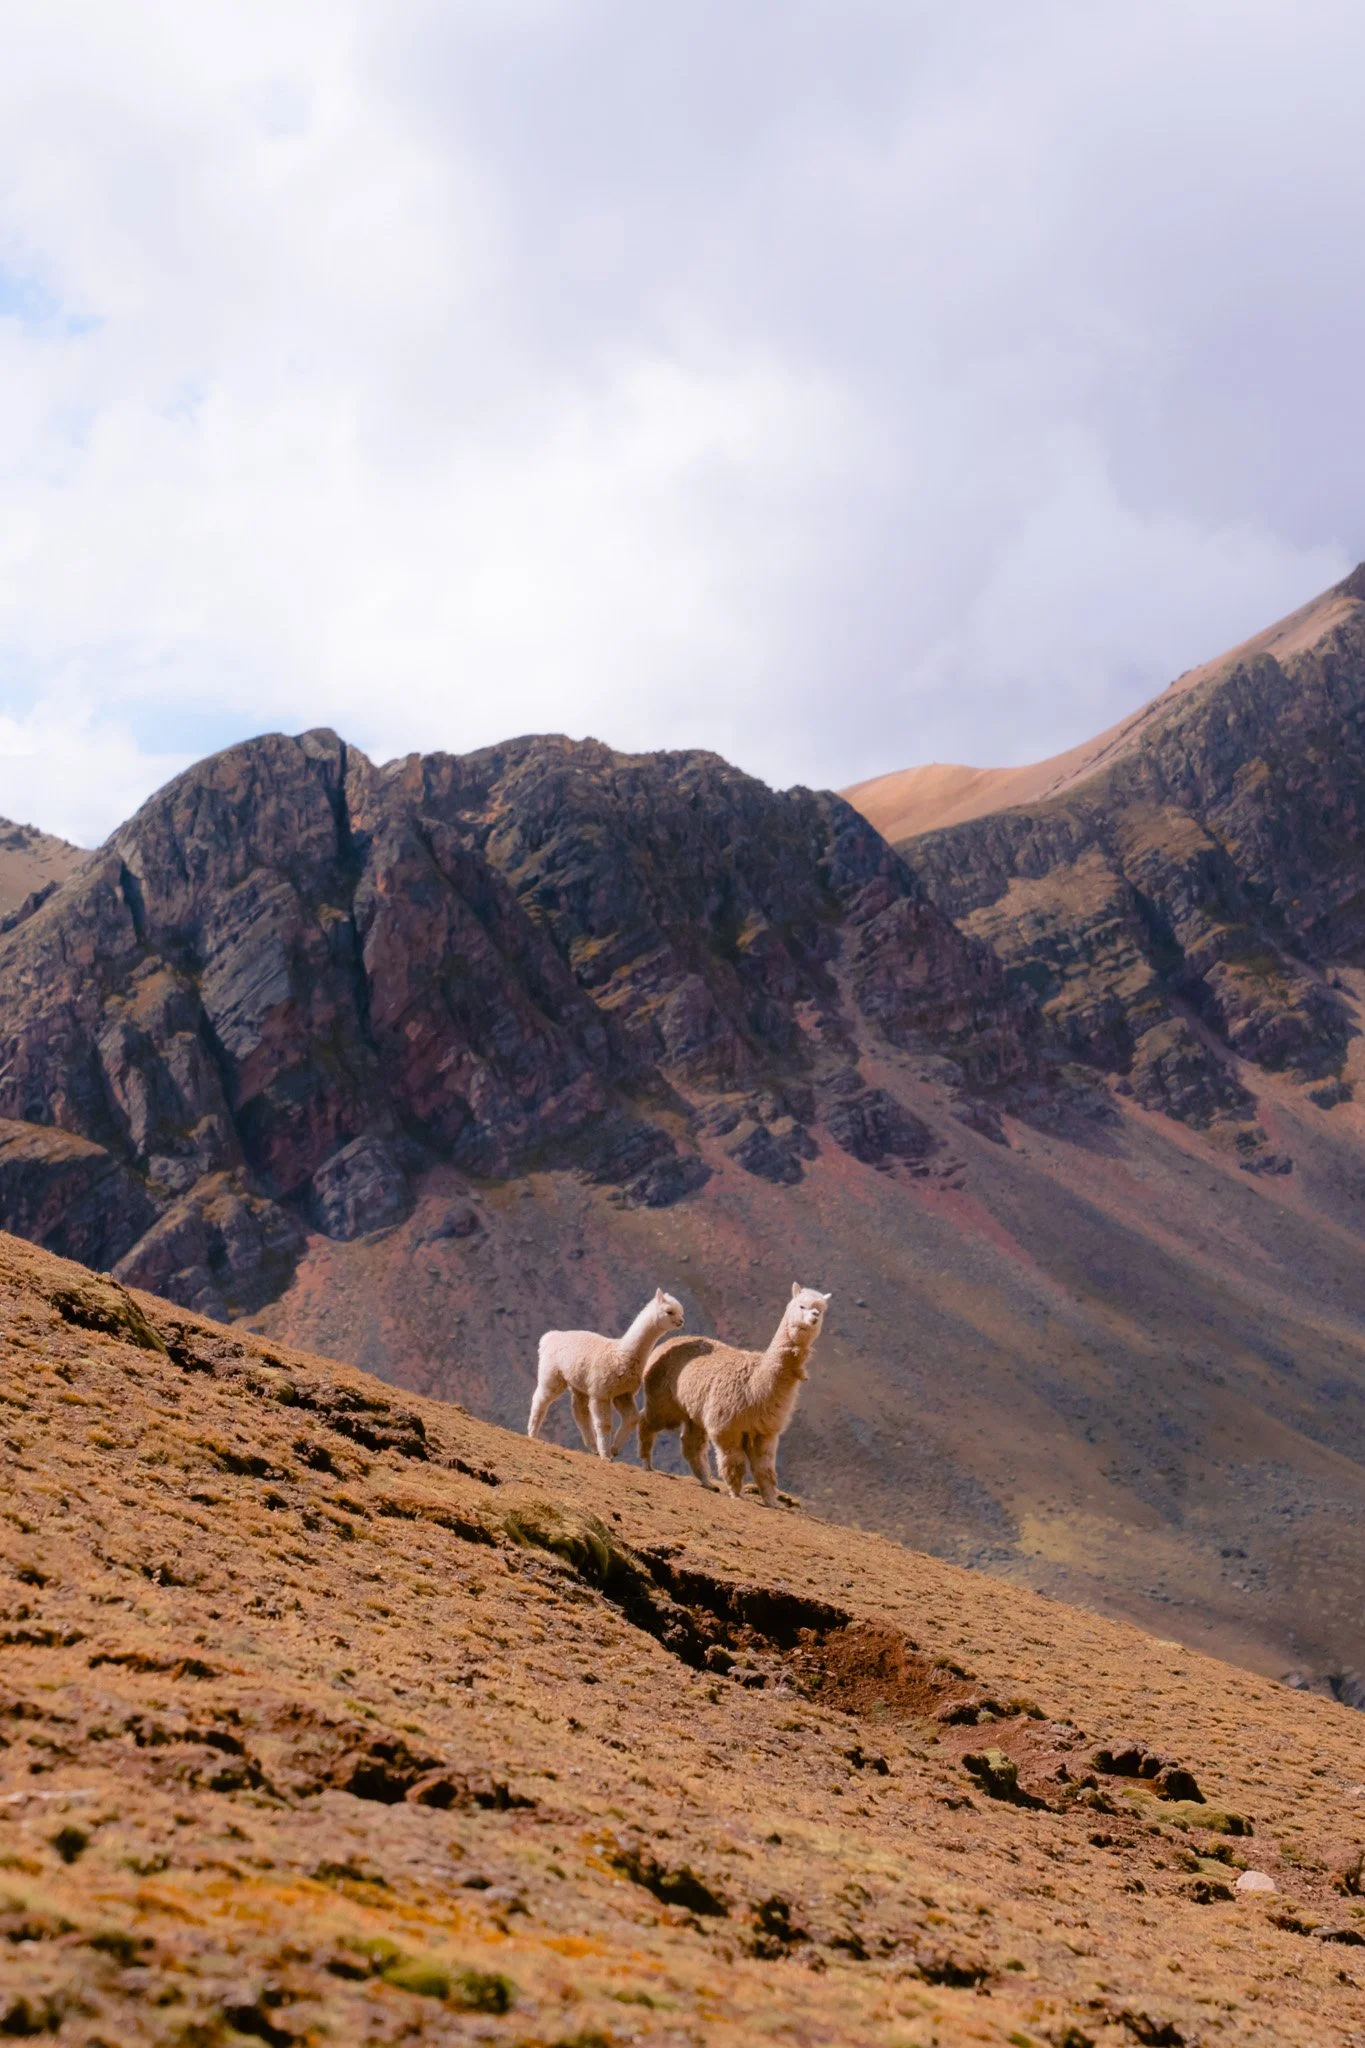
Explore a llama and alpaca farm
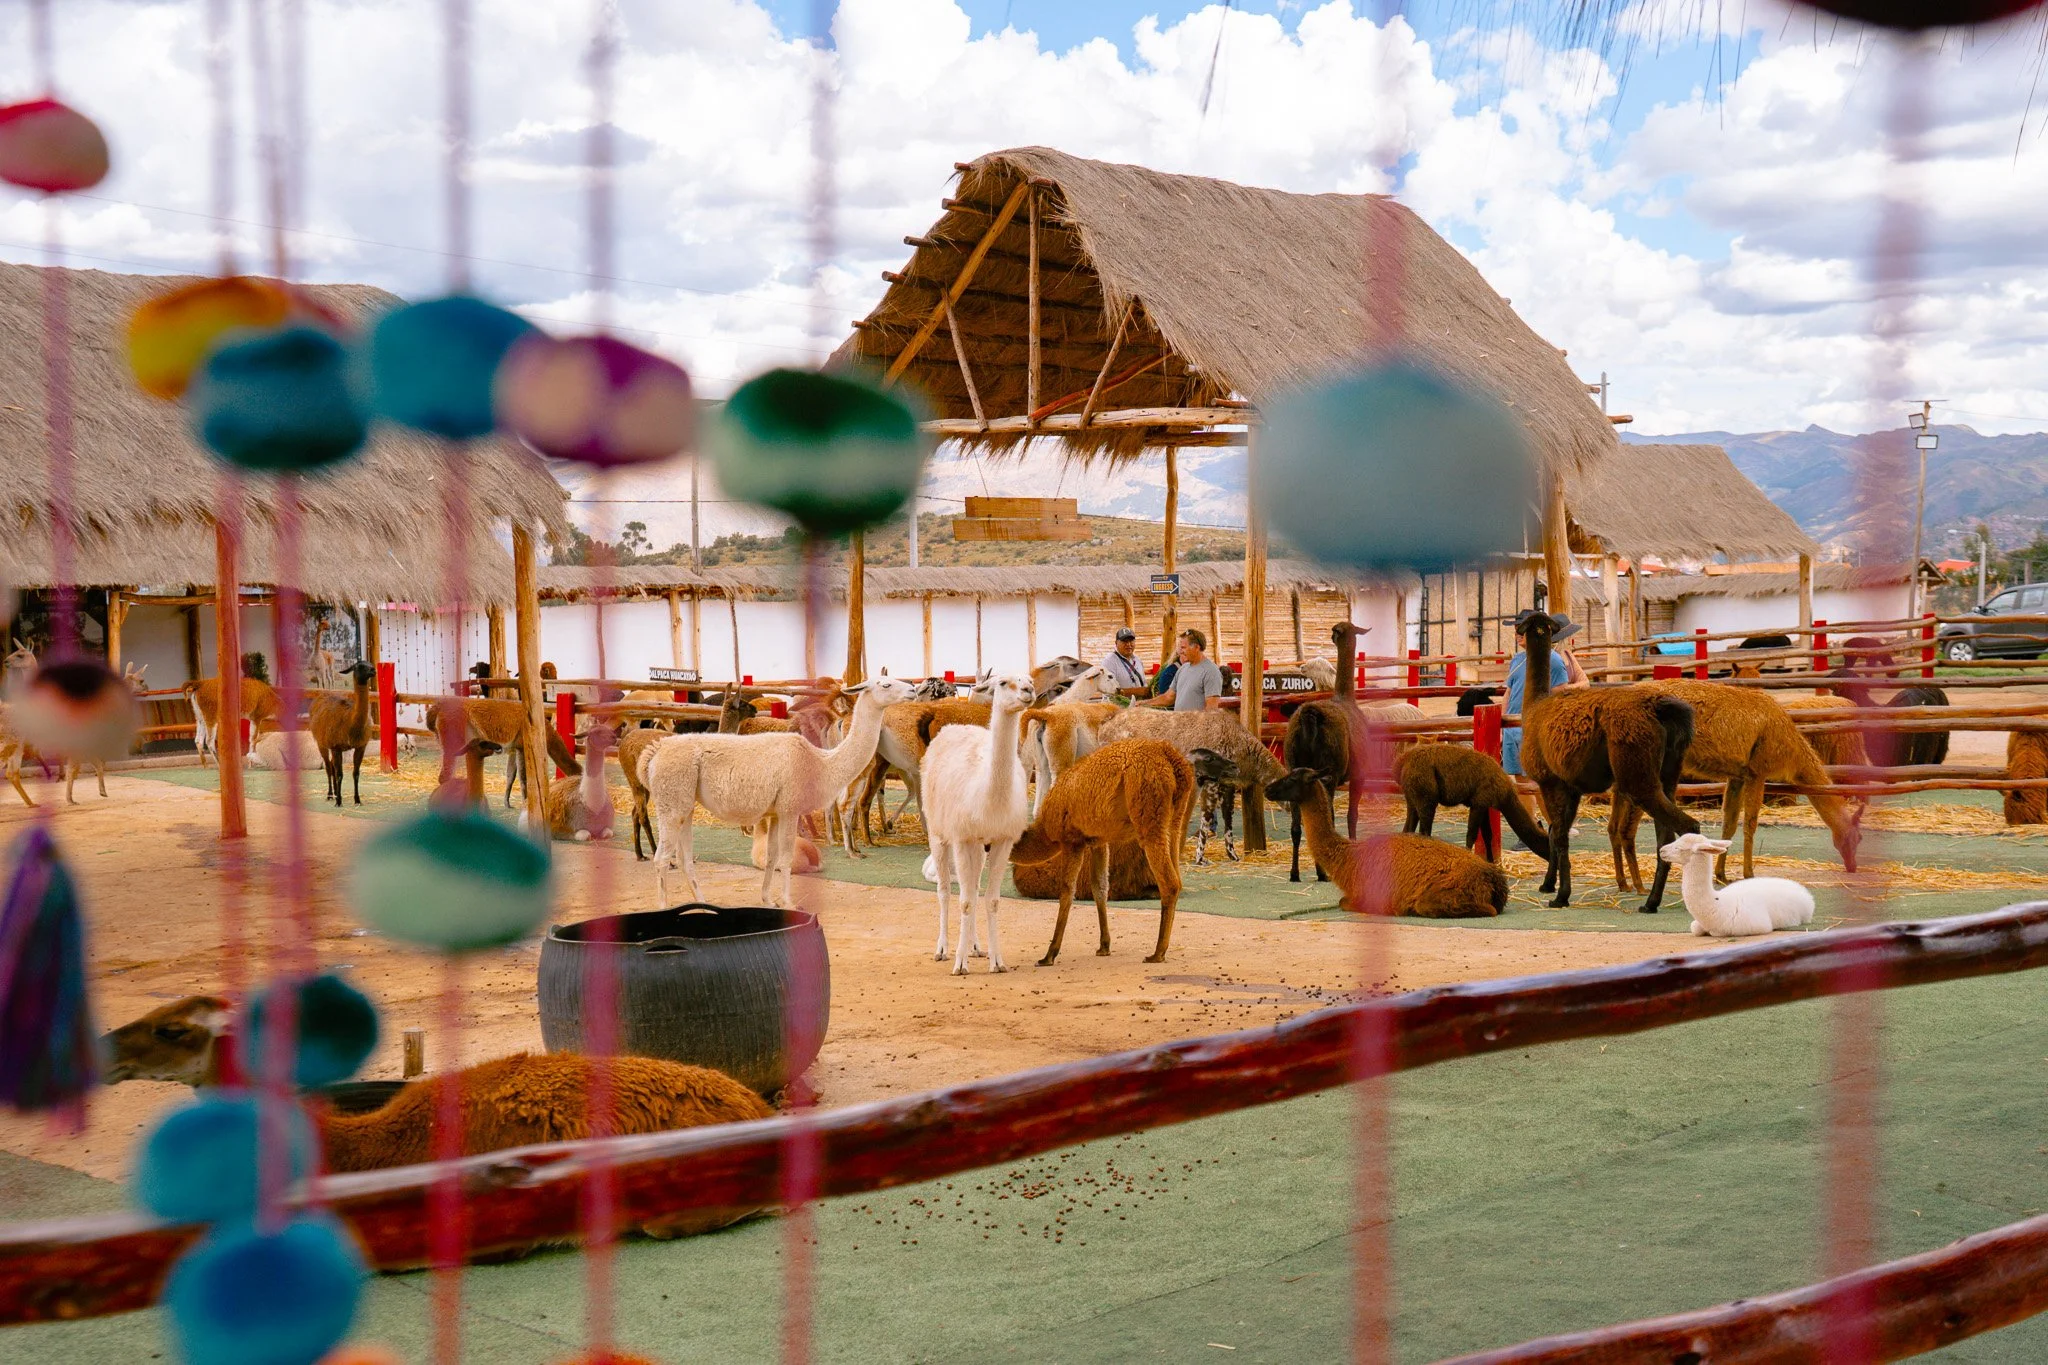
One of the more fun experiences near Cusco was visiting Manos de la Comunidad, where you can meet llamas, alpacas, vicuñas, and guanacos. You also get a chance to learn about textile traditions and shop for beautiful alpaca goods.
And yes, for the record: alpacas are not harmed for their wool. They need to be sheared regularly, so these textiles are cruelty-free.
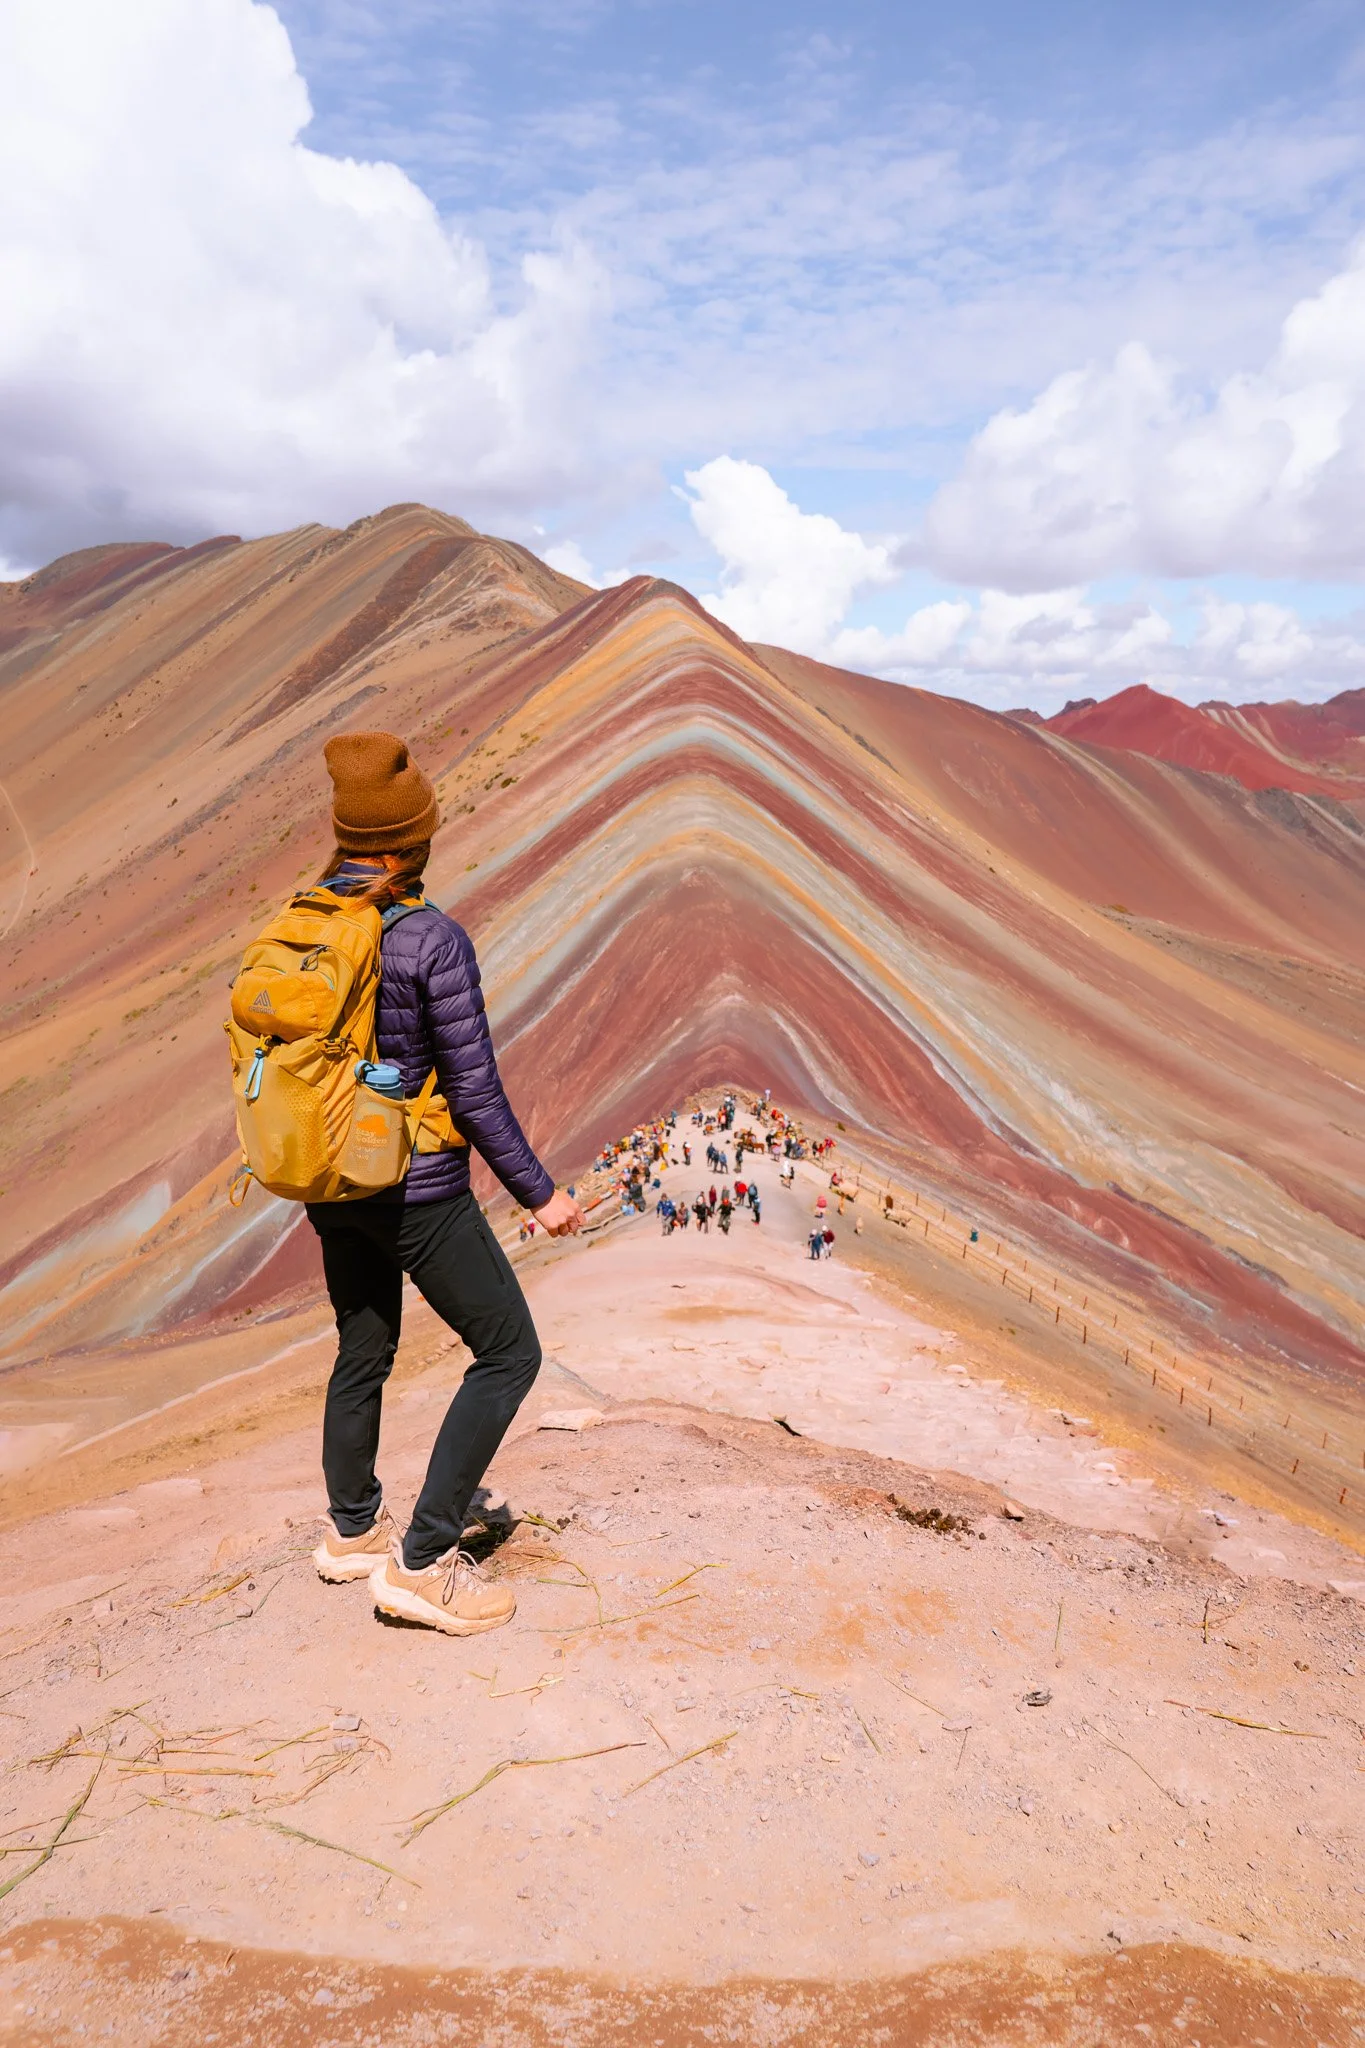
Visit the iconic Rainbow Mountain
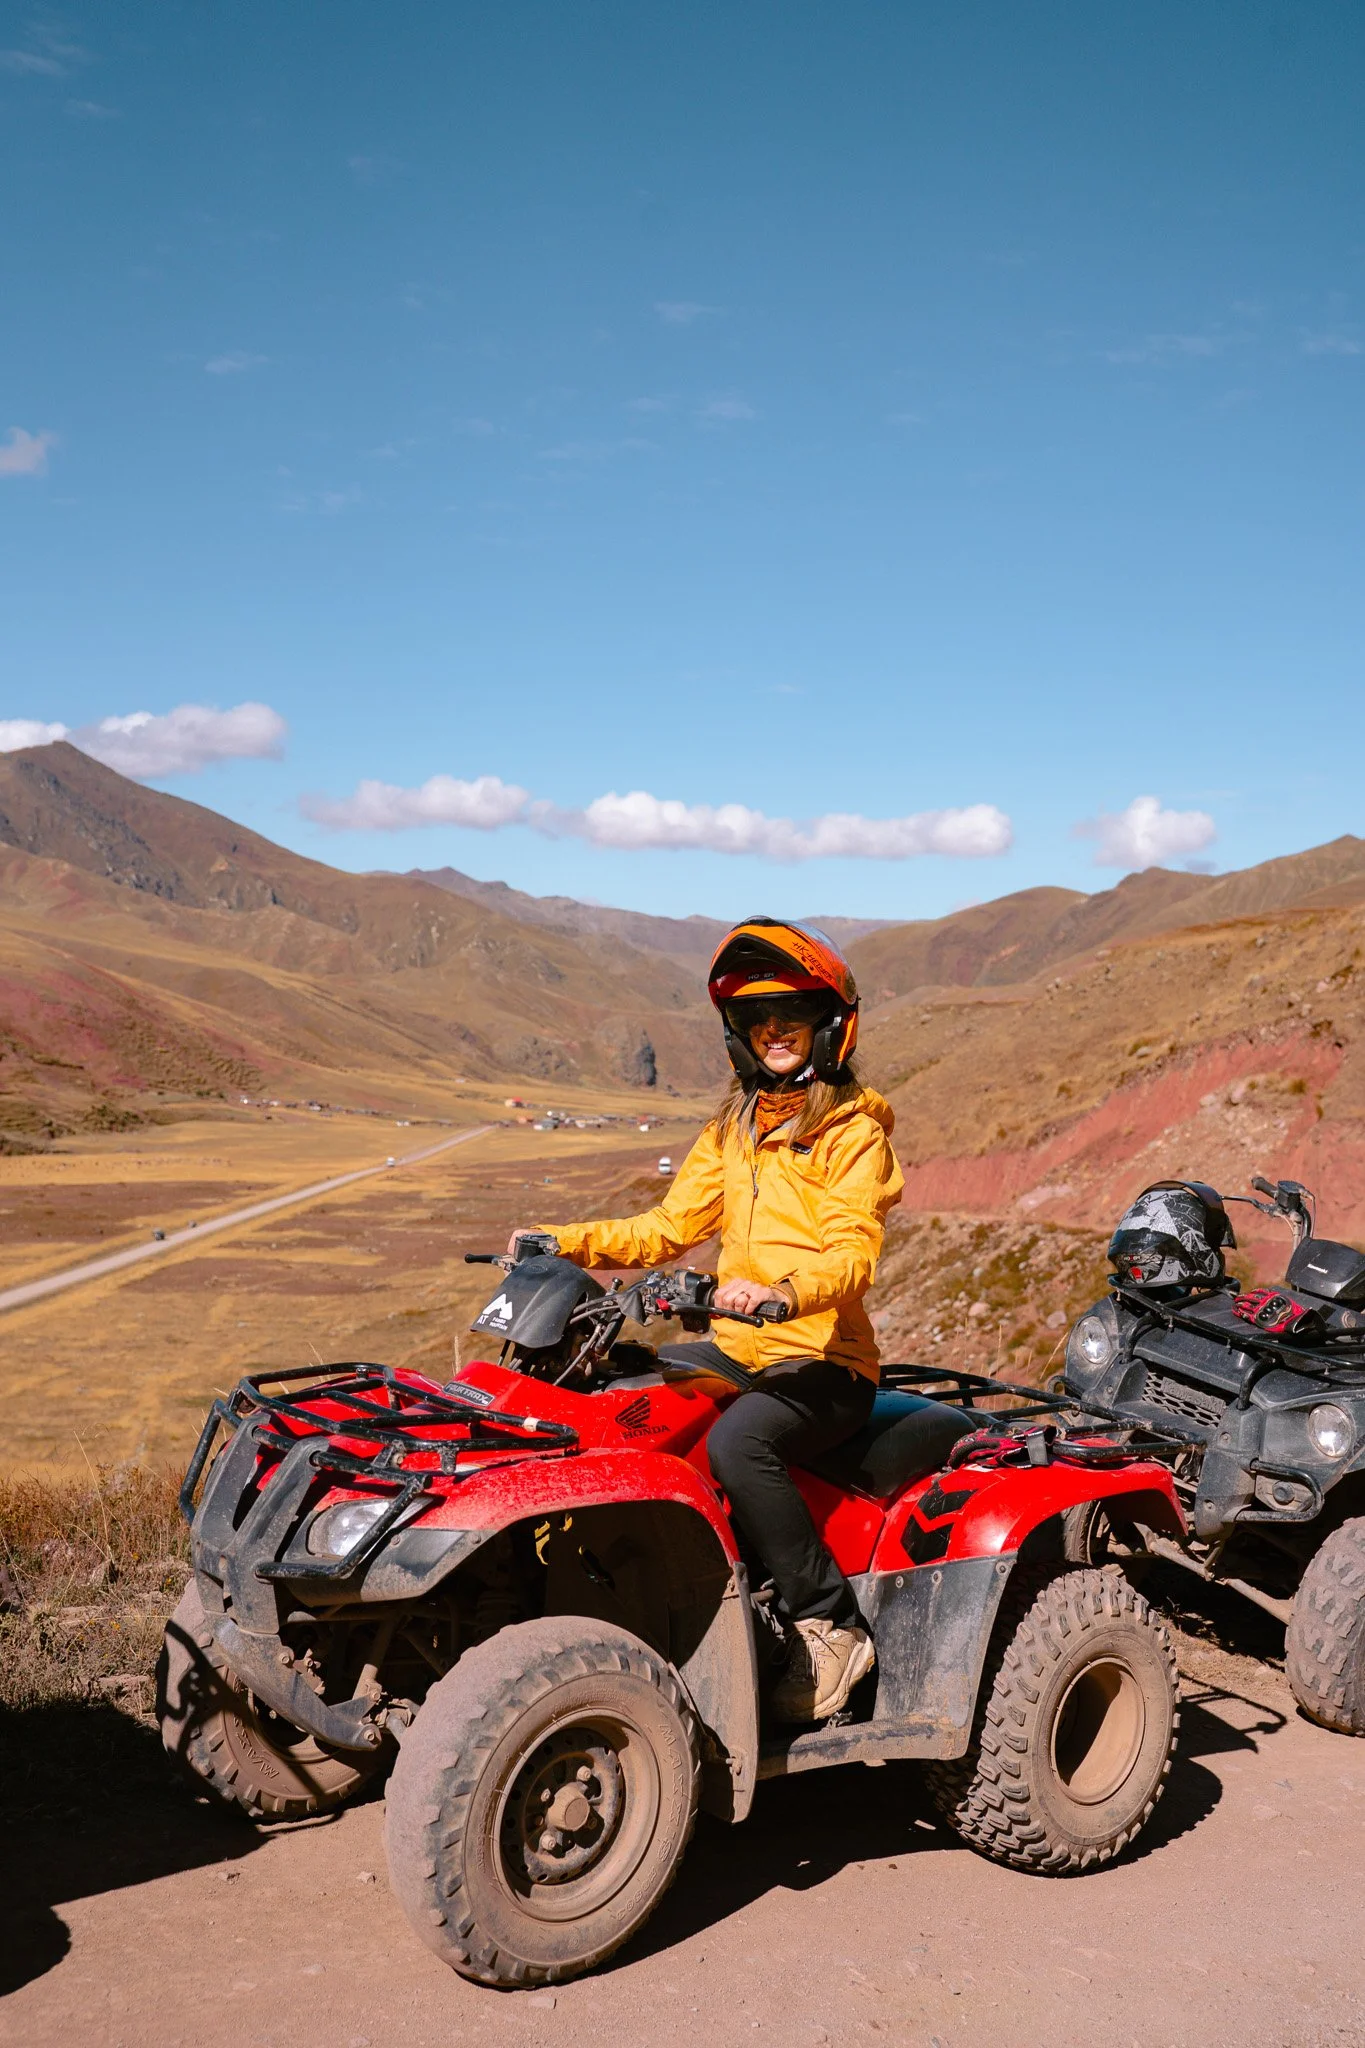
After finishing the Salkantay Trek and returning to Cusco, we added one more adventure to the itinerary: riding ATVs up to Rainbow Mountain and then hiking up!
You can certainly do this before the trek, but it was nice to save it for last because we were much more acclimated to the altitude and it’s good to have a buffer day before flying home.
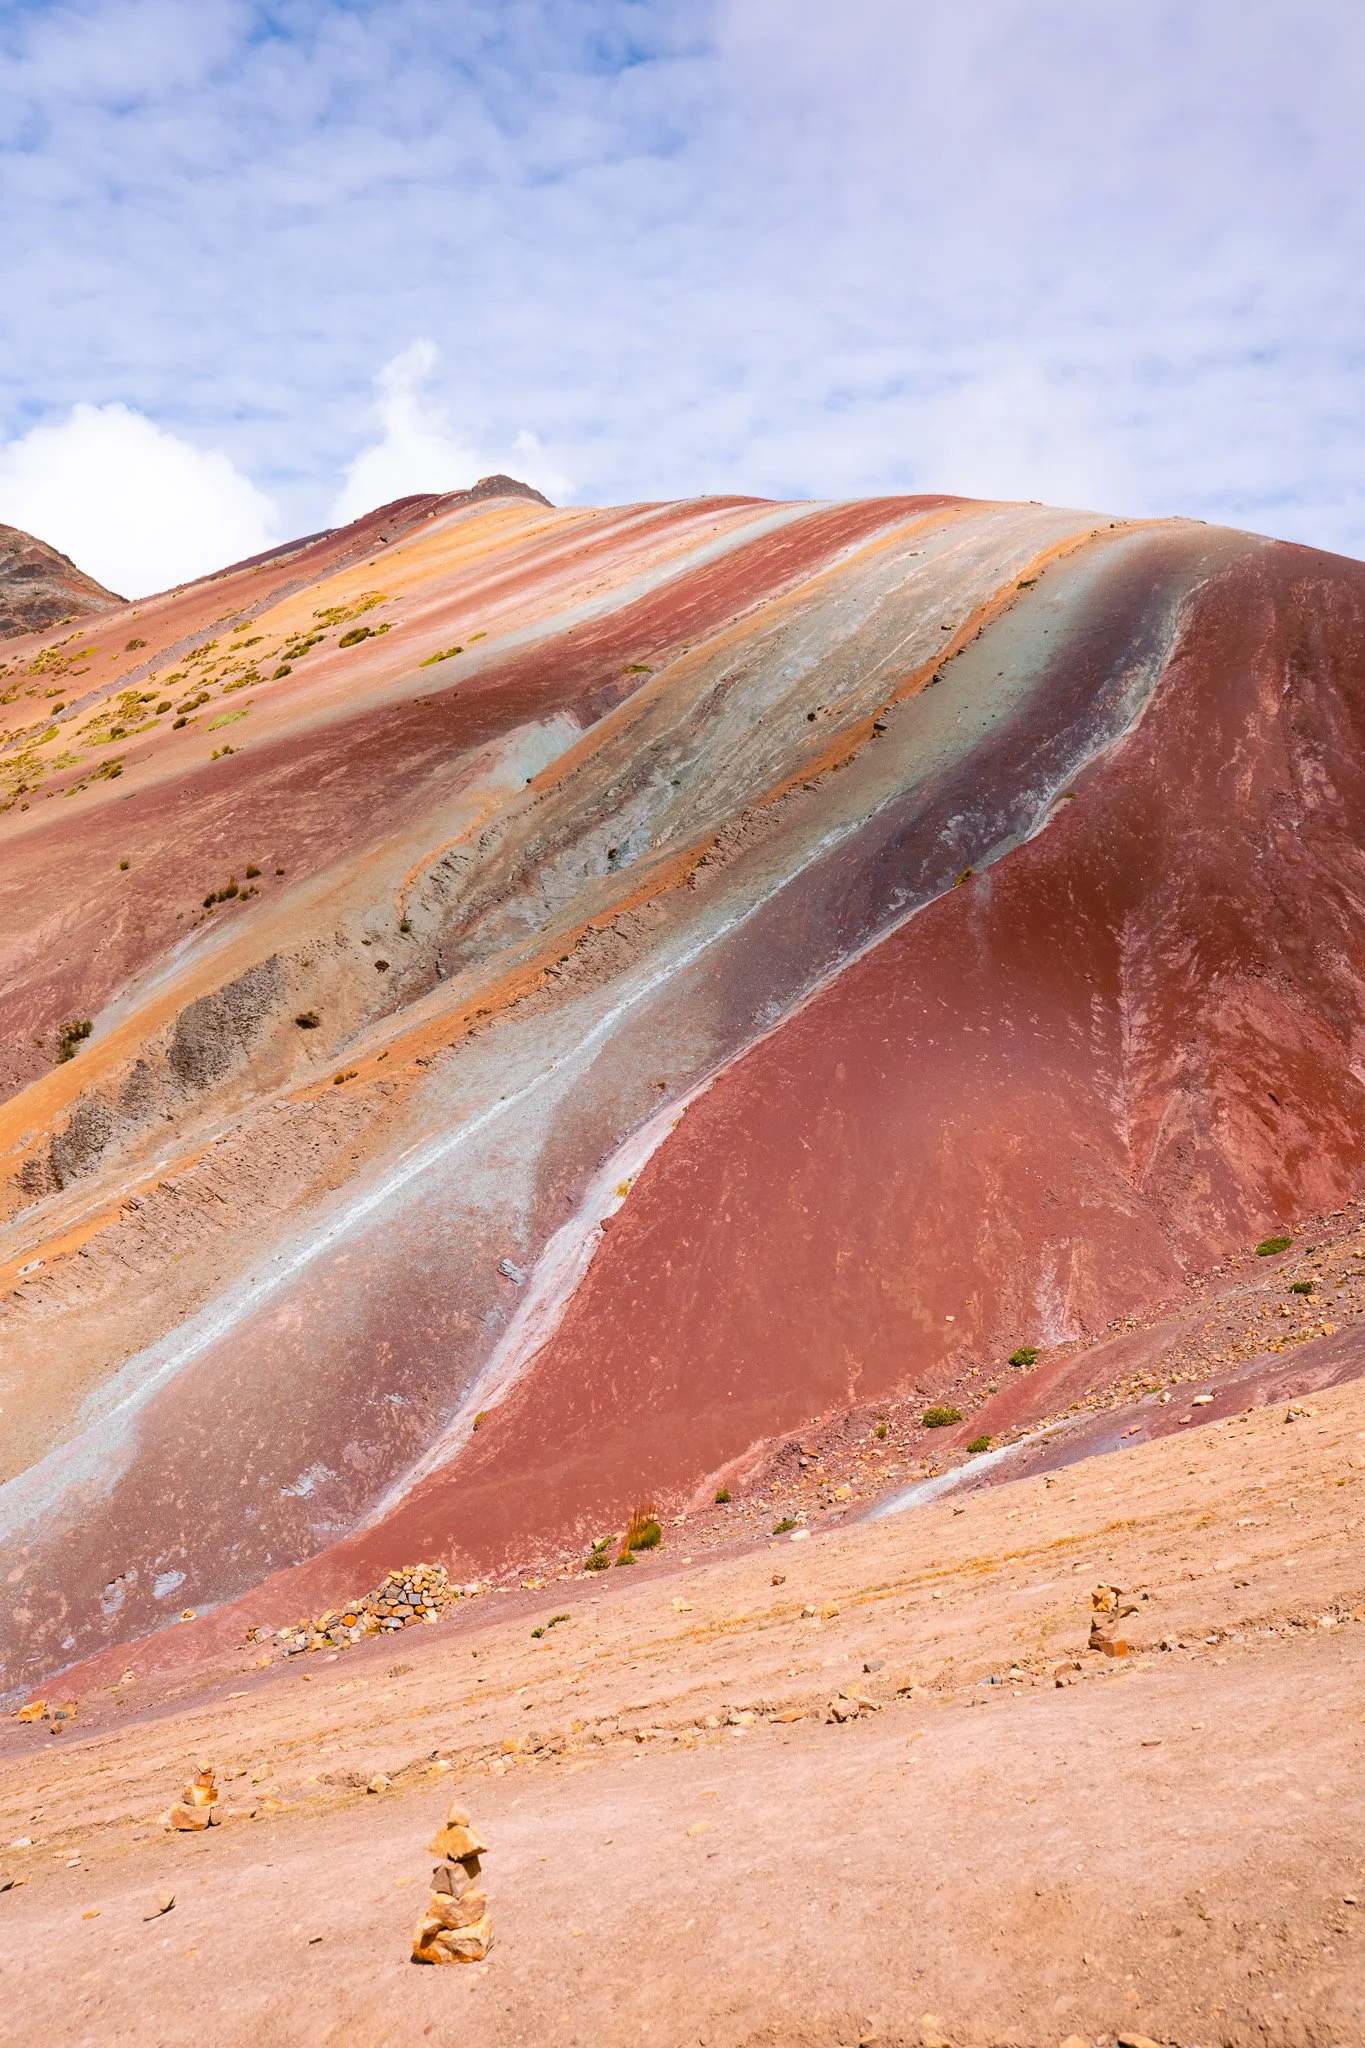
Also known as Vinicunca, Rainbow Mountain sits deep in the Andes at an elevation of 17,060 feet (5,200 meters), making it one of the highest places most travelers will ever visit (and definitely the highest I’ve ever been). It’s located about 3 hours southeast of Cusco, so visiting it usually requires a very early start and will basically take the entire day.
The mountain has become famous for its striking, naturally layered colors. Bands of red, gold, green, and purple streak across the slopes, created by different mineral deposits in the rock that have been exposed over time through erosion.
Photos of Rainbow Mountain started circulating widely about a decade ago, and it quickly became one of Peru’s most popular day trips from Cusco.
Rainbow Mountain sits at 17,060 feet, which is no joke. Even though the final walk is relatively short, altitude makes everything harder. Depending on the weather, the colors can look muted or incredibly vivid, so it’s one of those experiences where conditions really matter.
I’m glad I did it, but I would only recommend it if you’ve already acclimated and you’re honest with yourself about how your body is handling the elevation.
As a pro-tip, there apparently is another incredible landscape nearby that many people miss: Red Valley (Valle Rojo).
Red Valley sits just beyond Rainbow Mountain and is known for its dramatic deep crimson hills and ridgelines that stretch across the surrounding landscape. Instead of the rainbow-colored stripes you see at Vinicunca, the terrain here is almost entirely shades of red and rust-colored earth.
The hike to Red Valley is relatively short — usually about 20–30 minutes past the main Rainbow Mountain viewpoint — but surprisingly few tours include it. Because of that, it tends to be much quieter than Rainbow Mountain, which can get quite crowded later in the morning.
f you’re booking a Rainbow Mountain excursion, ask whether the tour includes Red Valley access. Some companies charge a small additional entrance fee for the area, while others simply don’t build it into the itinerary.
The Salkantay Trek

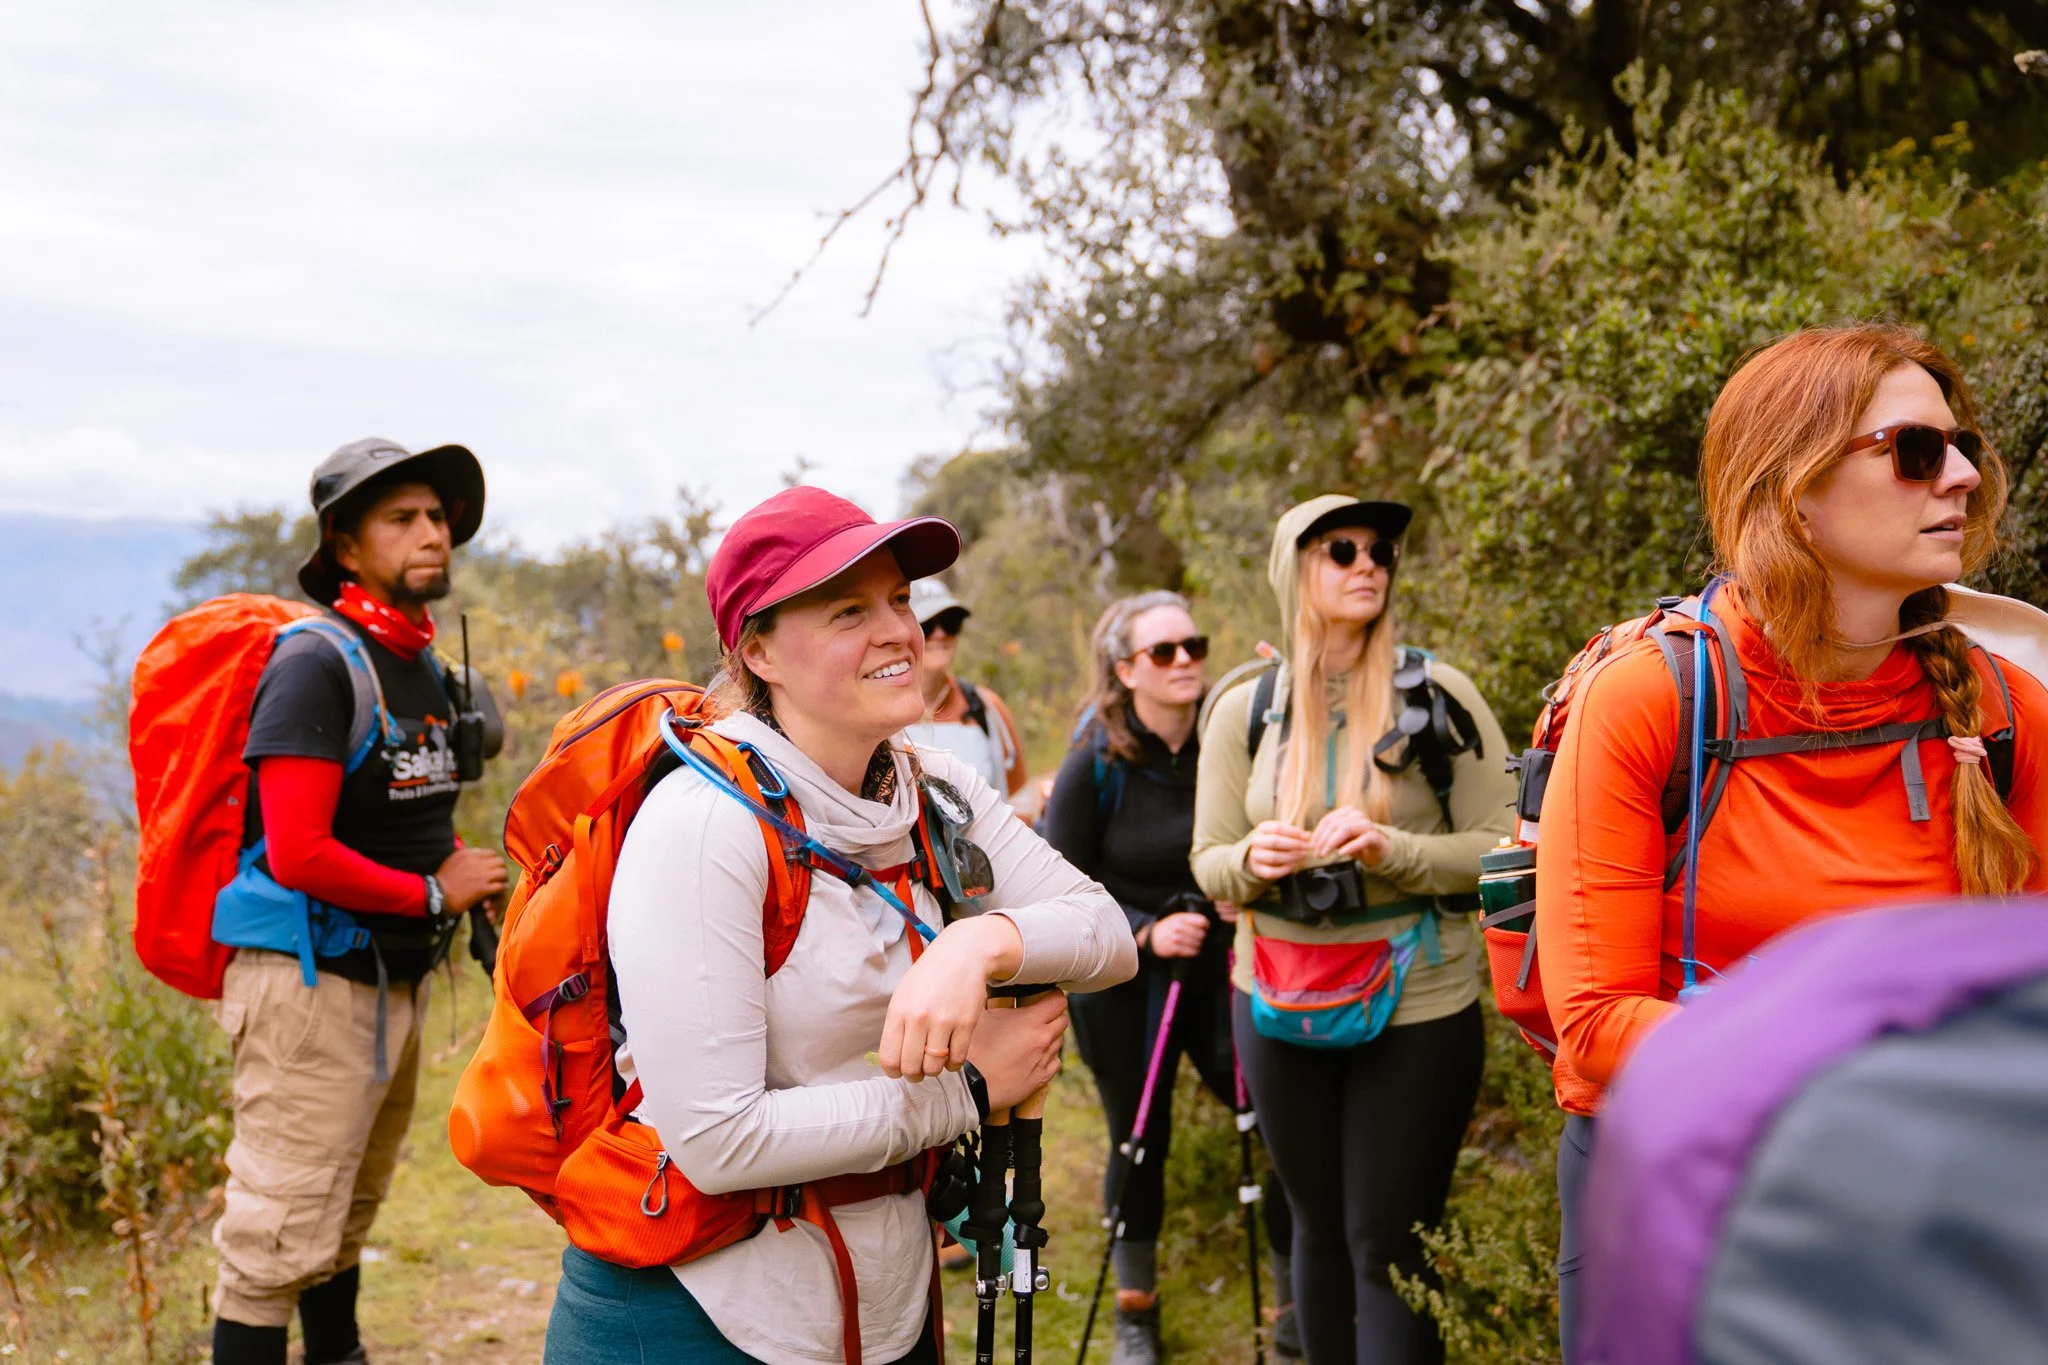
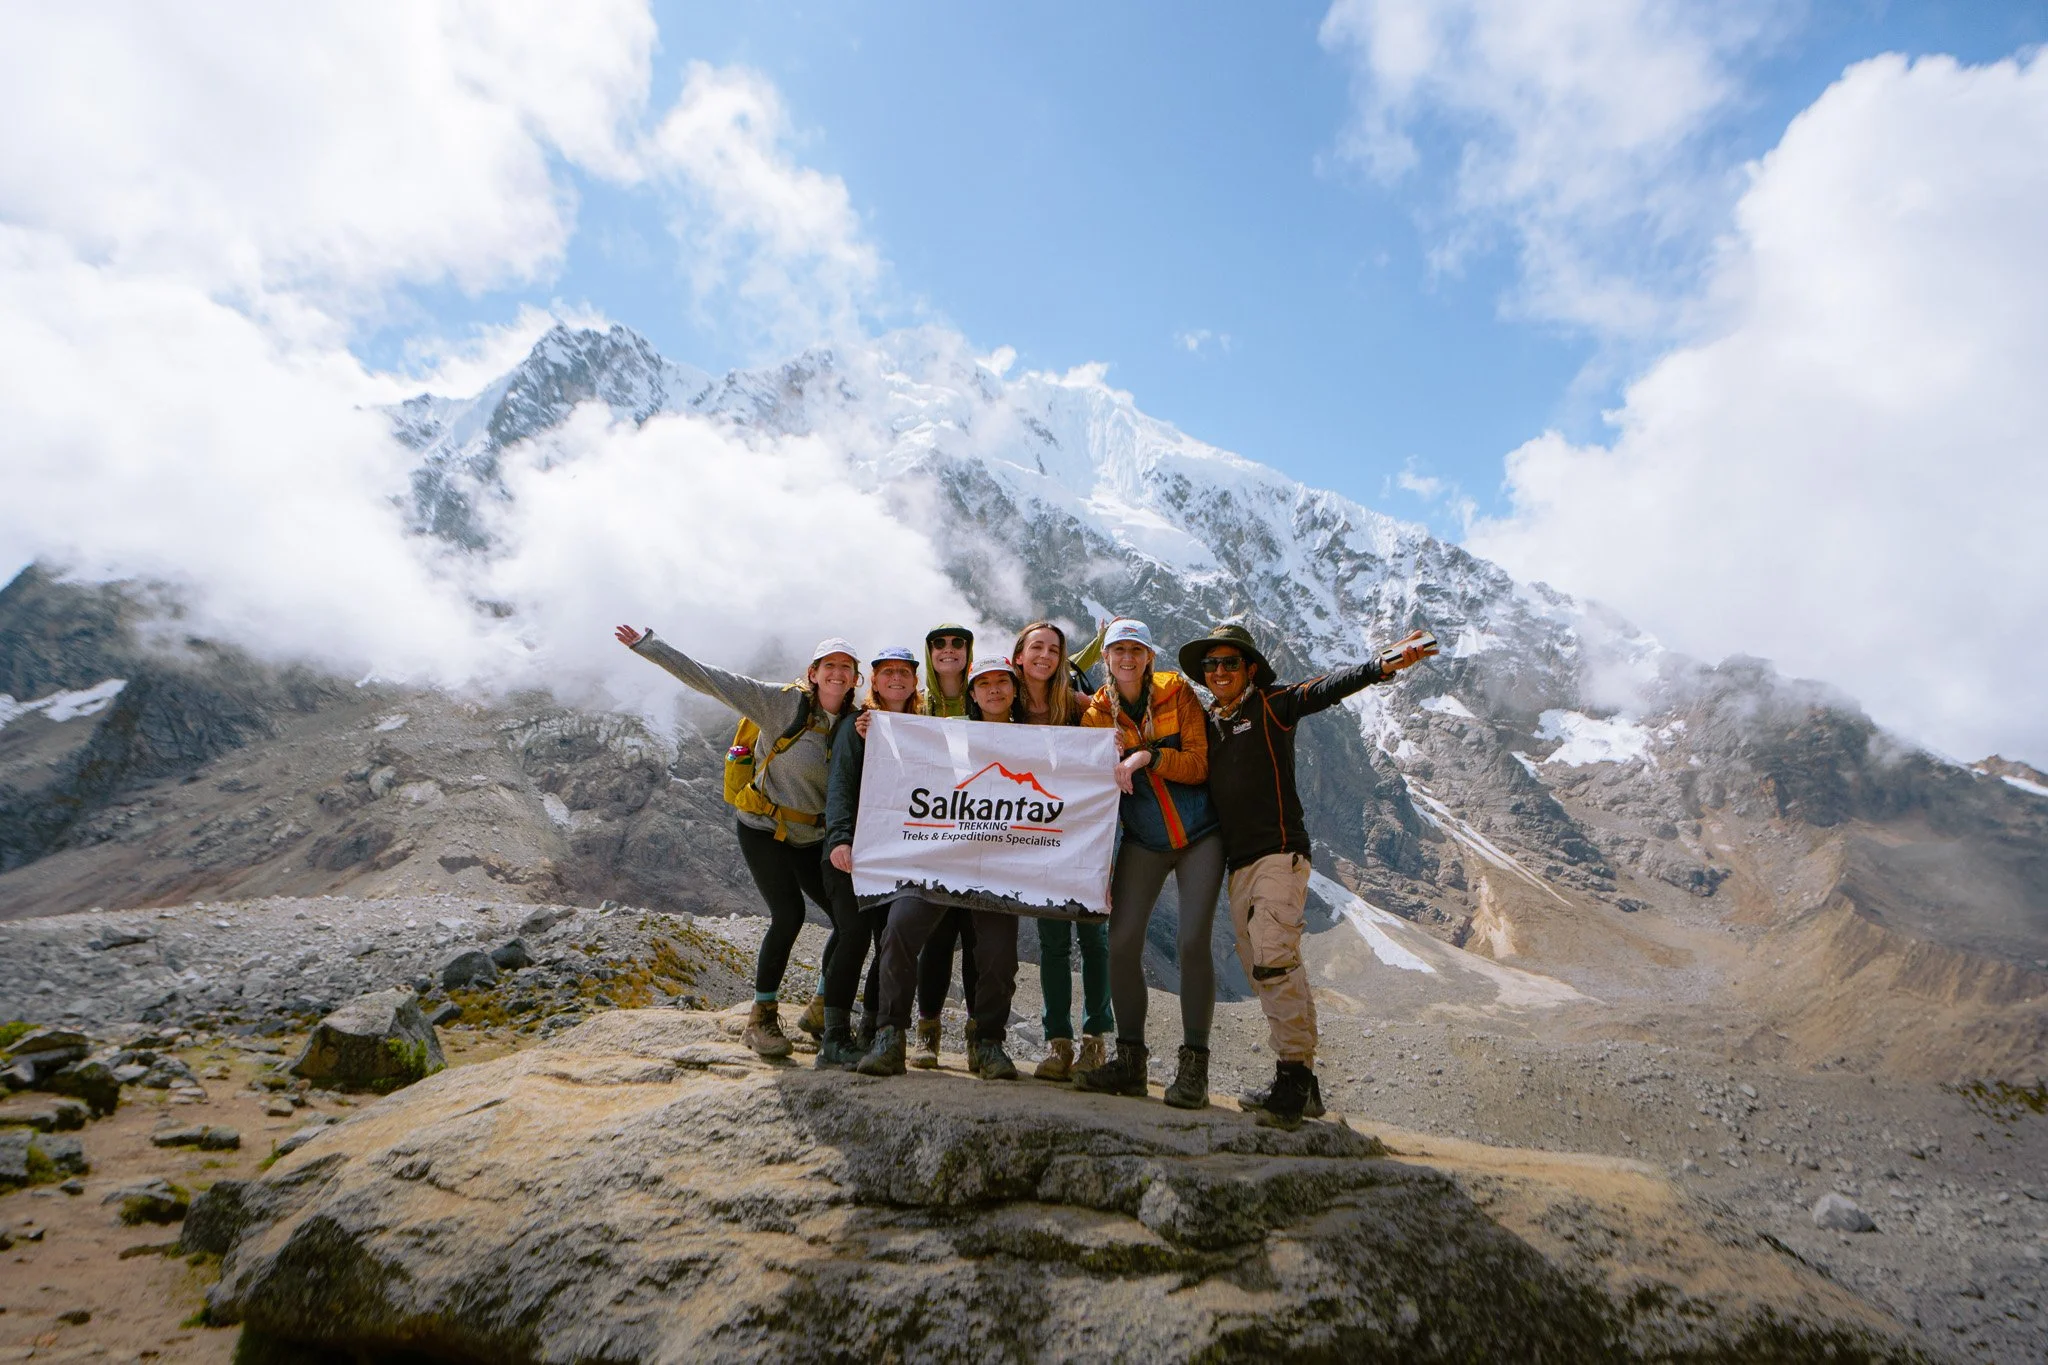
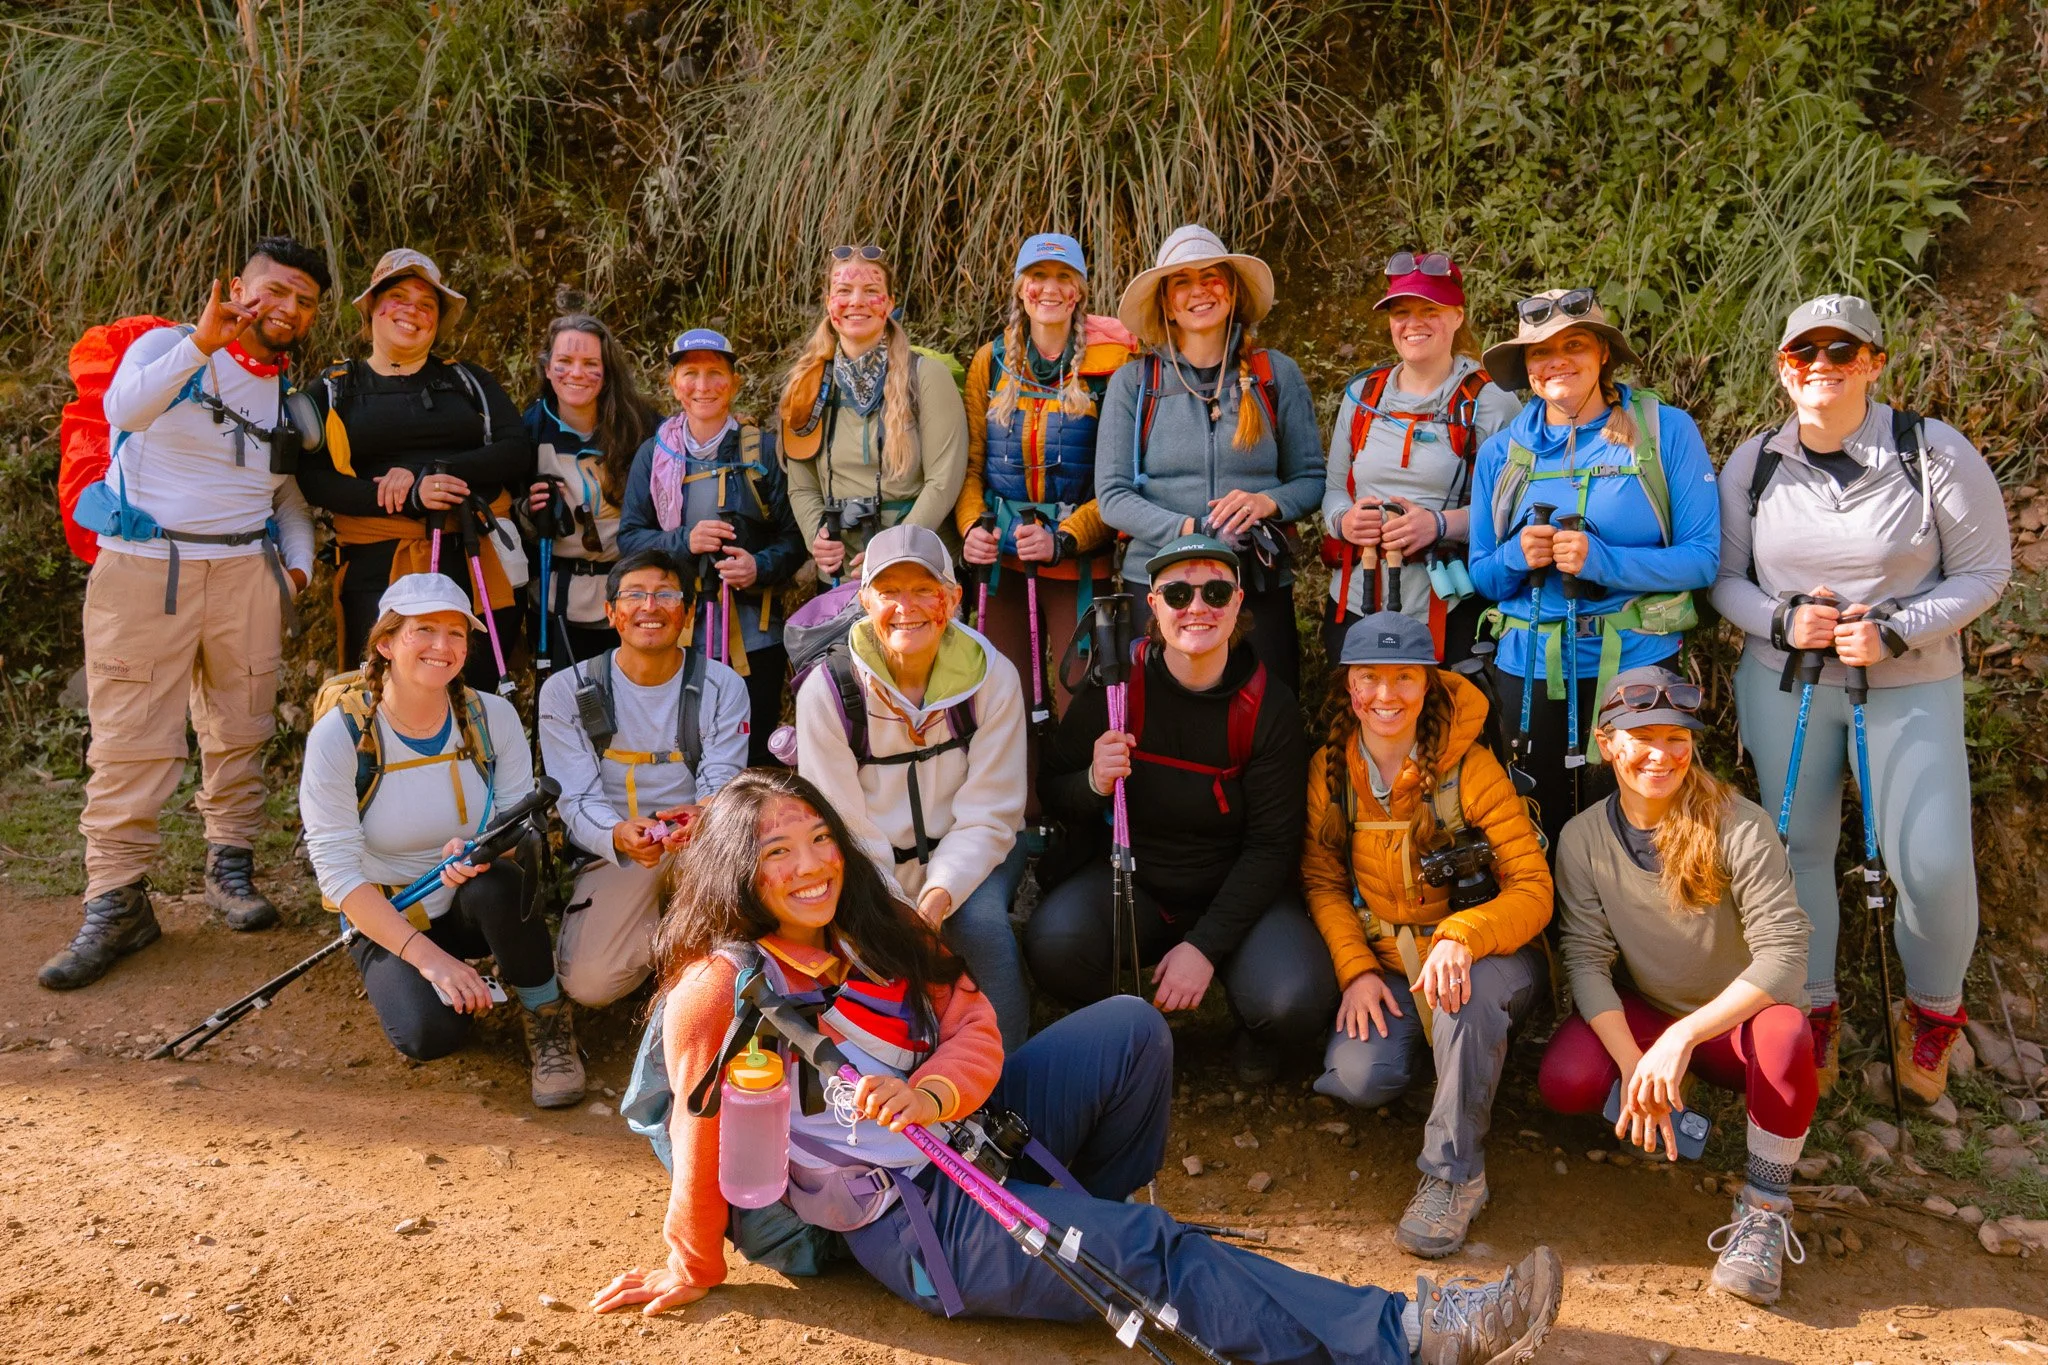
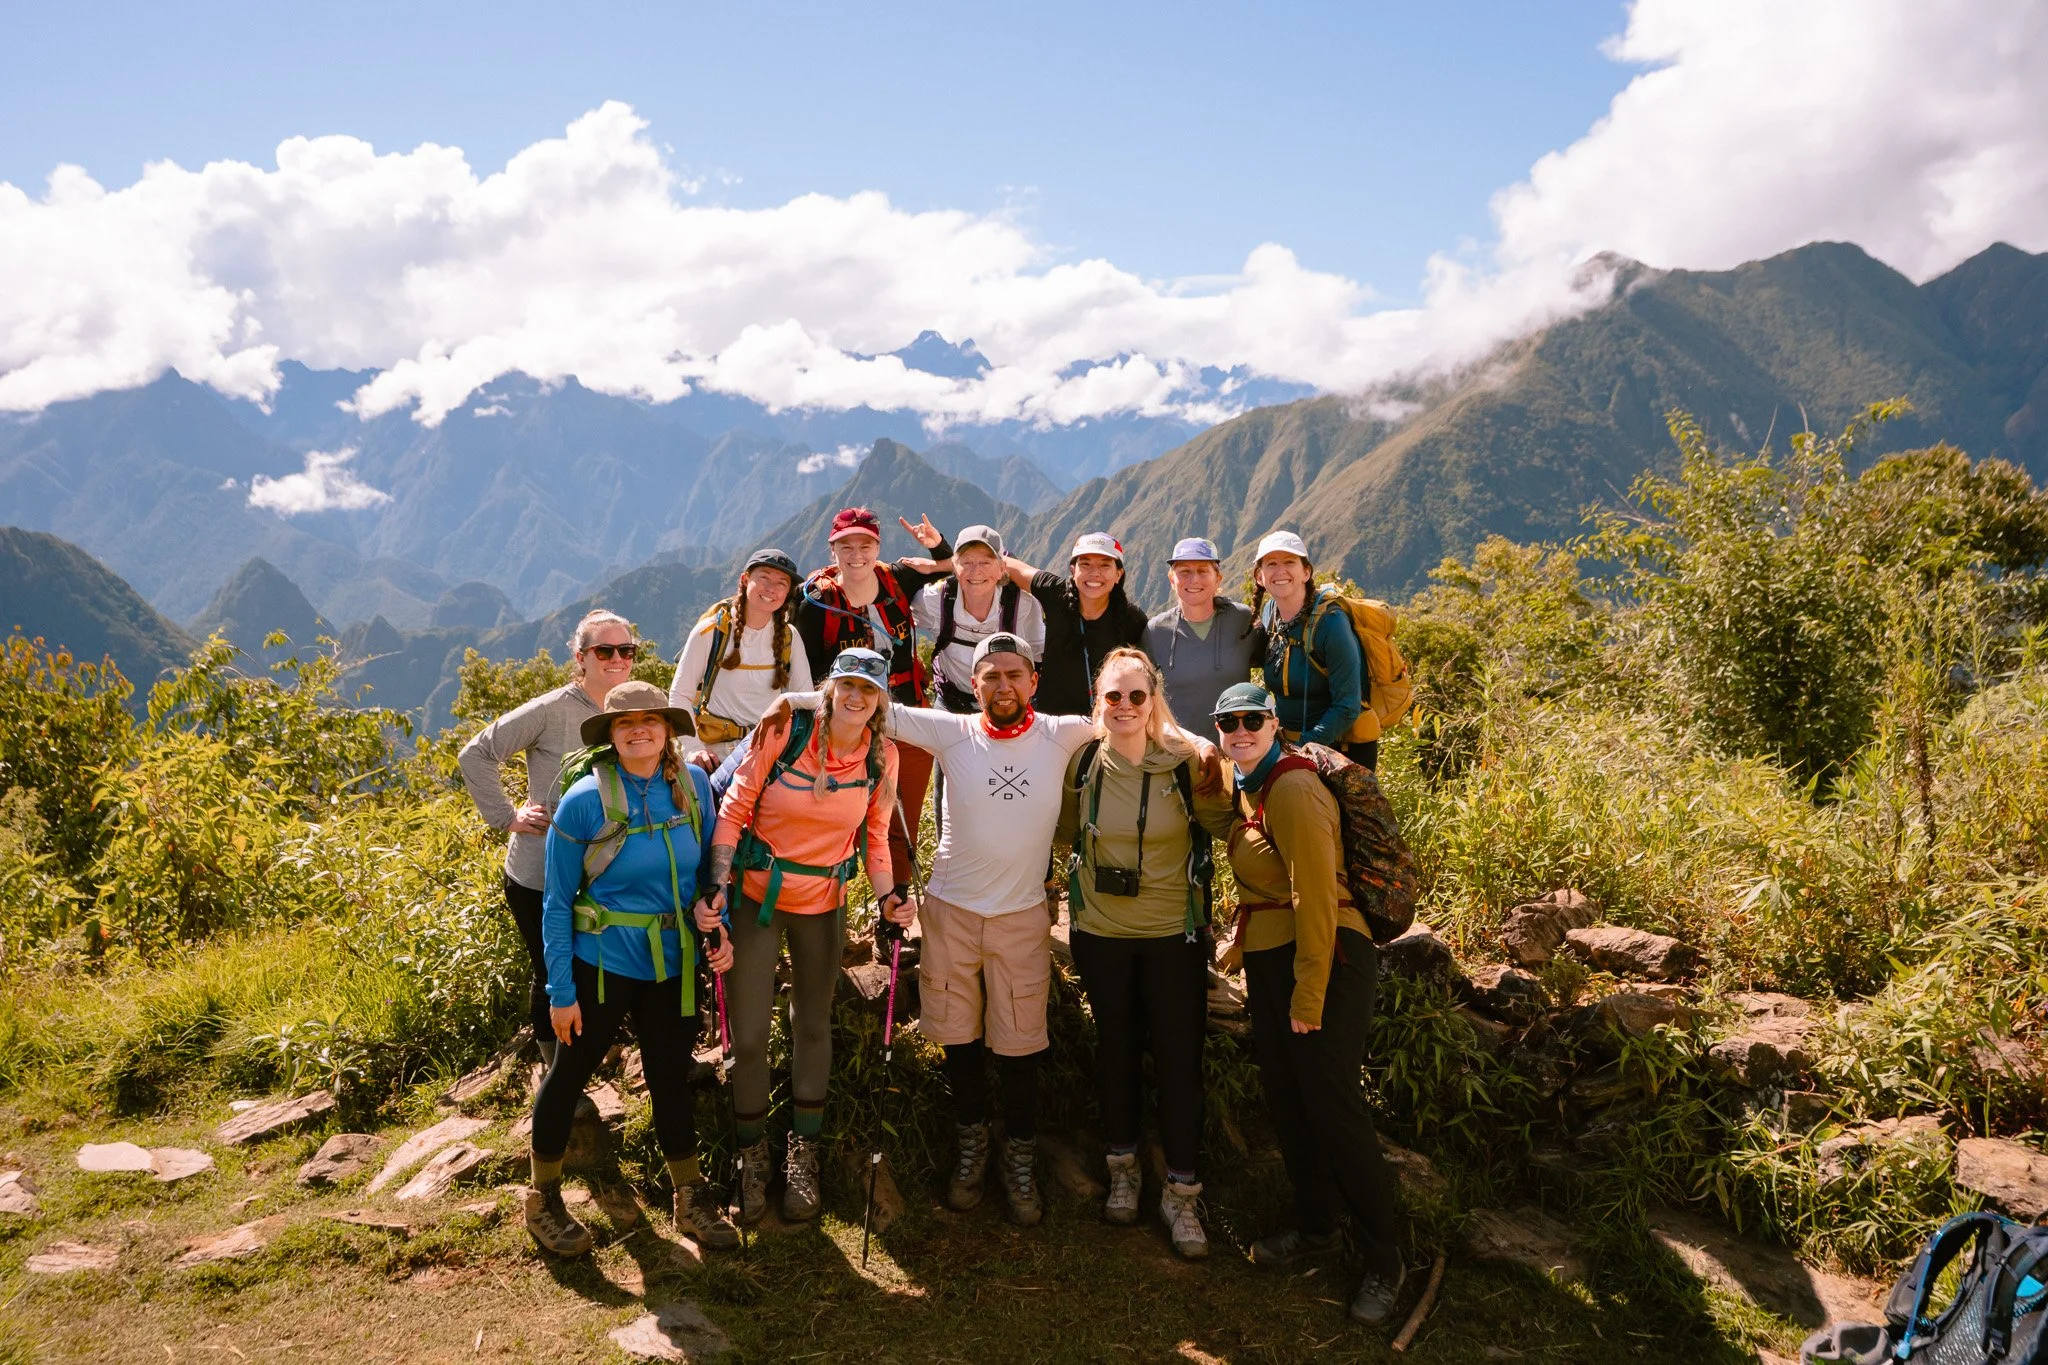
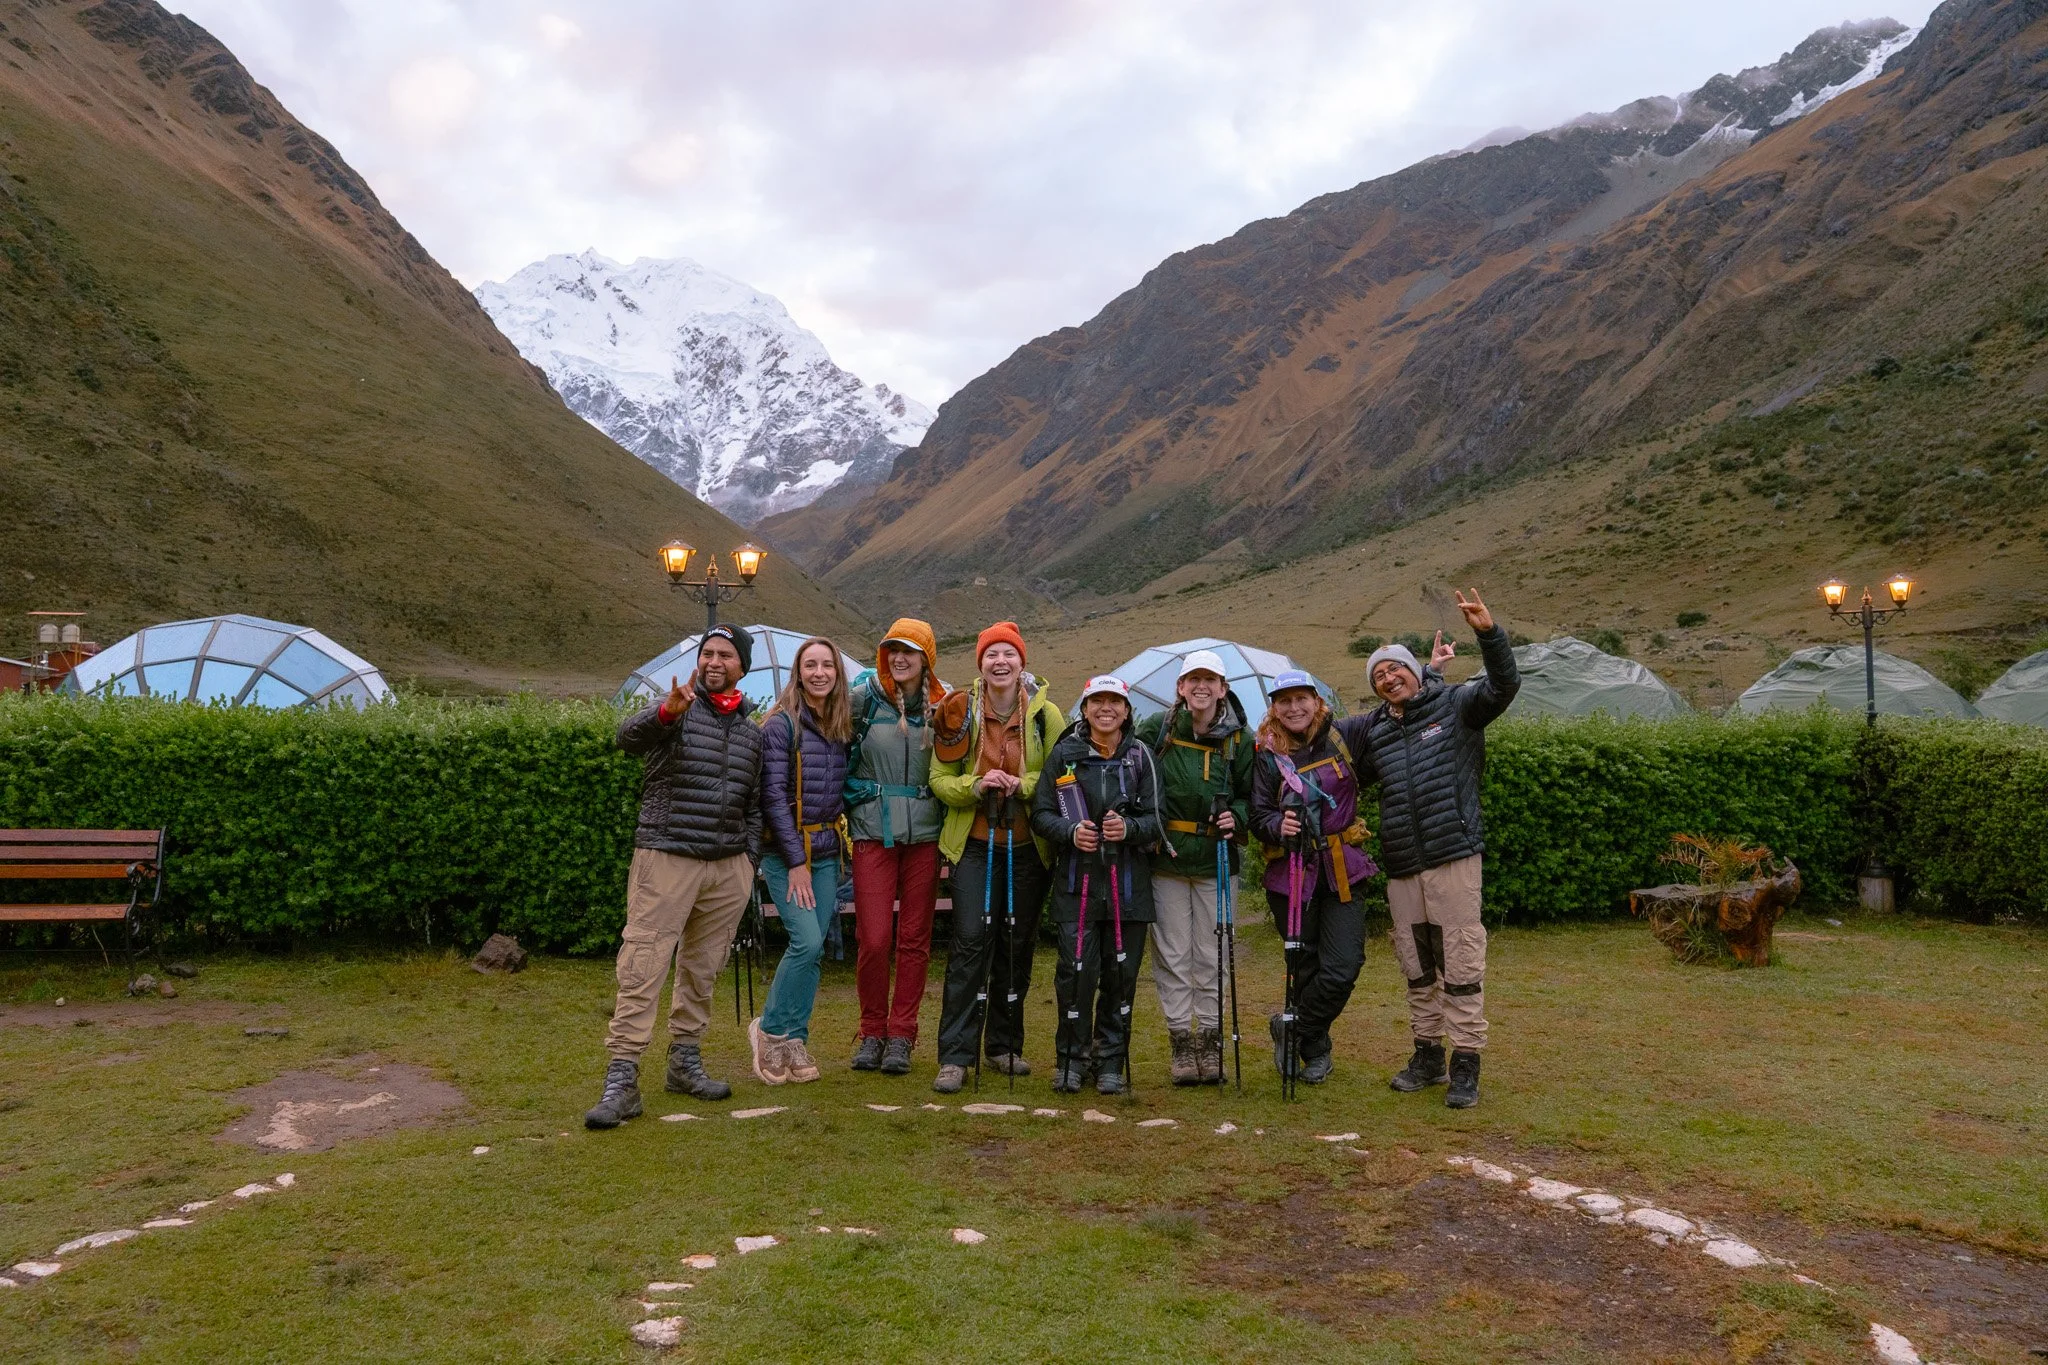
Our whole group and guides, Manuel (left) and Kenneth (right), from Salkantay Trekking on the first day of our trek!
What I came to love about Peru was the way the local culture reveres and respects the mountains. “Salkantay” actually comes from the Quechua word sallqa, which means wild, uncivilized, savage, or invincible…leading people to refer to it as “Savage Mountain.”
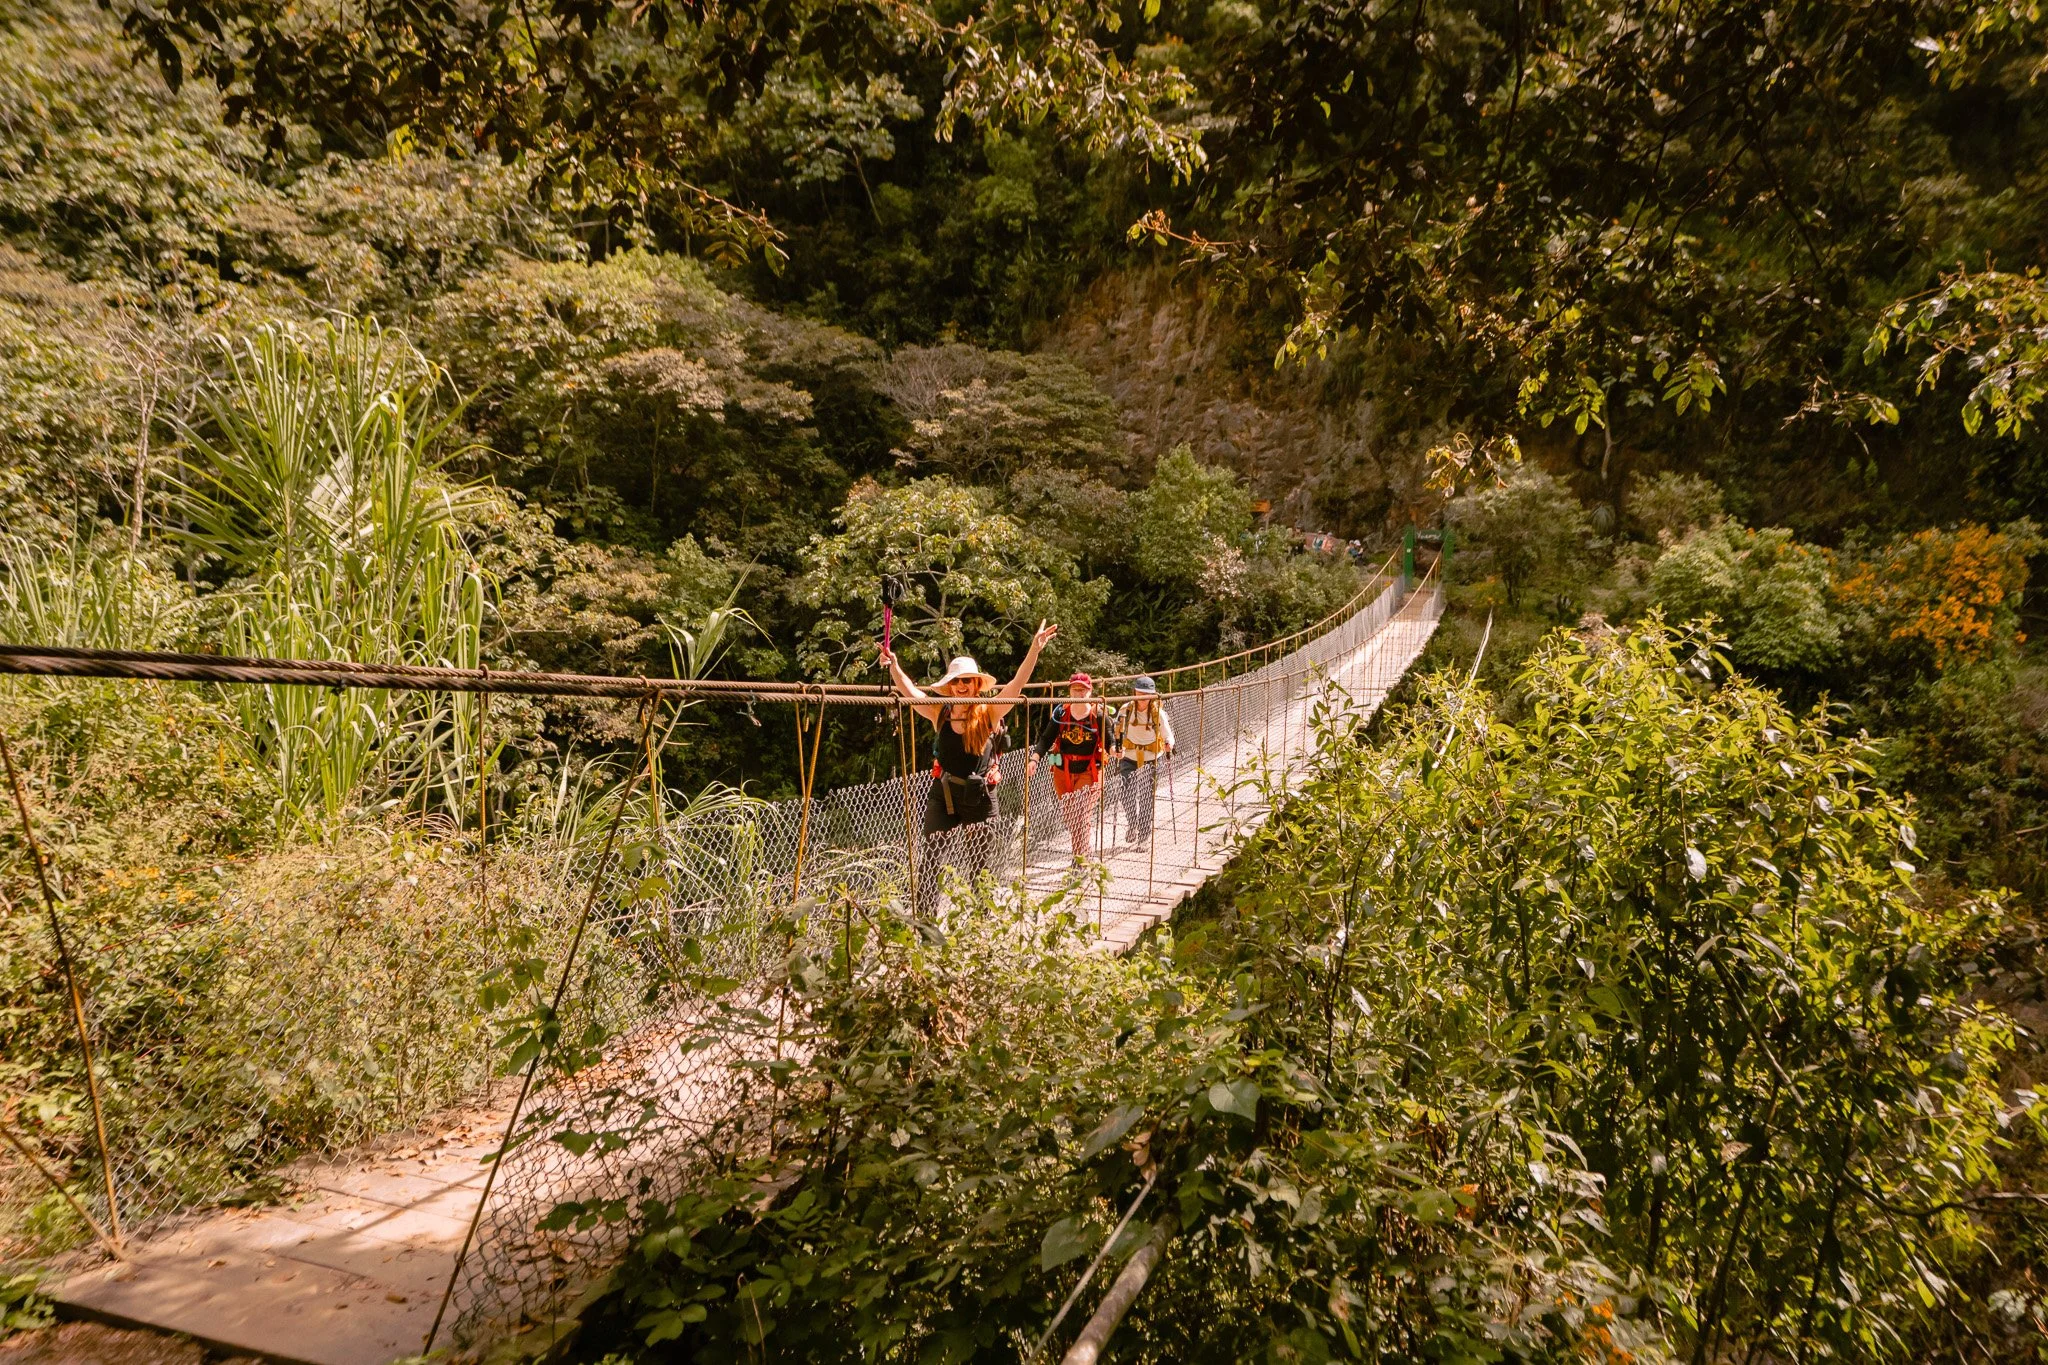
And honestly, it did live up to its name. The Salkantay Trek was one of the most rewarding yet physically challenging multi-day hikes I’ve ever done, mostly due to the altitude, changing environments, rainy weather, and long days. That said, it was a supportive trek, meaning most of our gear was carried by donkeys and we literally had chefs making meals for us every day. There were also multiple “bail out” options, meaning if you didn’t want to hike, you could ride a horse up and over the pass or take a train towards the last stretch into Aguas Calientes.
It was genuinely worth every second and was one of those experiences that reminded me that my body and mind is capable of pretty incredible things!
The Salkantay Trek At-A-Glance
We hiked roughly 46 miles (64 km) over 4 days and 5 nights, with about 7,000 feet of elevation gain. Here’s what the route looks like:
Day 1: Cusco → Soraypampa → Humantay Lake
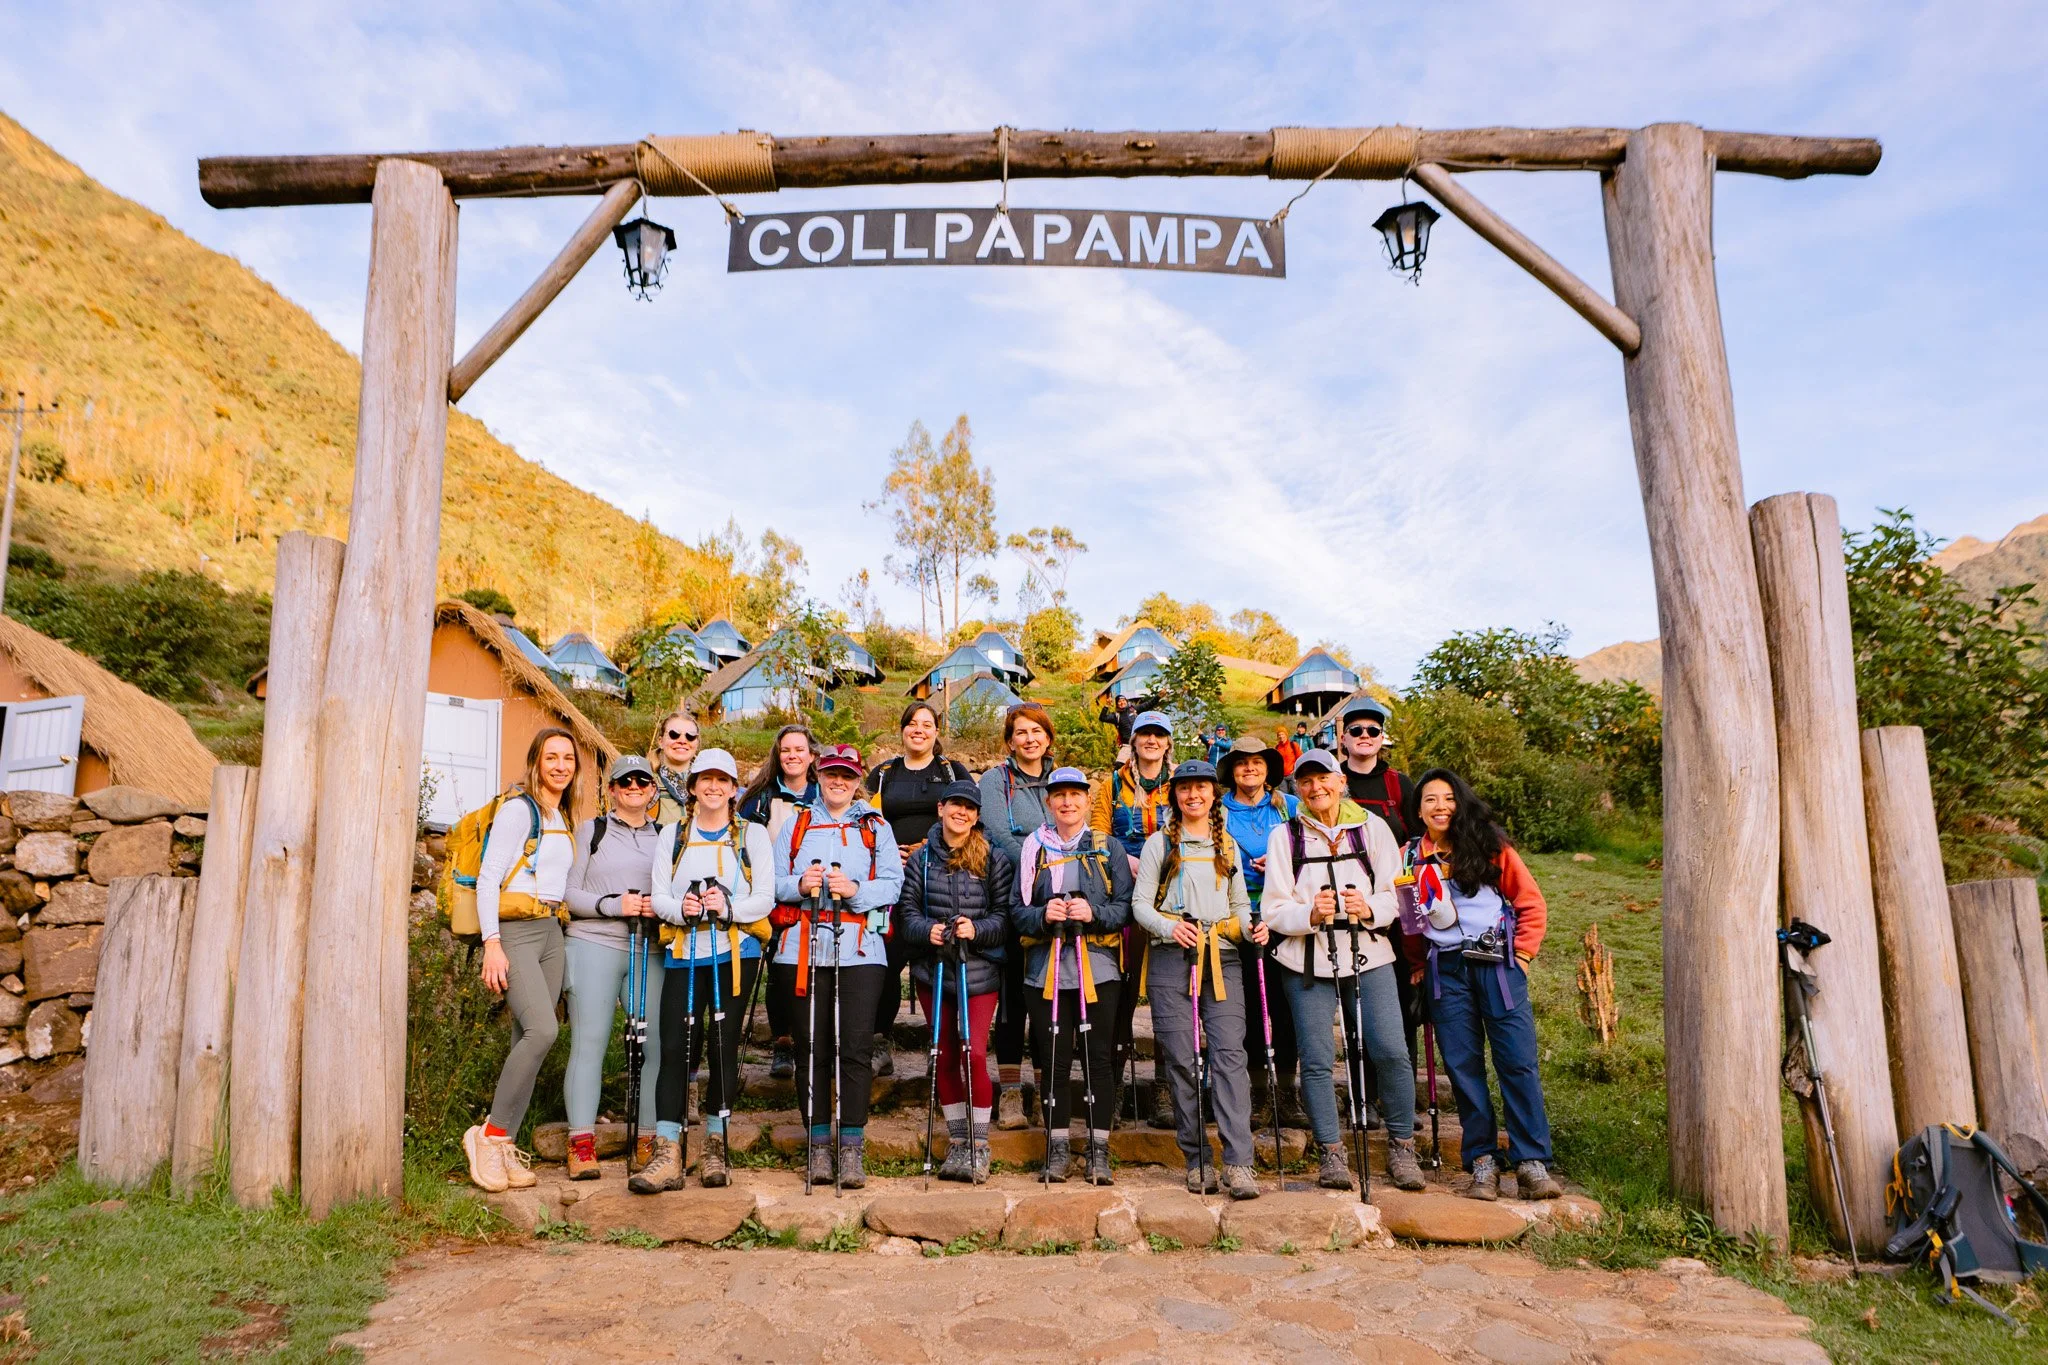
Day 2: Soraypampa → Salkantay Pass → Collpapampa
Day 3: Collpapampa → Lucmabamba
Day 4: Lucmabamba → Llactapata → Aguas Calientes
Day 5: Aguas Calientes → Machu Picchu
What’s Included
For this portion of the trip, we had incredible guides from Salkantay Trekking accompany us and I can’t say enough amazing things about them. Booking with a guiding company like this one comes with some amazing perks and inclusions, such as:
Pre-departure briefing so you know everything to expect on the trek
Entry tickets to Humantay Lake, Salkantay Trek, and Machu Picchu
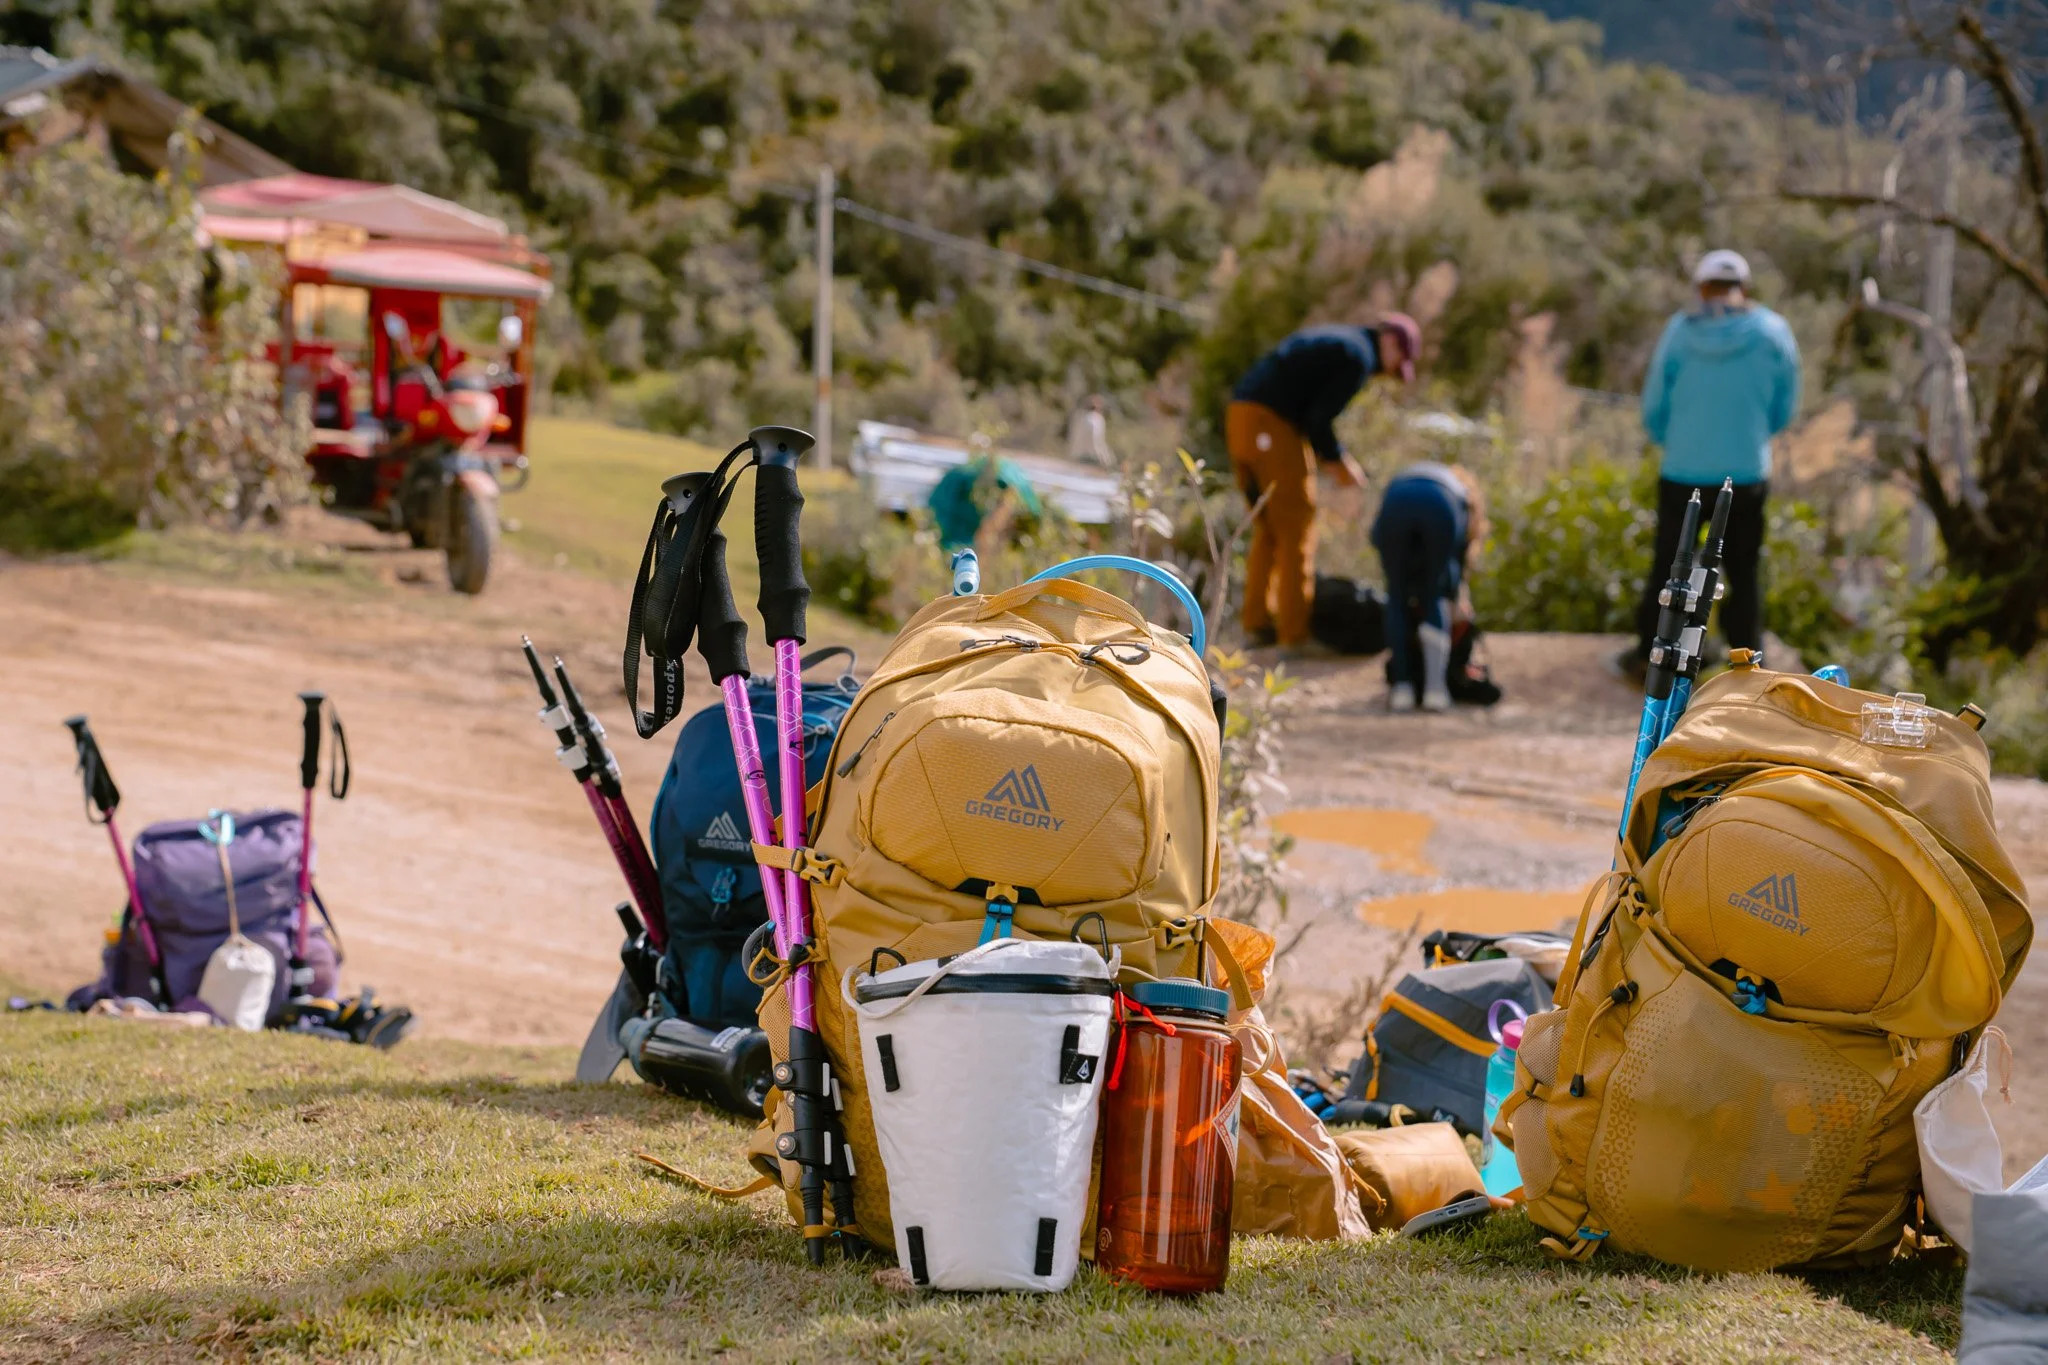
One 40L duffle bag (maximum weight limit of 11 lbs) where you can put all your overnight stuff, extra clothes, etc. that the staff and pack mules carry for you. That means you basically just need to carry a daypack for the whole trek.
Professionally trained guides who speak English and Spanish who are certified in safety and quality service
Accommodation at beautiful campsites
Meals catering to all diets, hot drinks, and snacks…I can personally tell you that the meals exceeded my expectations!
Water on the trail
Transportation door-to-door
Sleeping bag and poles available for rent so you don’t need to fly with them
There were so many moments that felt hard to explain unless you’ve done something similar: waking up with a pounding altitude headache, forcing yourself to keep hydrating, moving slowly and stubbornly uphill, then suddenly looking around and realizing you are standing in a place so beautiful it almost doesn’t seem real.
One of the things that makes this trek so special is how much the landscape changes as you go.
You begin in the high Andes, surrounded by towering mountains and cold alpine terrain. Then as the days go on, the scenery softens and shifts into greener, warmer cloud forest and jungle landscapes.
Here is a full day-by-day breakdown of our trek!
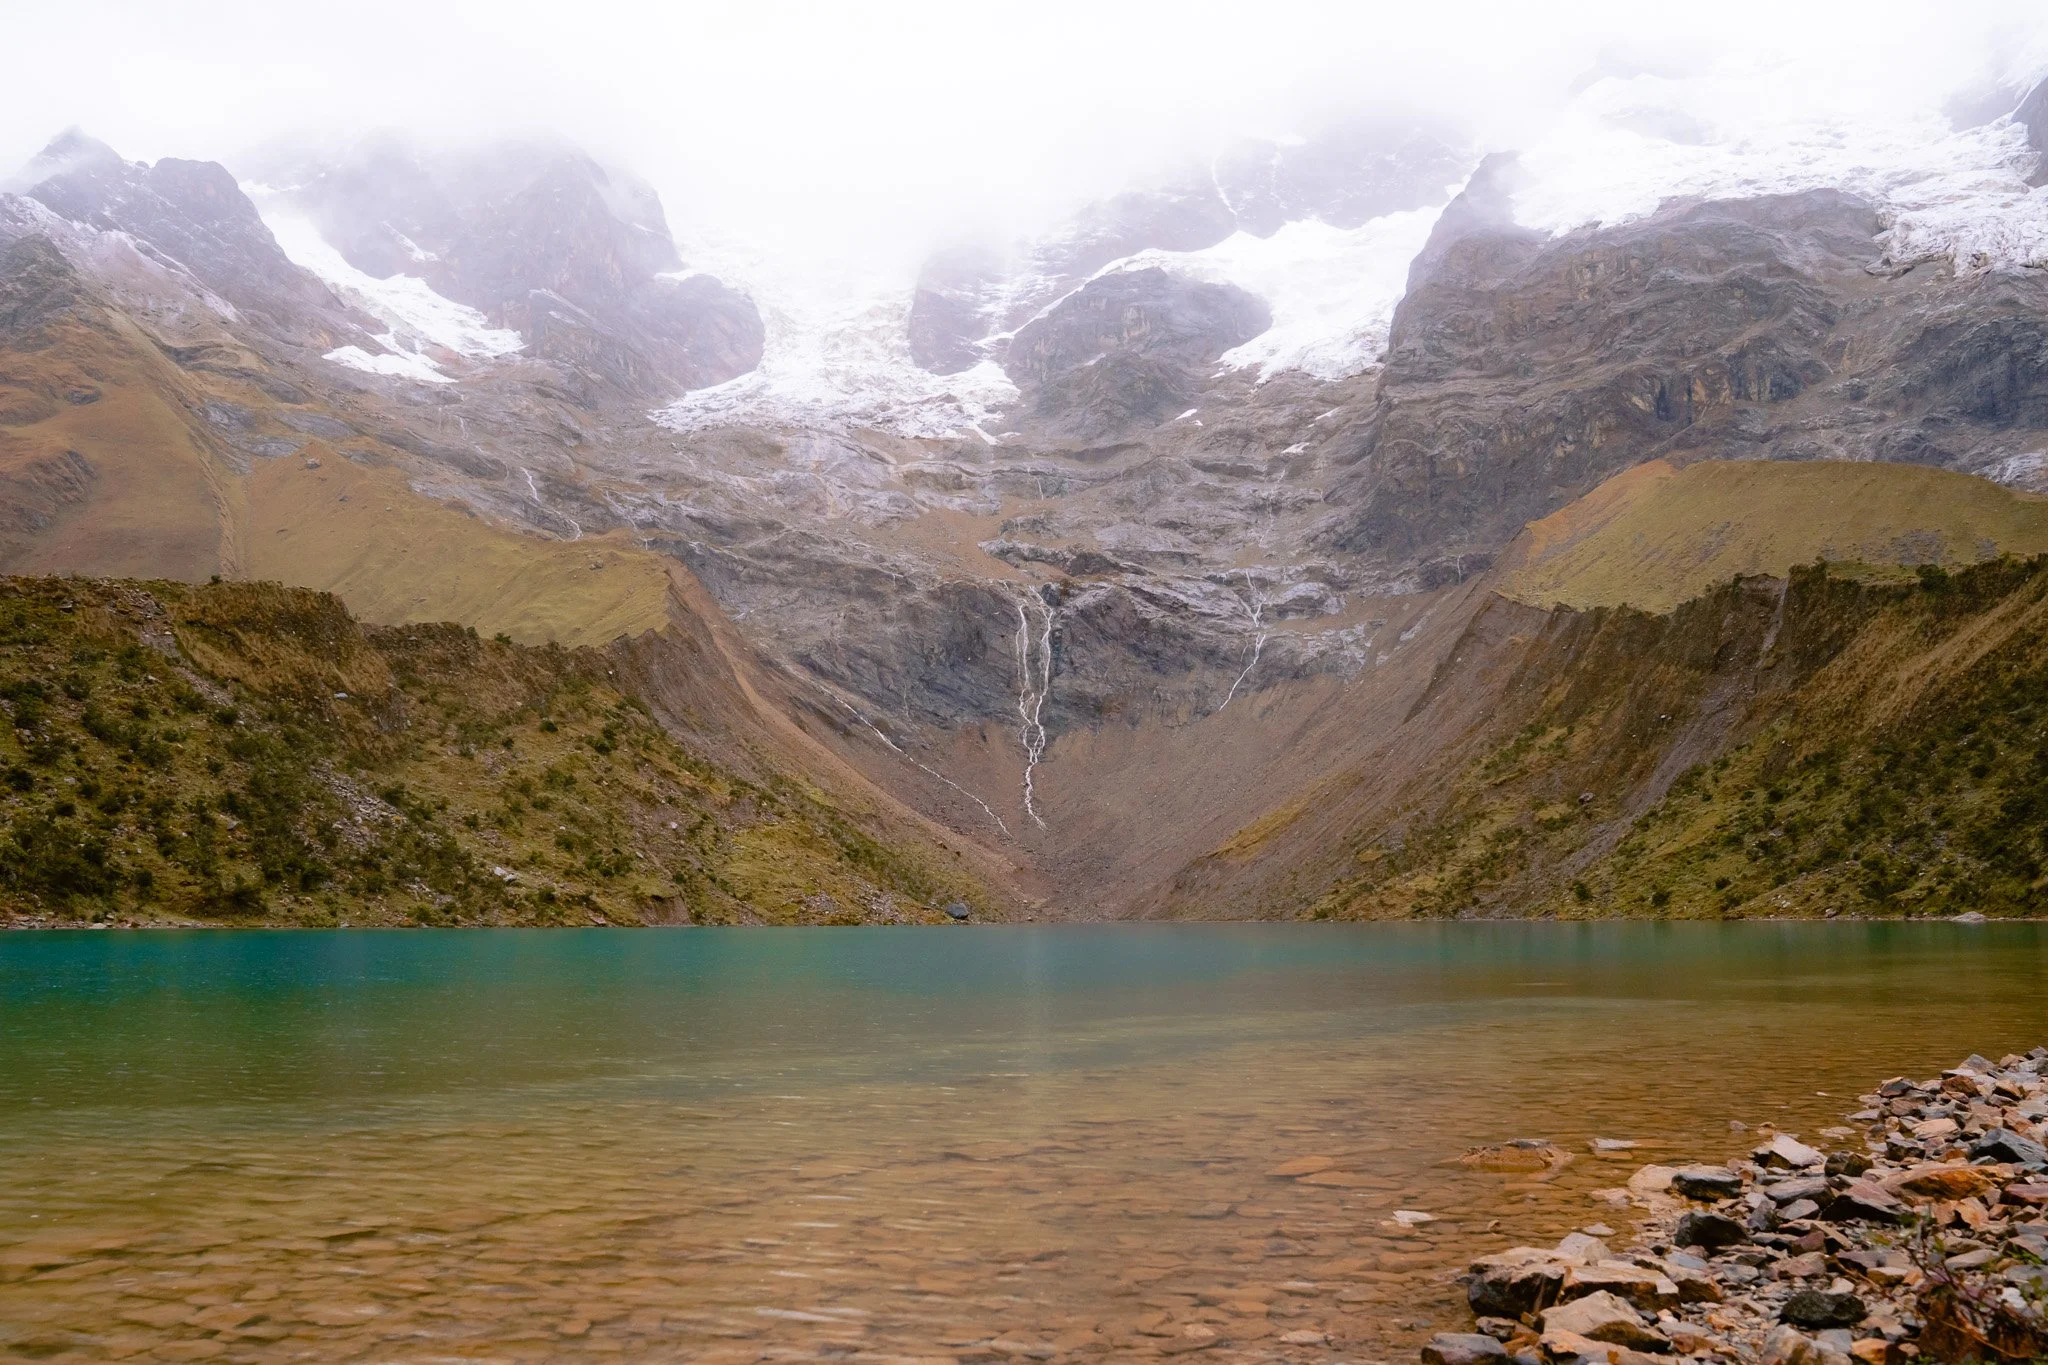
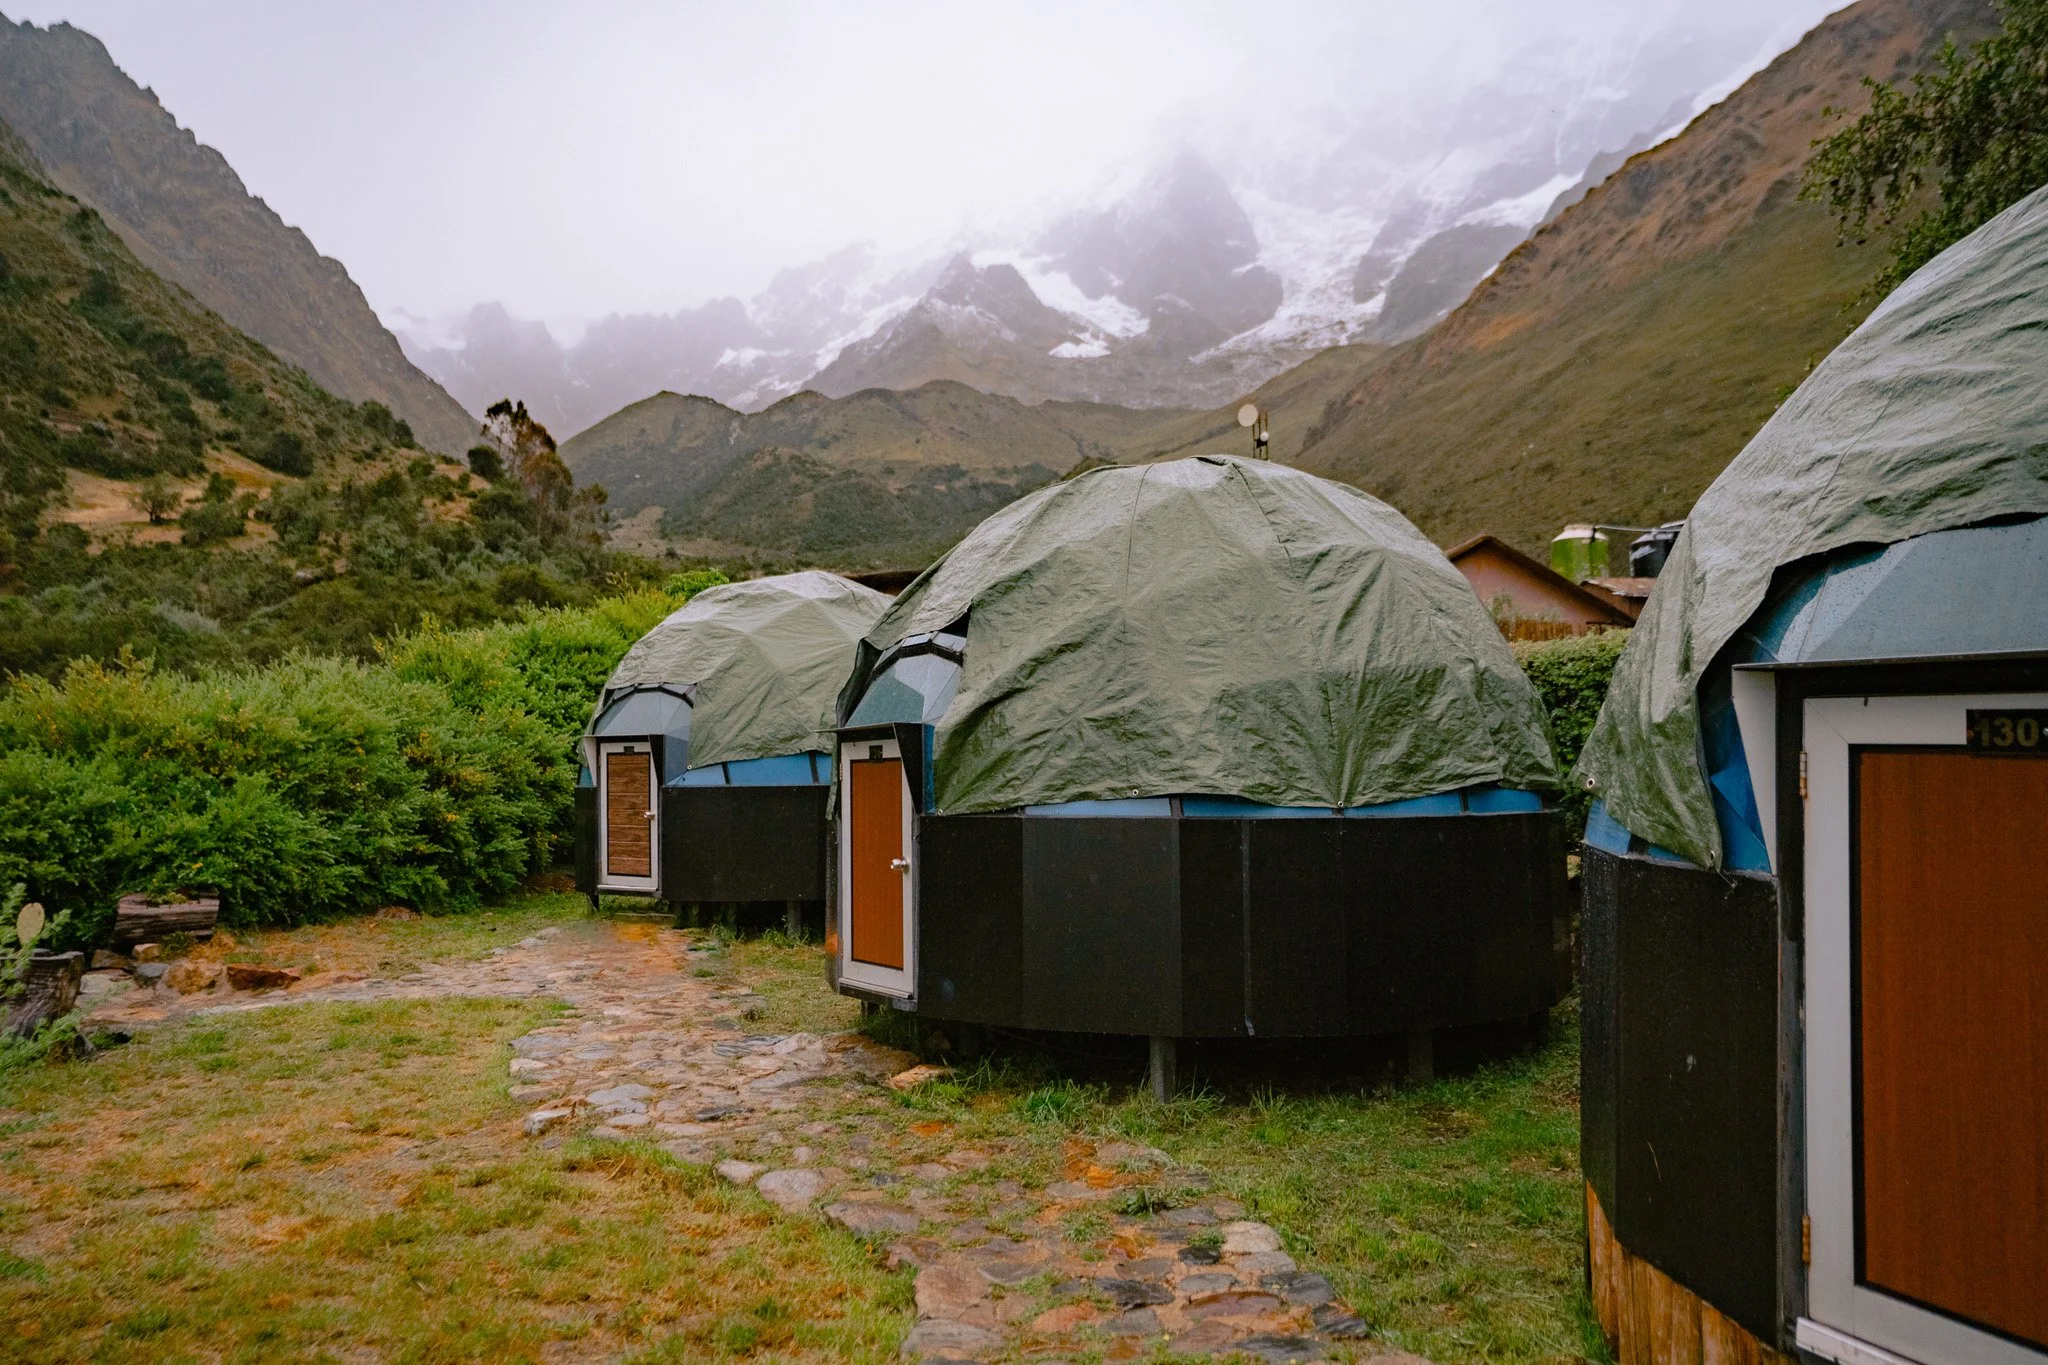
Day 1: Humantay Lake
🏨 Soraypampa – Sky Camp
Distance: 6 miles
Hiking time: 5–6 hours
Highest elevation: 13,780 ft (Humantay Lake)
The adventure began with an early morning drive from Cusco into the Andes (like, 4am early!) We stopped for breakfast in Mollepata, and then rode the bus another couple of hours until we reached the trailhead.
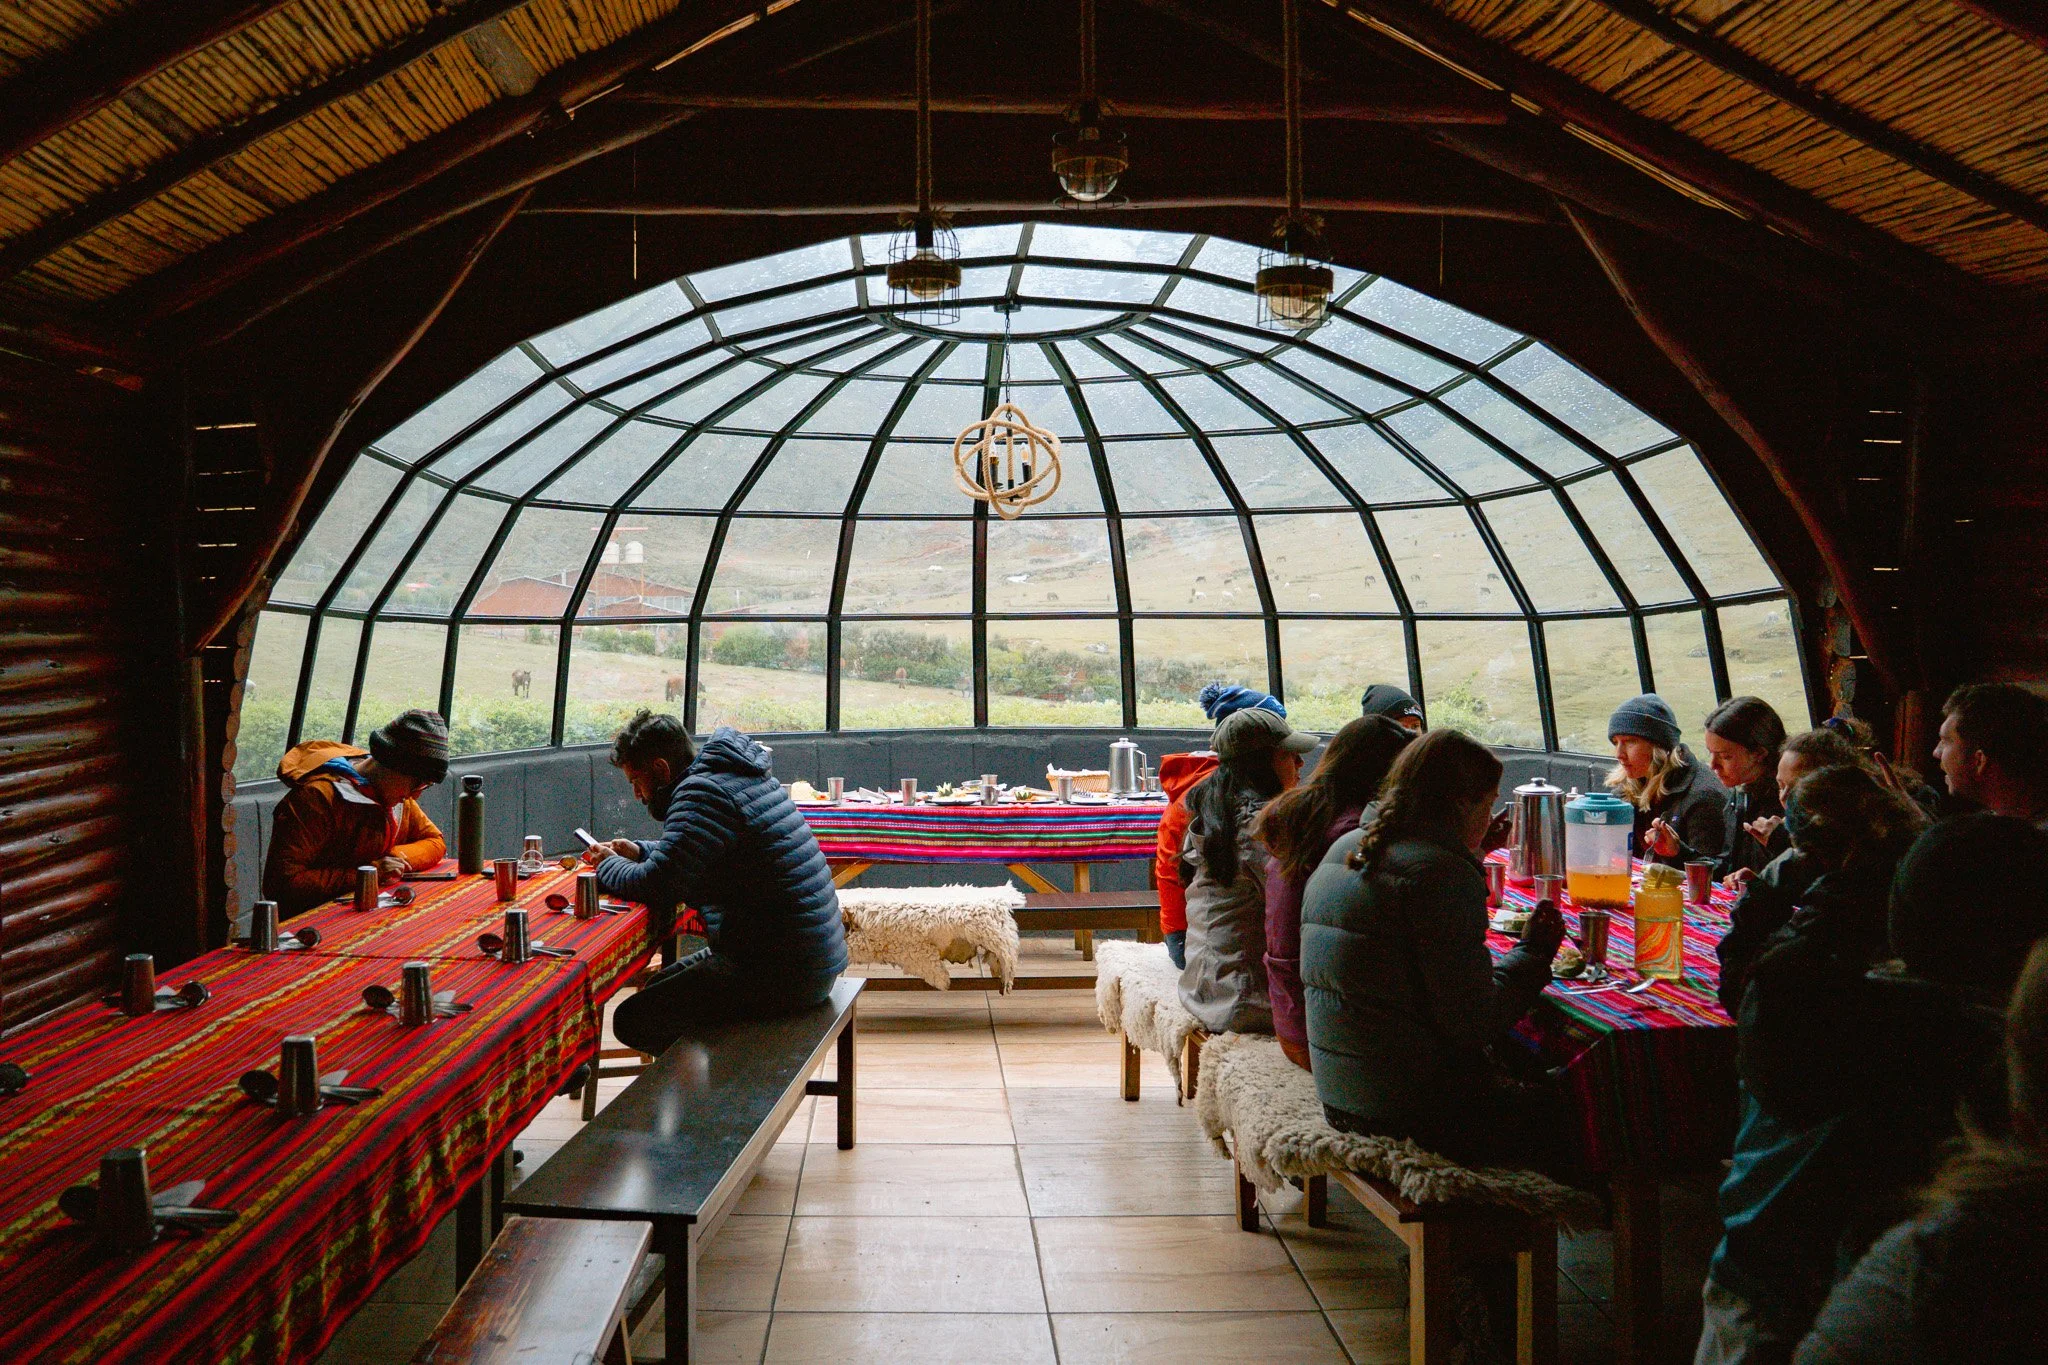
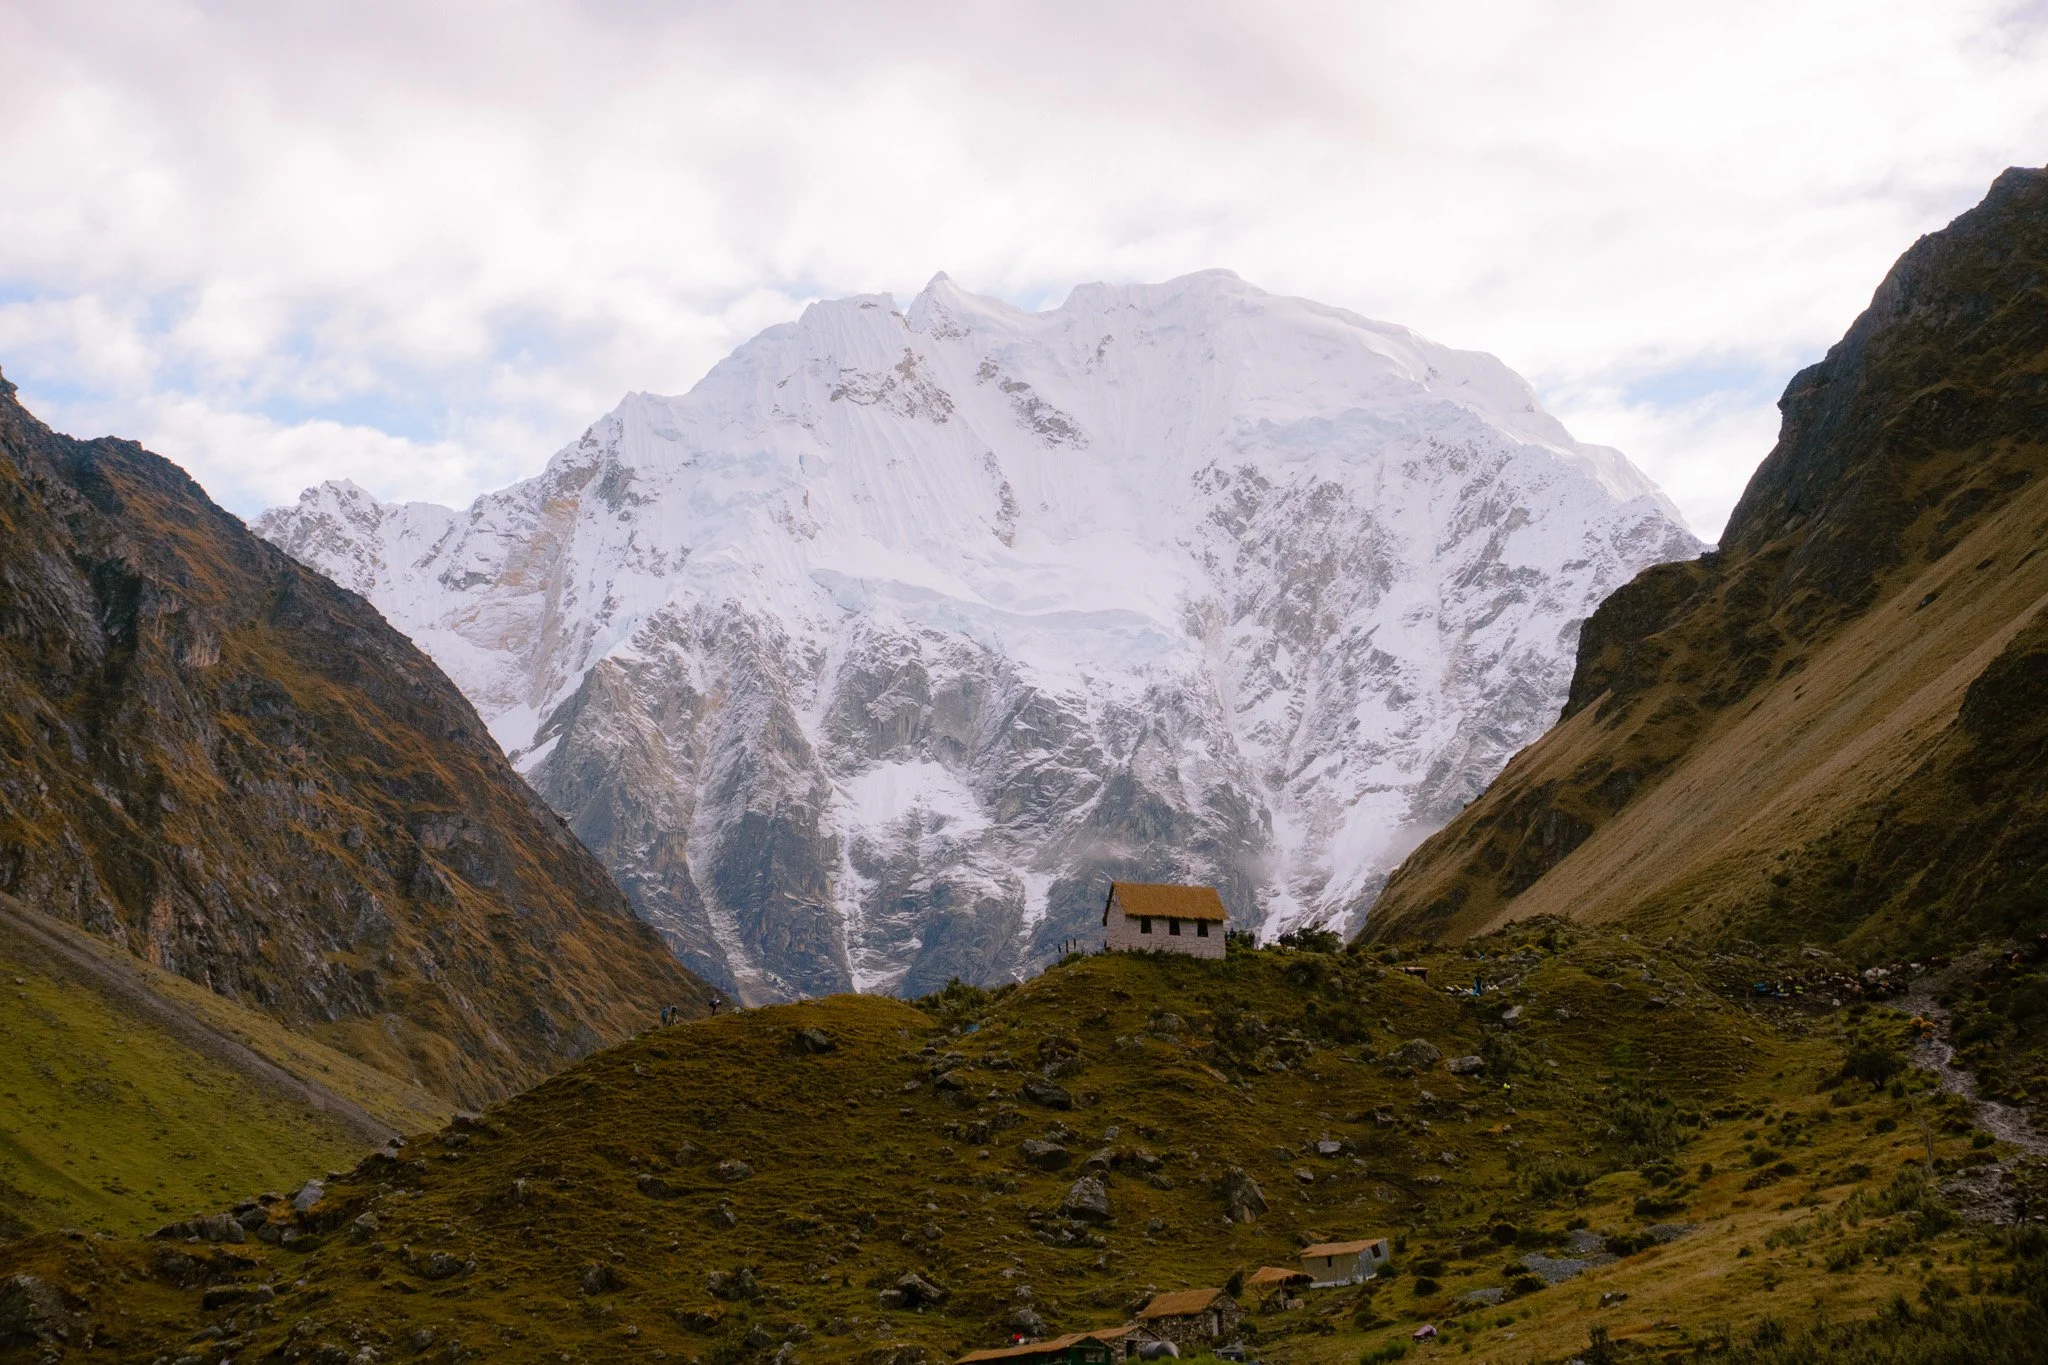
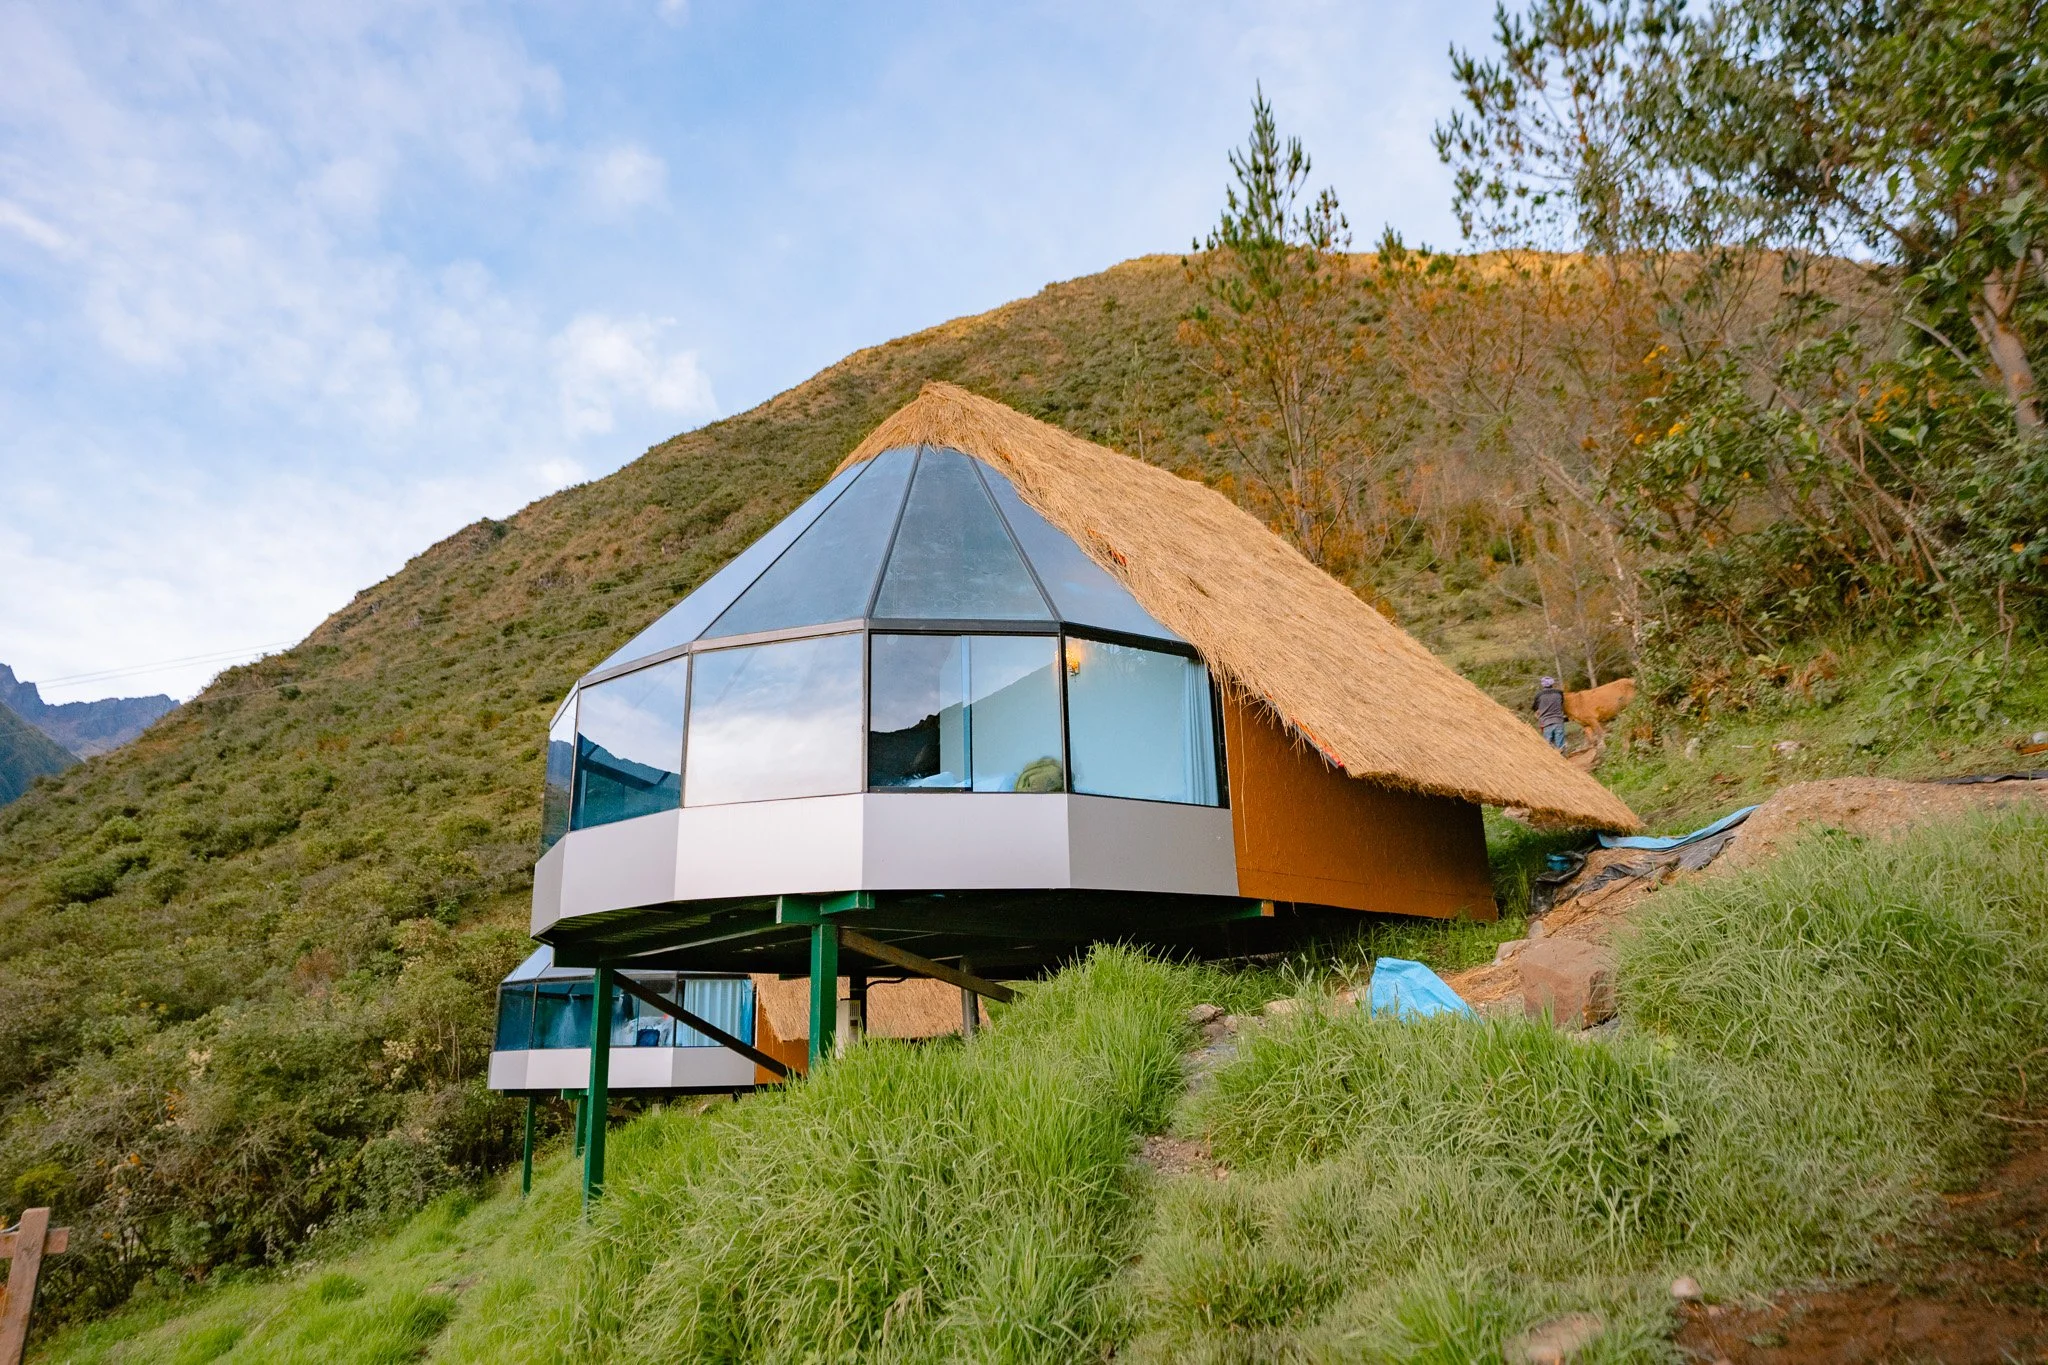
After reaching the trailhead near Challacancha, we had a quick briefing and then began our hike toward Soraypampa, where the first campsite sat beneath towering mountain peaks. The camp setup was a glass-domed accommodation with mountain views all around. It was rainy and cloudy the night we were there, but on a clear night you can apparently get sweeping views of the stars and surrounding peaks. Bathrooms were shared, and there were no showers. It was definitely a bundle-up-in-your-sleeping-bag kind of night.
Once we reached camp, we also had a little tea and lunch, although my appetite was nonexistent due to the altitude. Regardless, it’s really important to eat and drink, so I had some nourishment and then took a brief 10-15 minute nap before our afternoon adventure.
In the afternoon, we had an optional (but highly encouraged) hike up to Humantay Lake, a brilliant turquoise alpine lake sitting beneath Humantay Mountain. The altitude hit me hard here, and I remember pushing myself uphill in the rain with a pounding headache and wondering how my body was going to handle the next day. Humantay Lake sits at 13,780 feet, and once we made it up and took some photos, we were ready to make it back down to a slightly lower altitude. It was incredibly beautiful and quite literally breathtaking.
This was our highest overnight stay at 12,795 feet. It was definitely hard to sleep at that altitude, which was to be expected. I had one of the worst altitude headaches I can remember, woke up at 1am from a headache, and was doing everything I could think of — electrolytes, coca/muña tea, painkillers, rest — because I knew that the next day, we would go even higher.
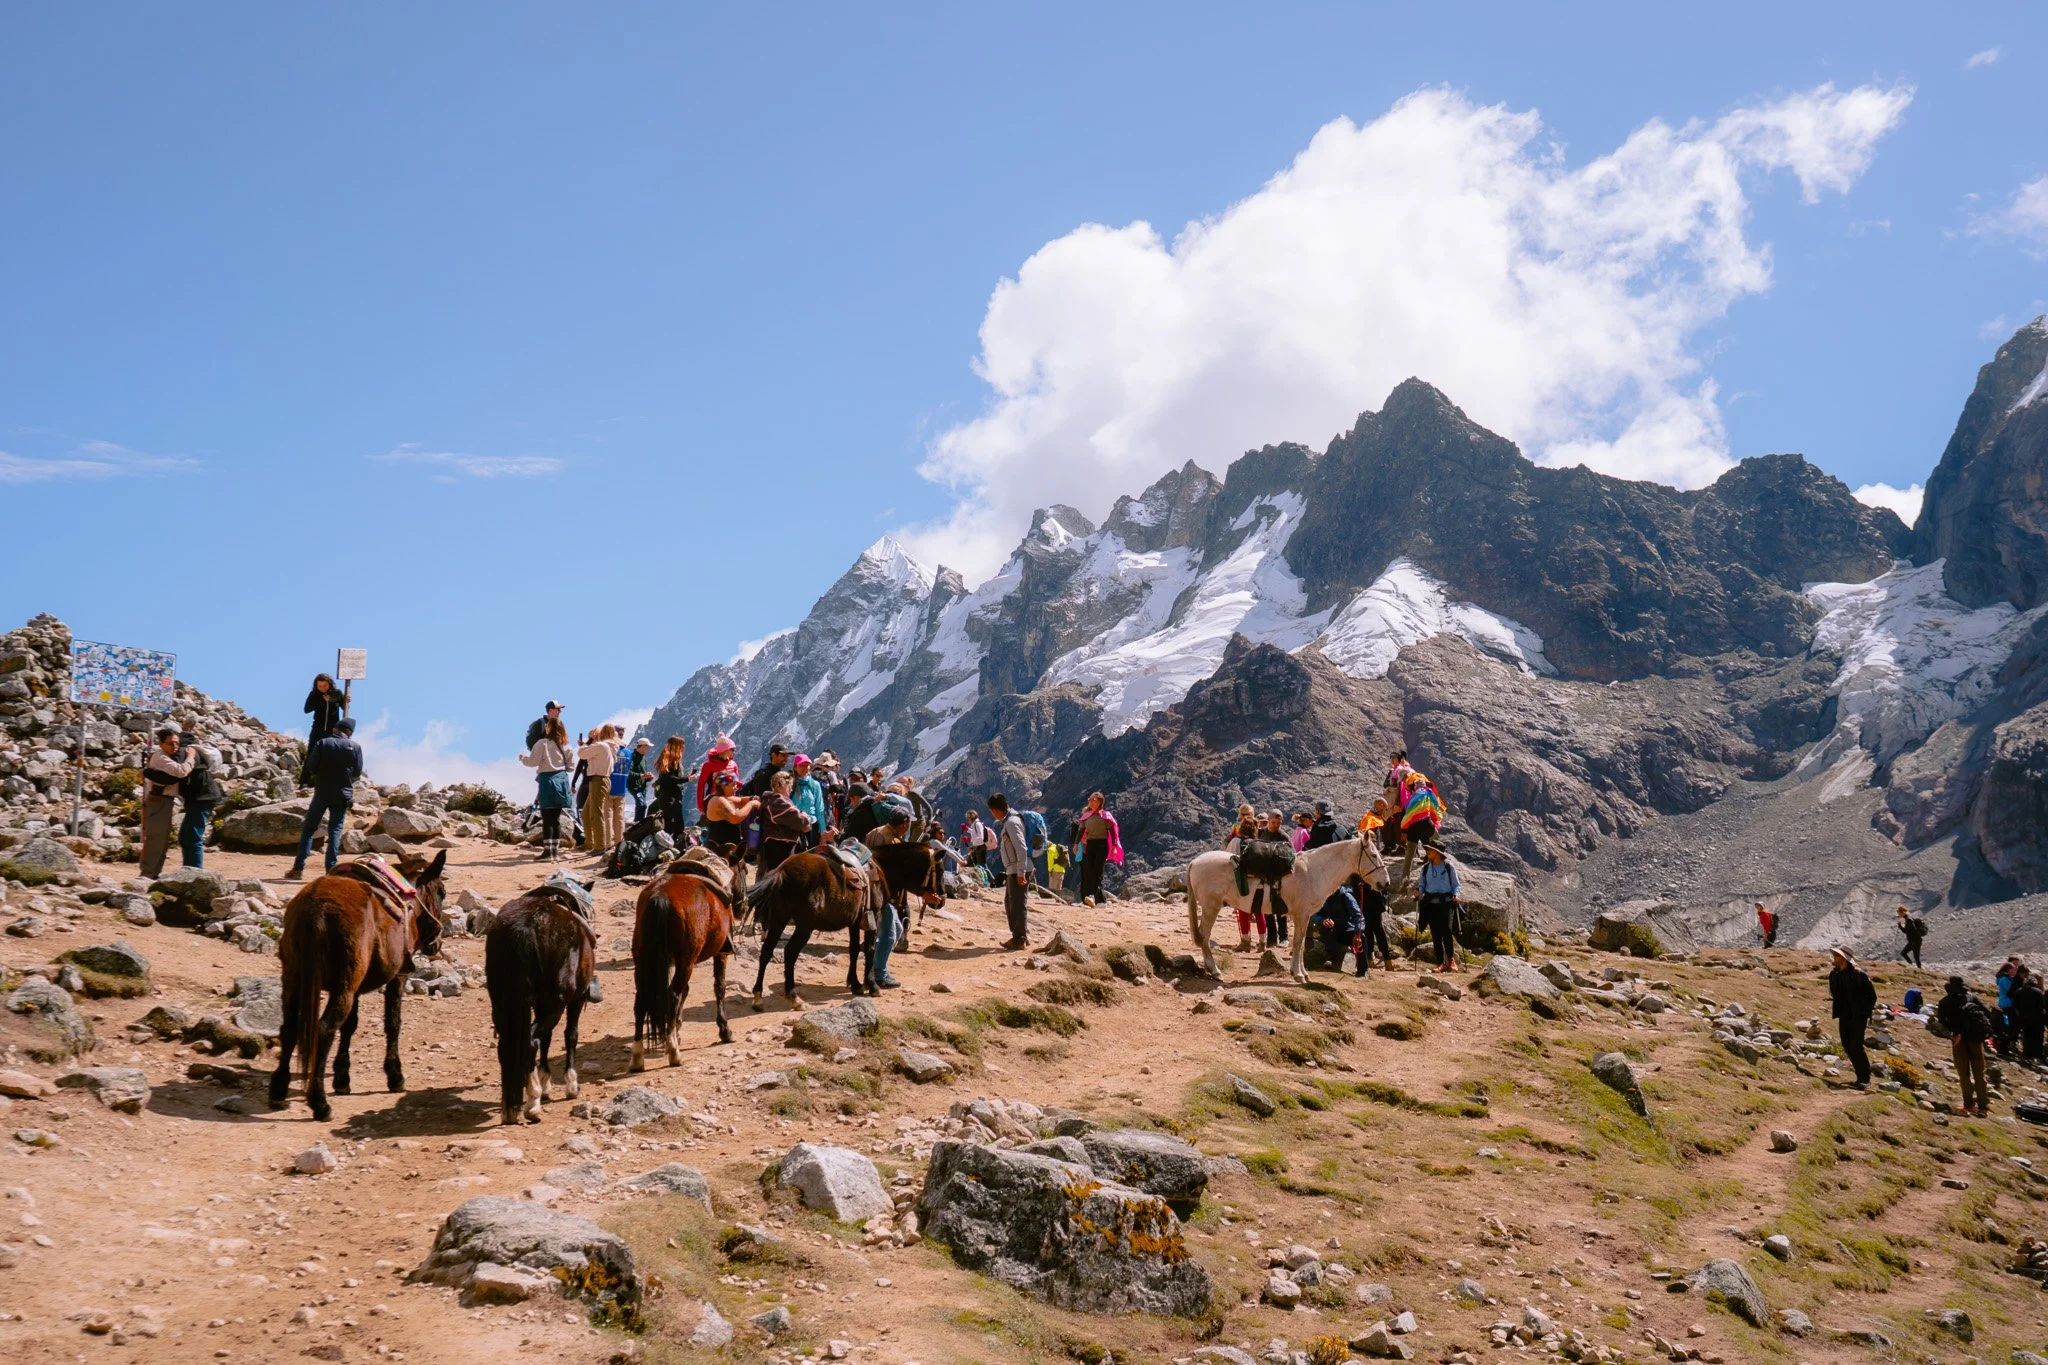
Day 2: Salkantay Pass
🏨 Collpapampa – Mountain Sky View
Distance: 14 miles
Hiking time: 10–11 hours
Highest elevation: 15,090 ft (Salkantay Pass)

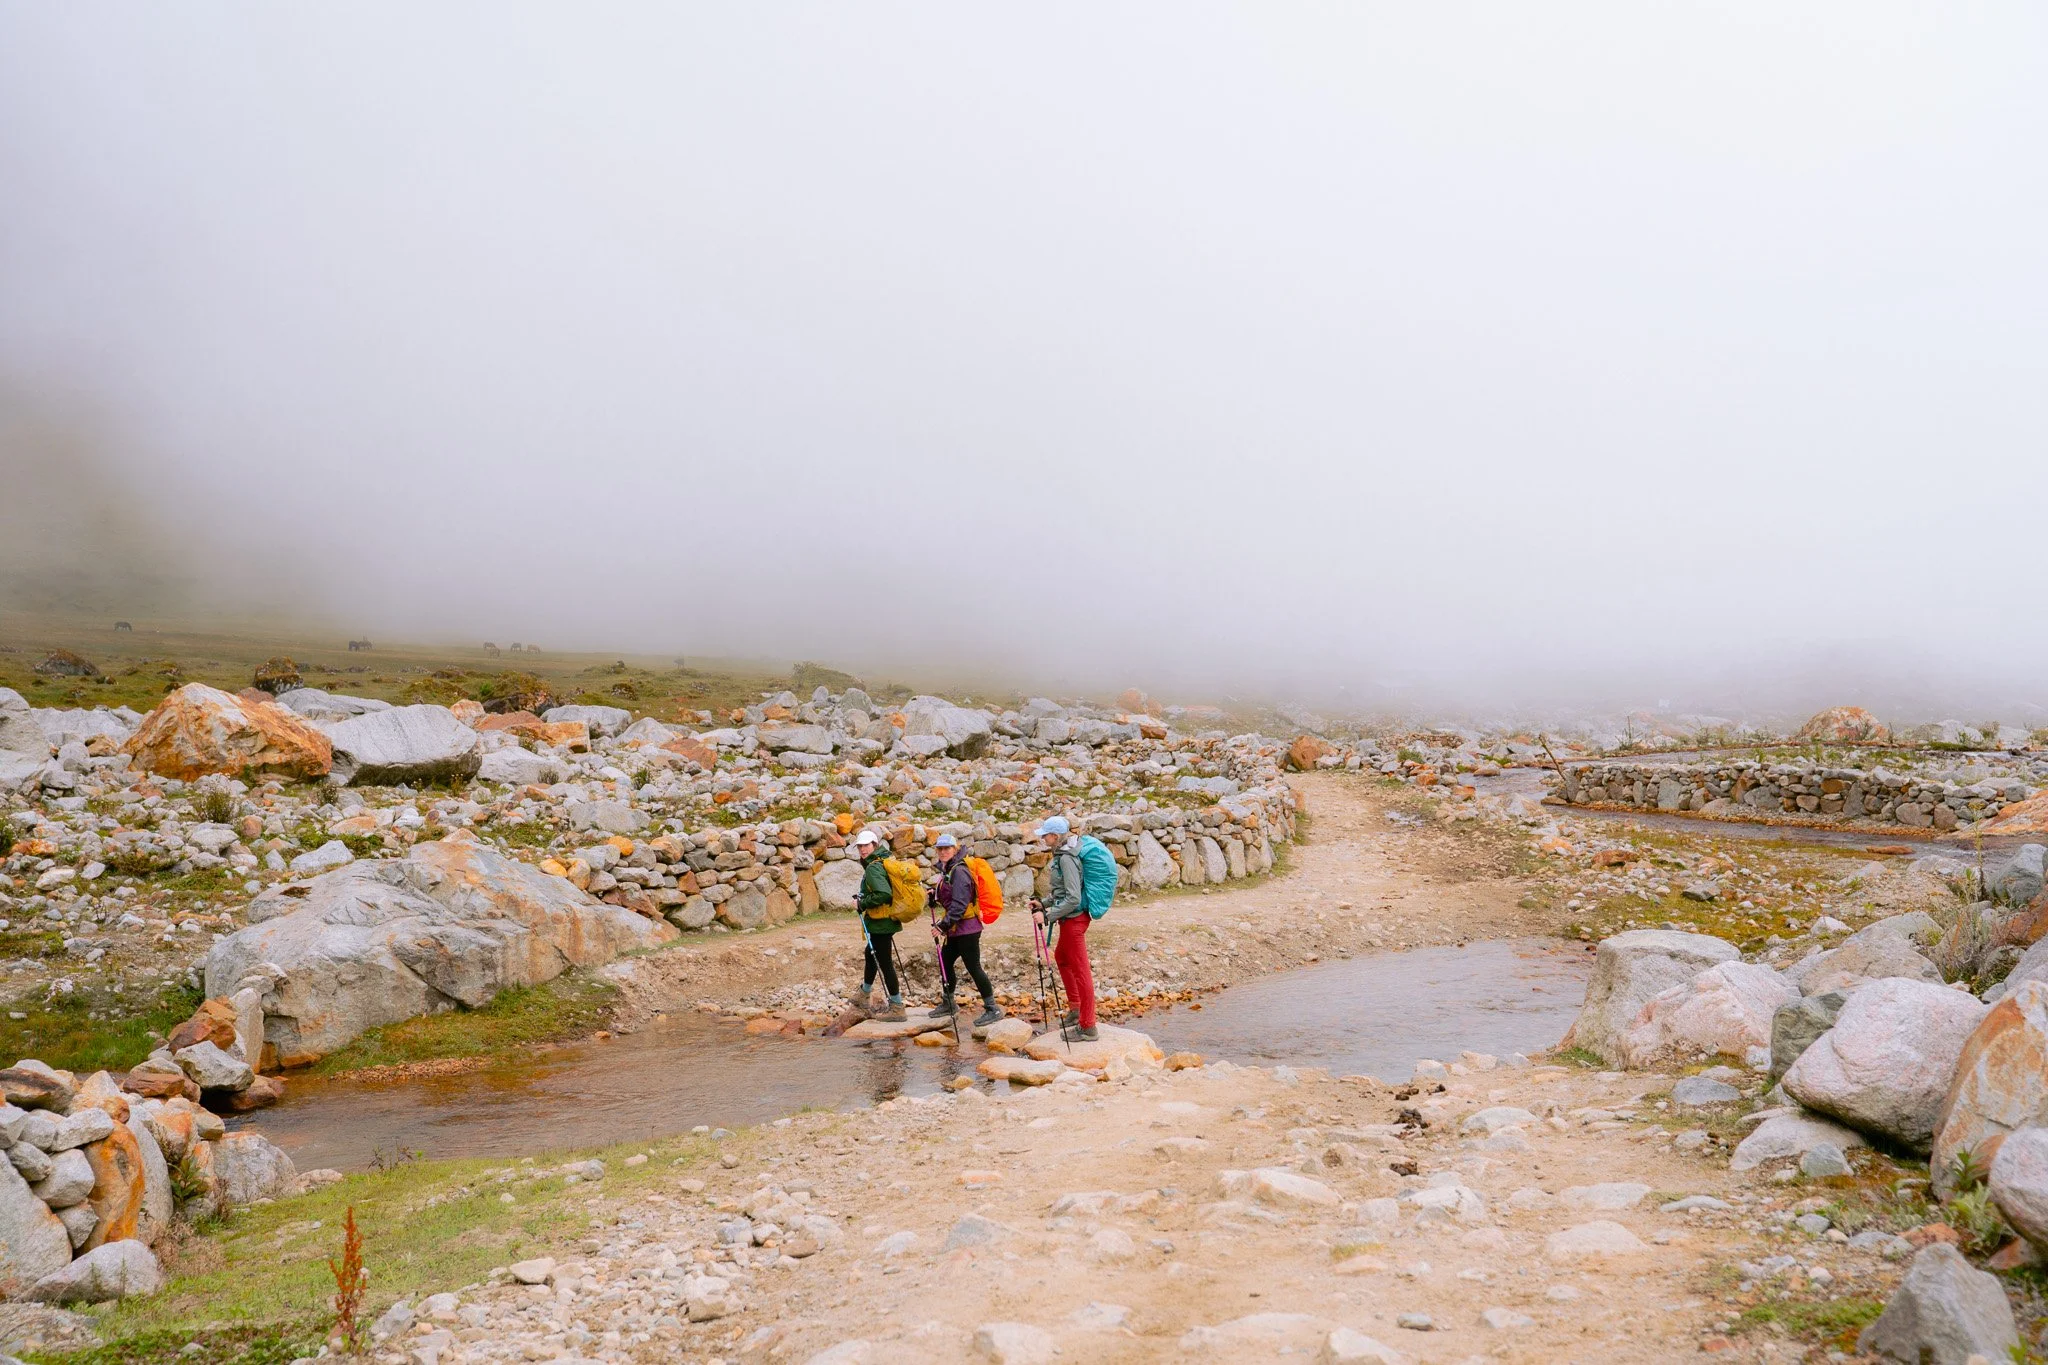
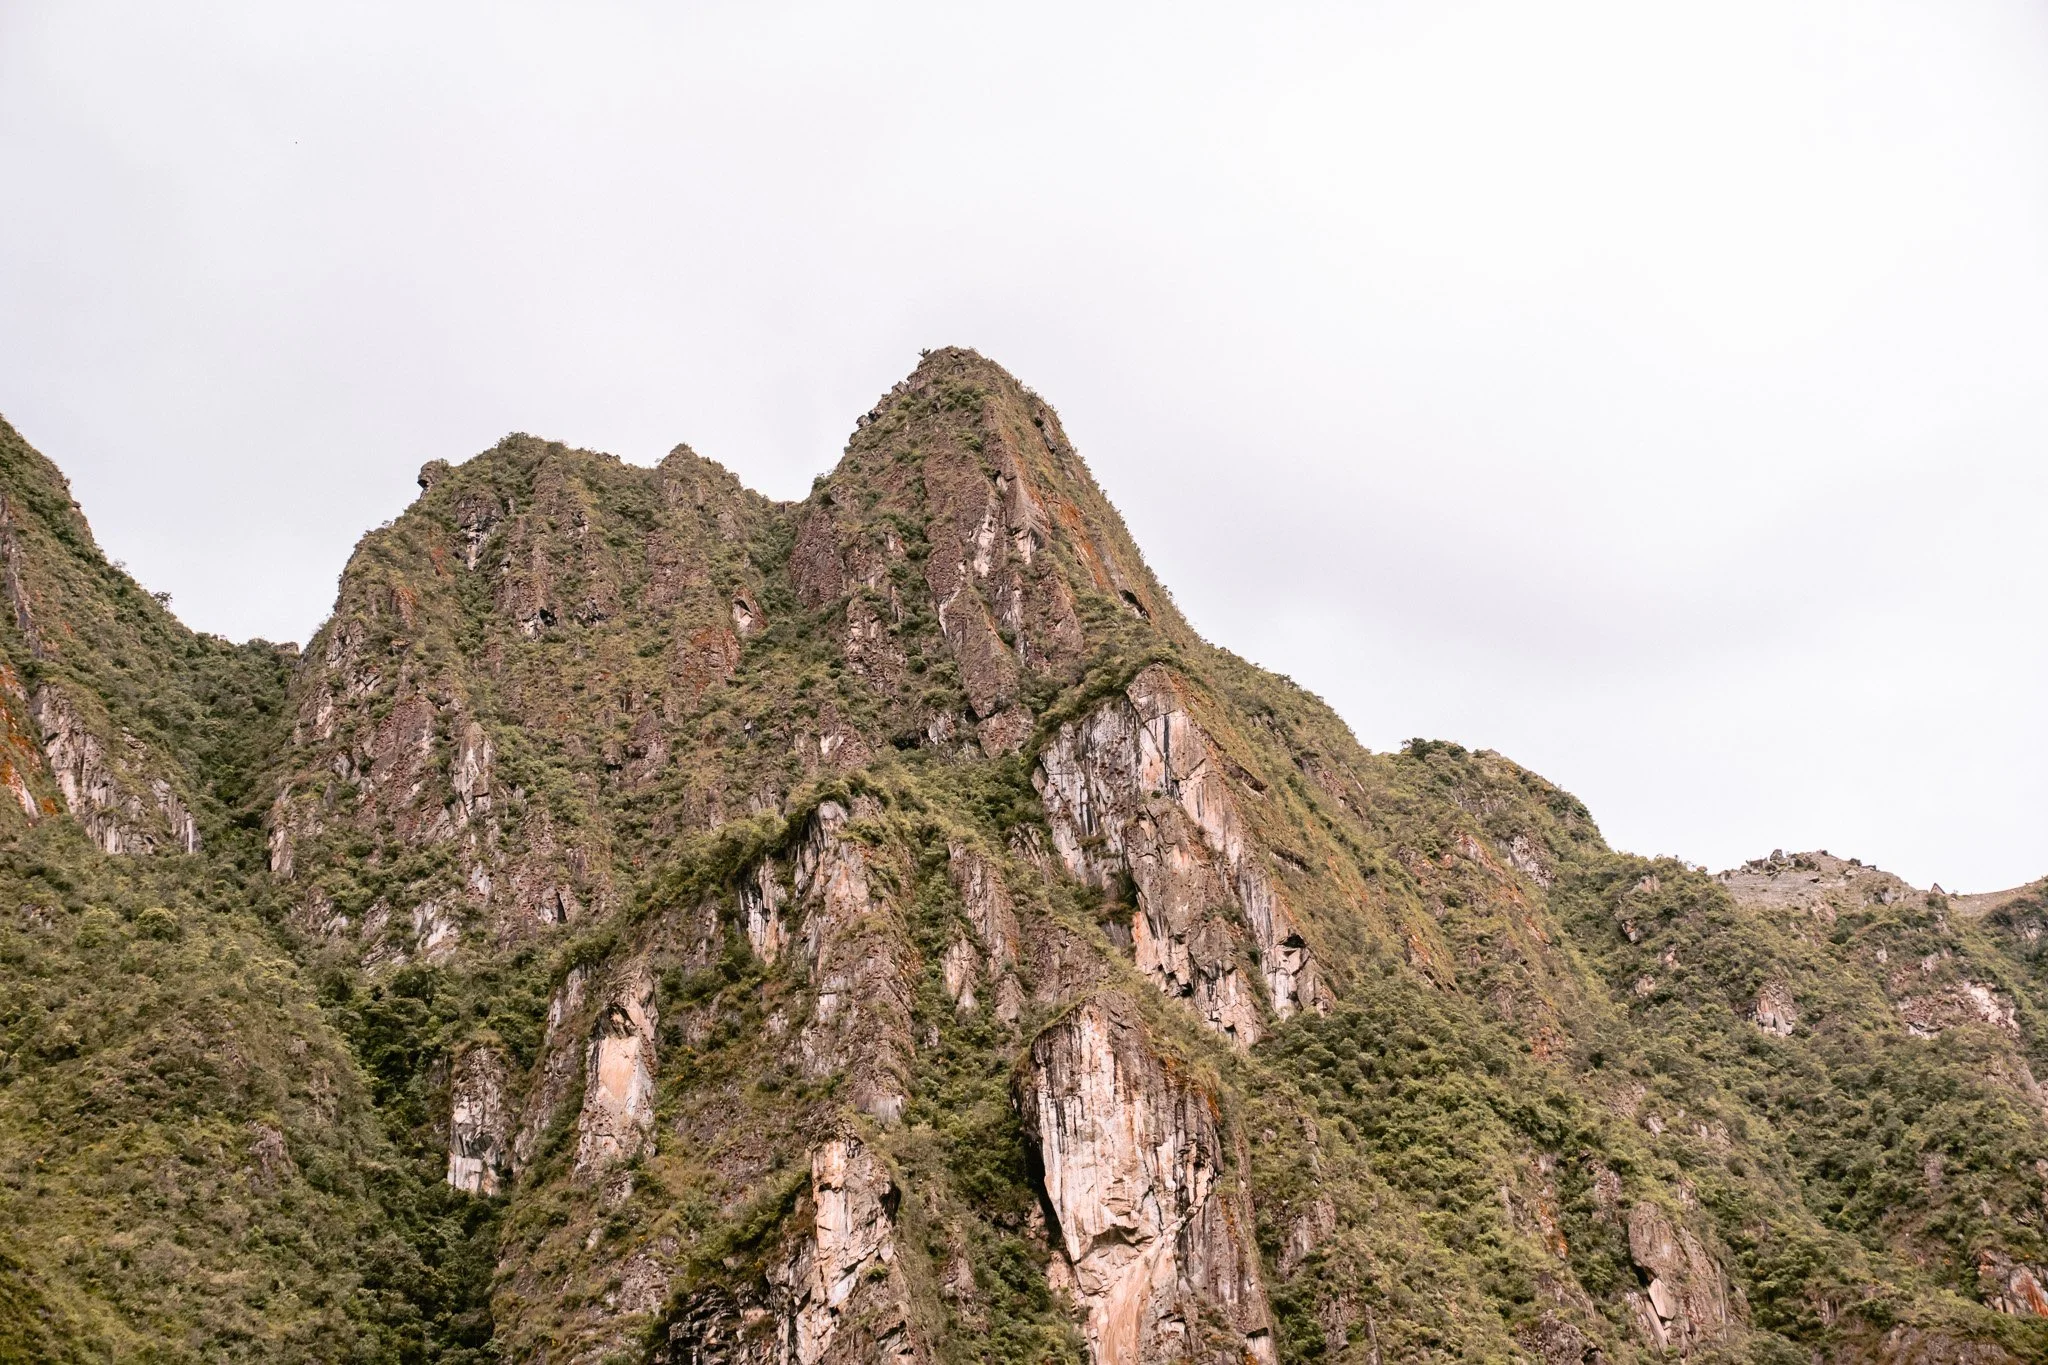
This is the hardest and most dramatic day of the trek.
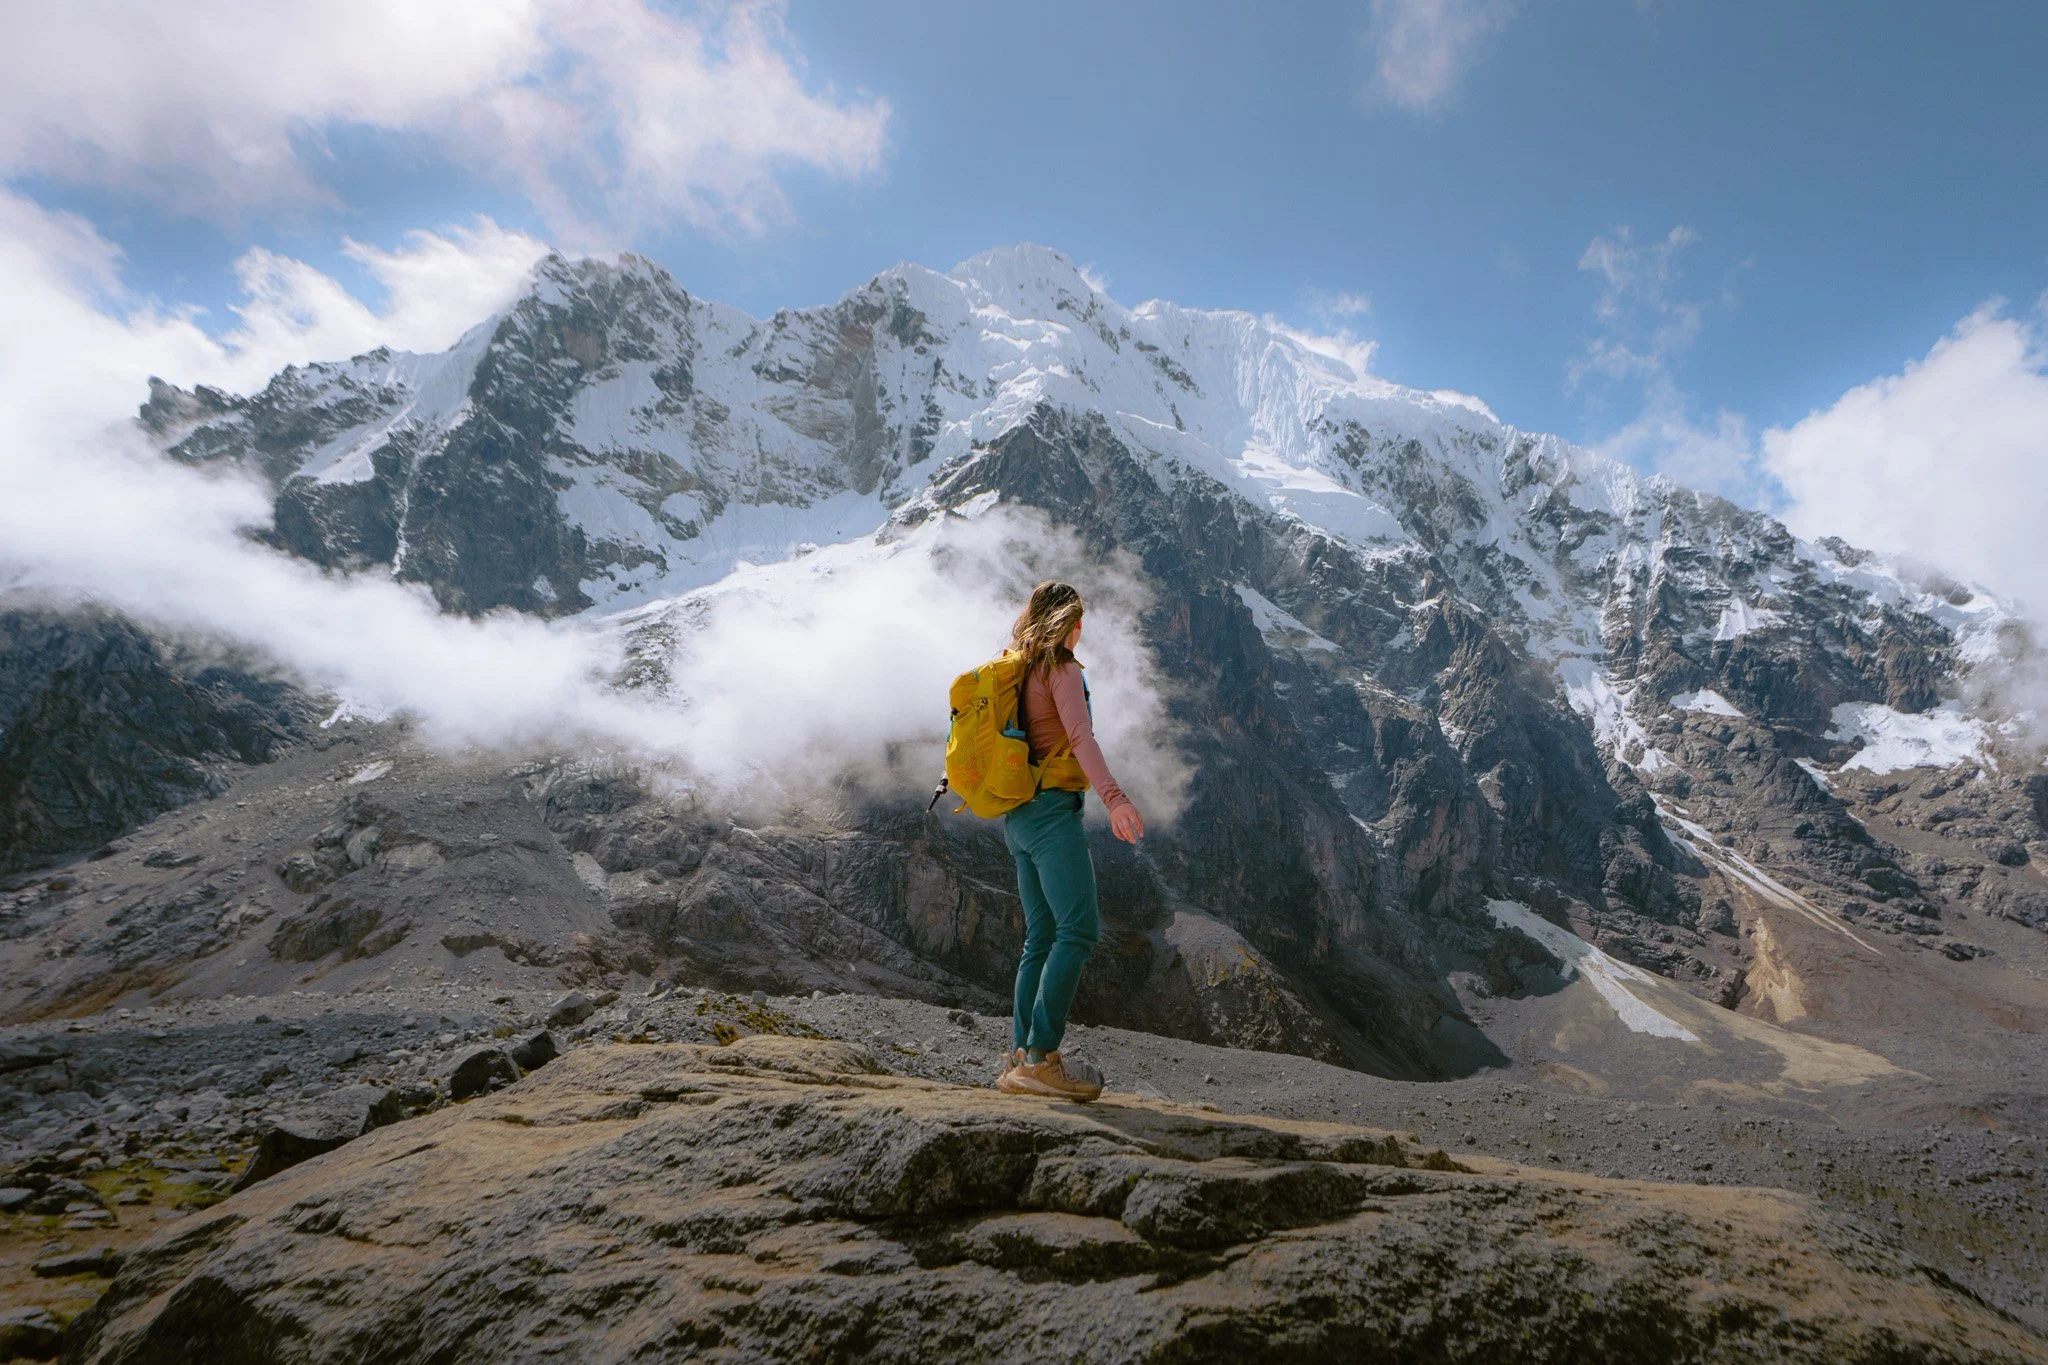
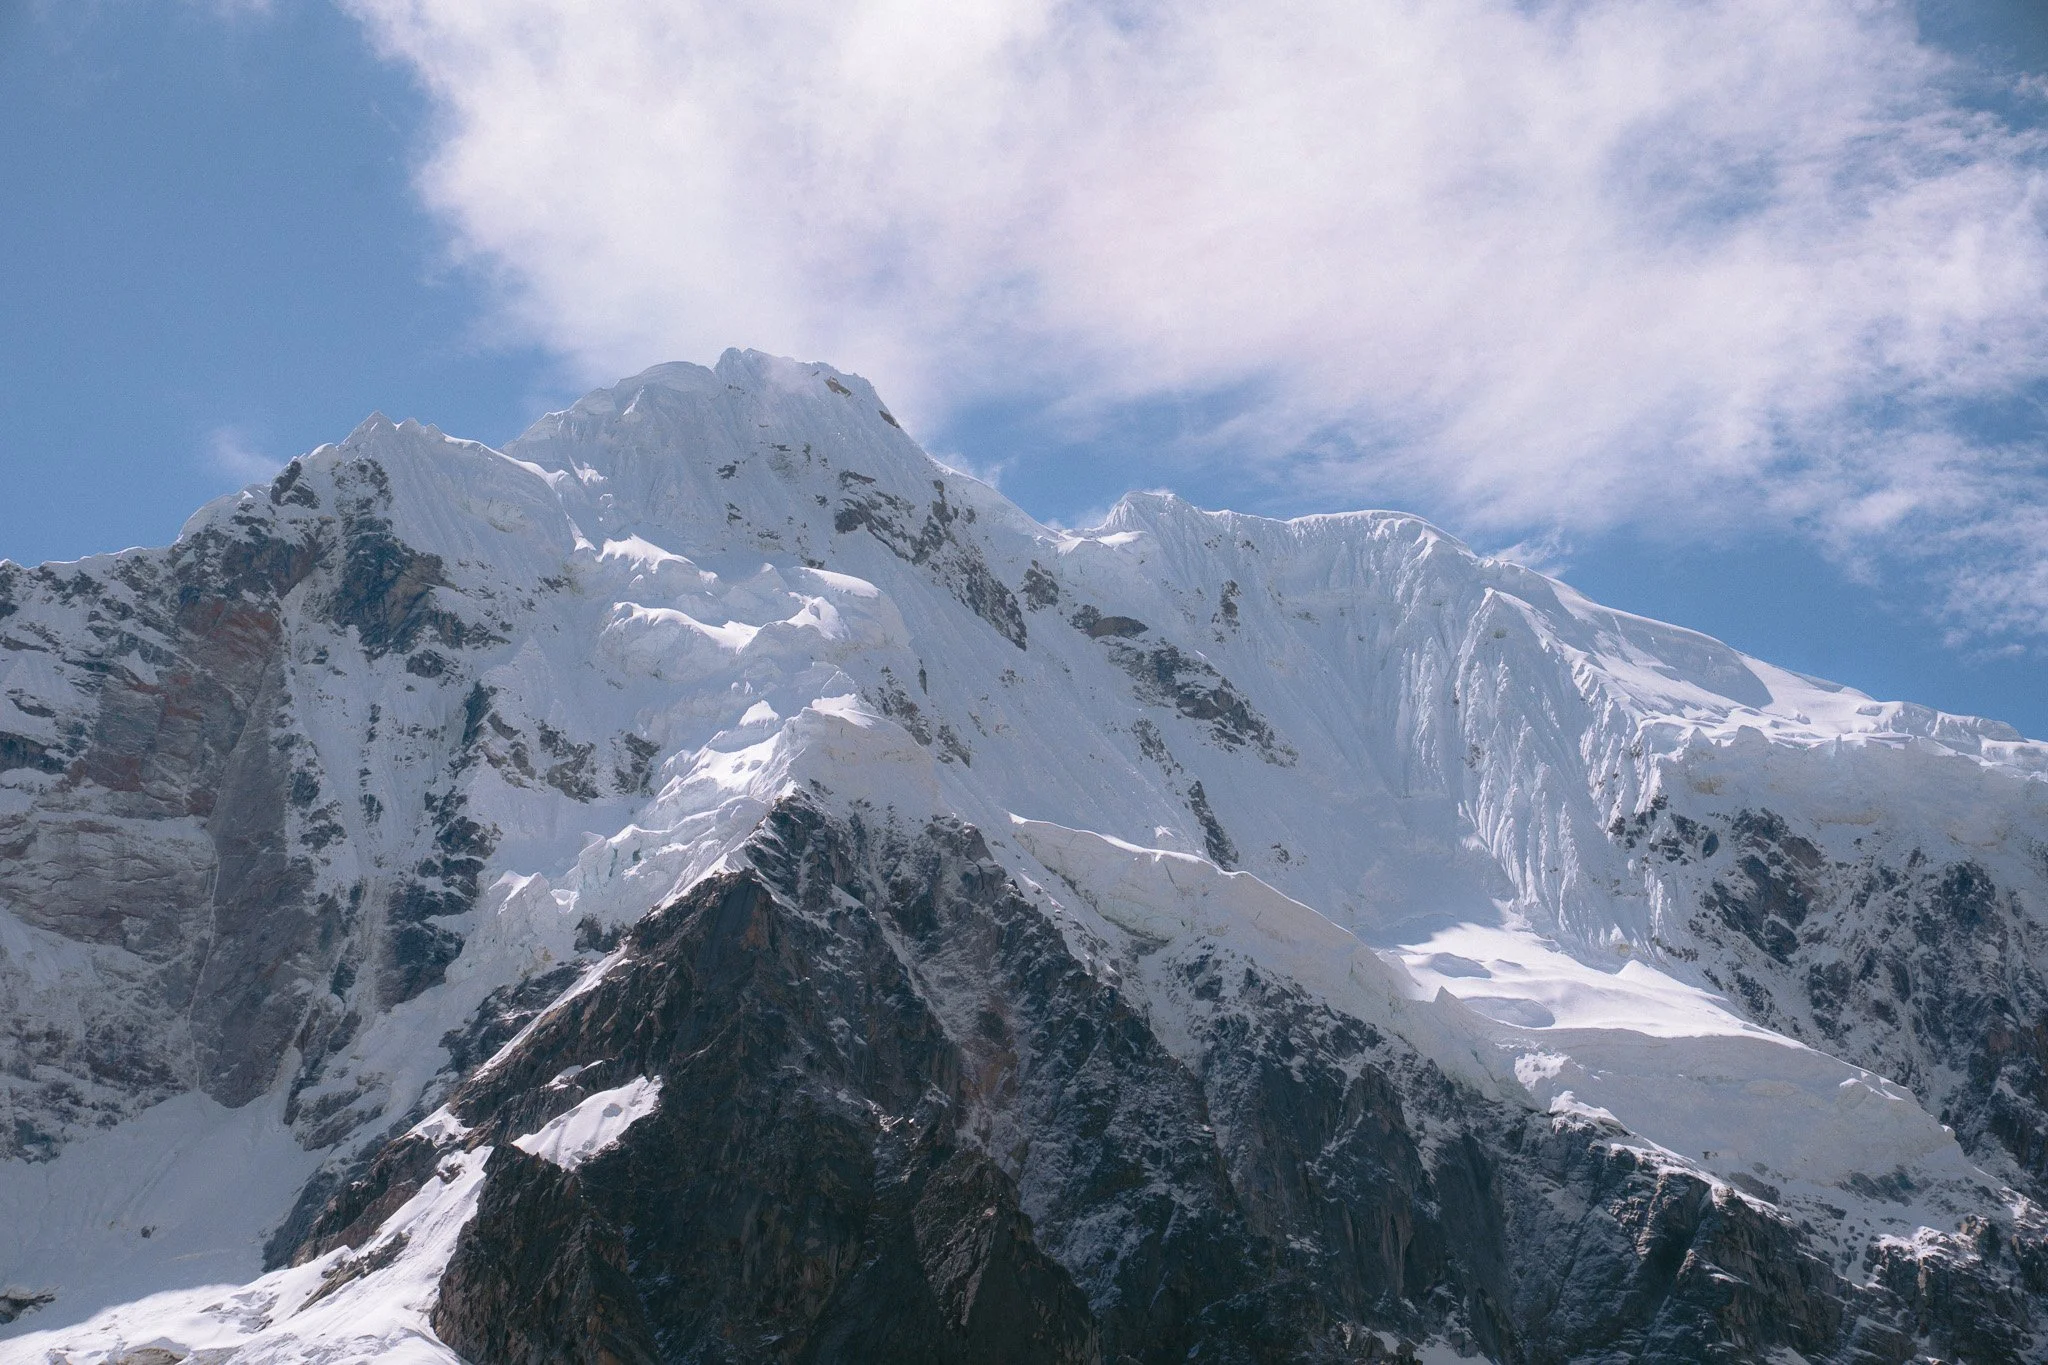
We began before sunrise, slowly climbing toward Salkantay Pass, the highest point of the entire trek. The mountain towering above the trail — Nevado Salkantay — rises over 20,000 feet and dominates the landscape.
Reaching the pass at 15,090 feet was an incredibly emotional moment for me. I had never hiked that high before, and after struggling with altitude the previous day, standing there felt like a huge personal victory. I remember the mix of excitement, anxiety, and sheer stubborn determination I felt, just putting one foot in front of the other, slowly. Once I made it to the top, I stood there absolutely breathless with tears in my eyes and watched the clouds roll past the Savage Mountain’s snowy peak. I had done something that truly pushed me beyond my comfort zone and soaked up that feeling of strength and accomplishment. Our bodies are capable of doing more than we could ever imagine!
From the pass, the trail began a long descent into green terrain as we made our way down toward Collpapampa. We descended about 6,000 feet (!!) through a cloud forest and into a vastly different environment. We literally went from mountainous, snowy peaks and rocky terrain to a jungle full of tropical plants, rivers, waterfalls and lots of humidity. We met up with the other half of our group who had opted to take horses over Salkantay Pass (which is a really great option if you aren’t feeling up for the hike) and had an absolutely glorious lunch before continuing our way to our accomodations for the night, Mountain Sky View.
Our lodging was at 9,678 feet, and this stay felt much more comfortable. This was one of my favorite overnights because the views over the cloud forest were absolutely gorgeous, especially in the morning when the clouds inverted below us. We had private bathrooms and showers here, which felt incredibly luxurious after a long day on the trail. Although I will say, do not expect the shower to be hot (ours wasn’t, and it kind of squirted all over the bathroom, but many in our group did have hot showers!) Either way, it felt amazing to have such a gorgeous place to stay AND a private bathroom after a grueling day of hiking.
Day 3: Lucmabamba
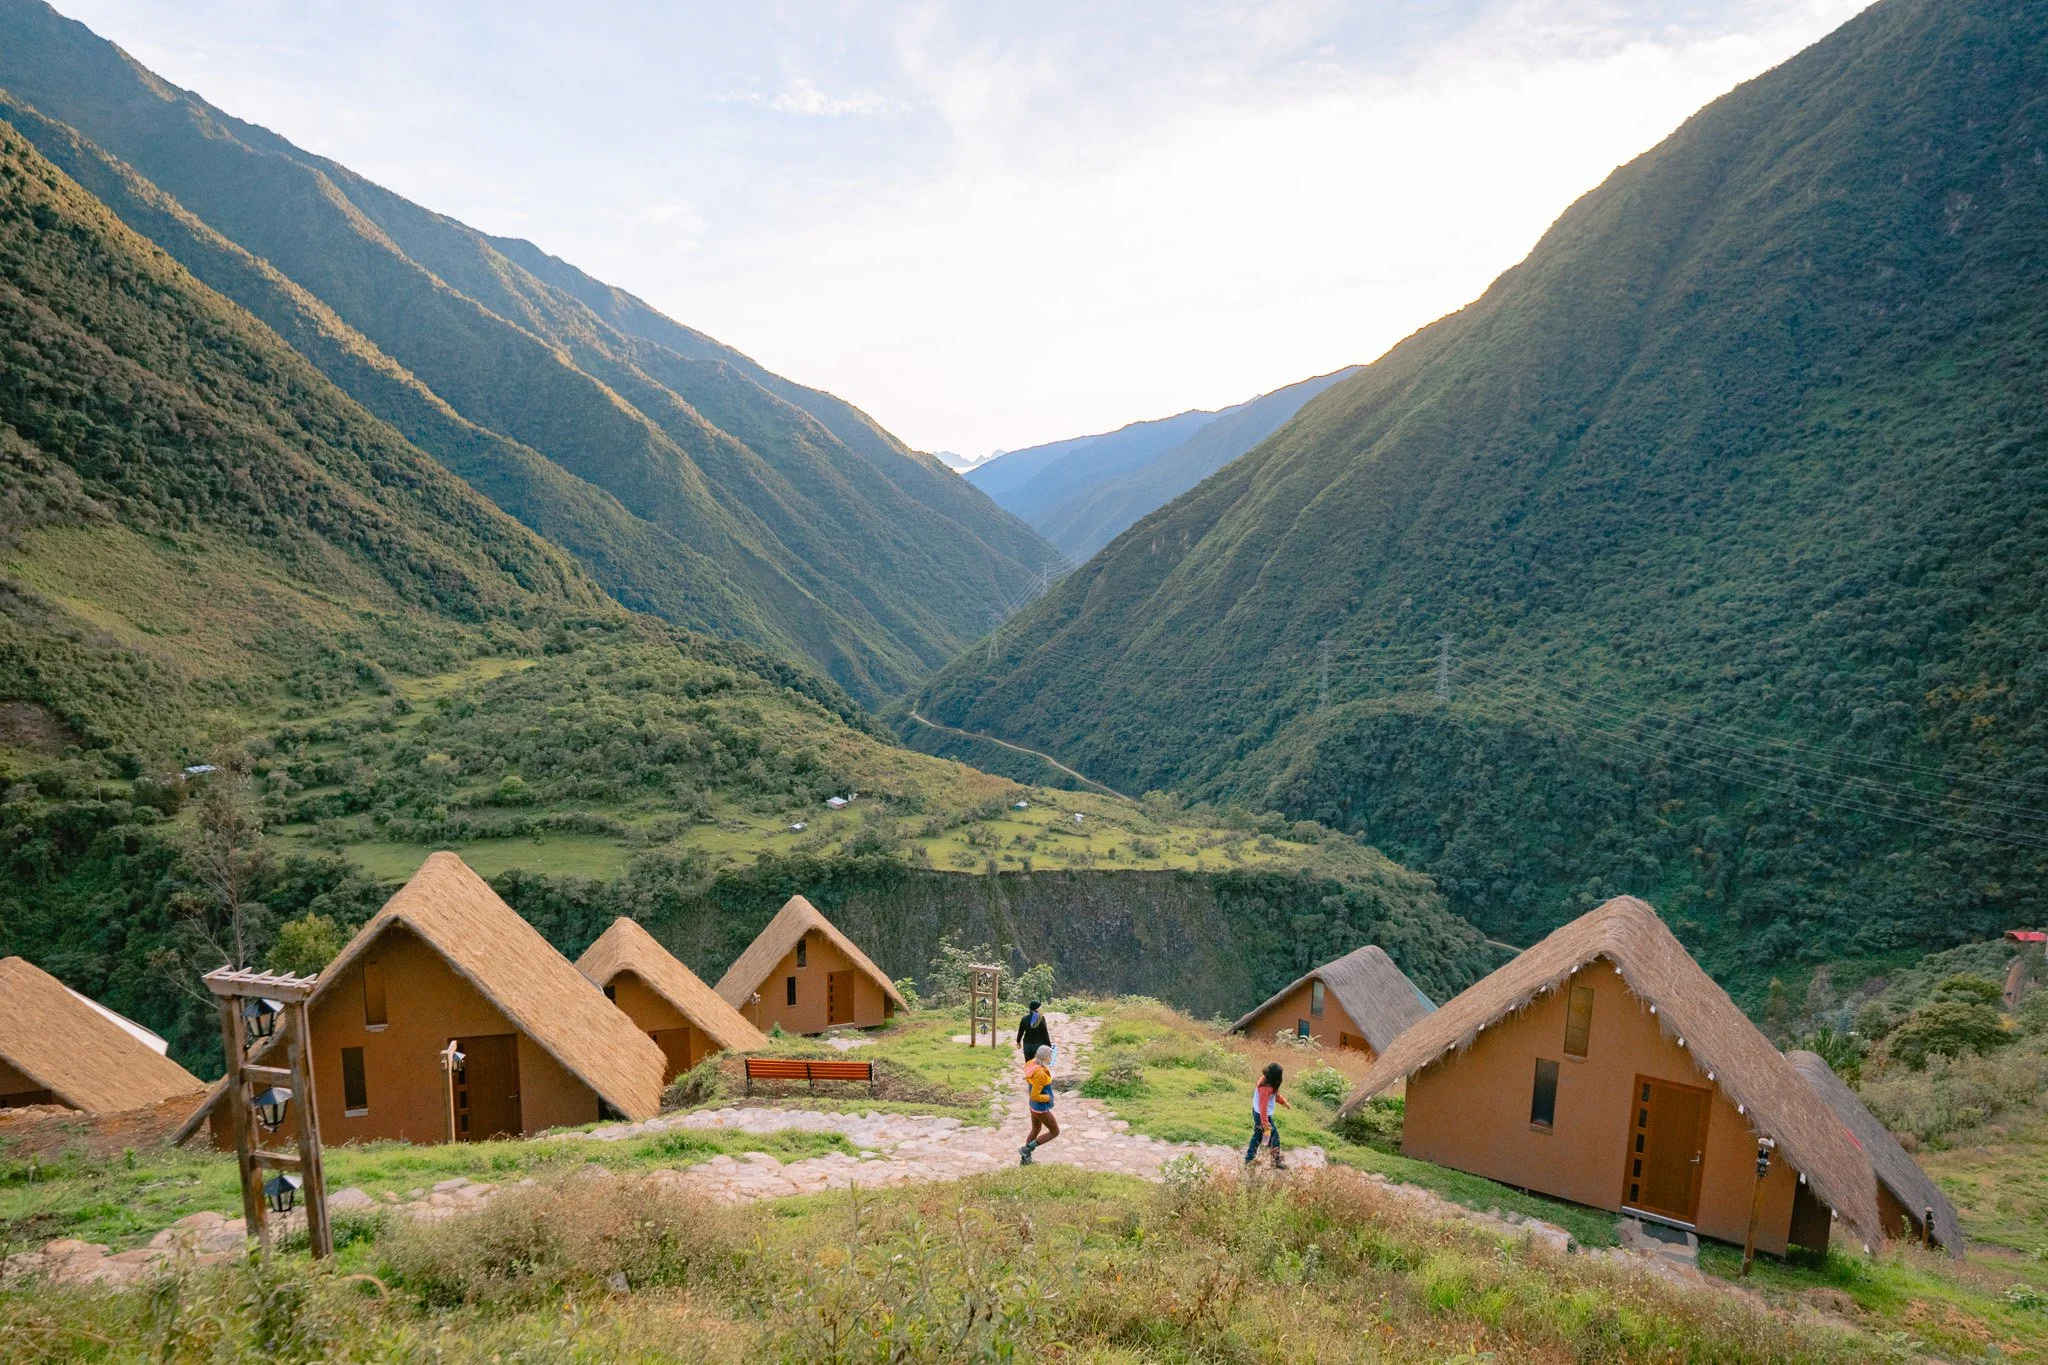
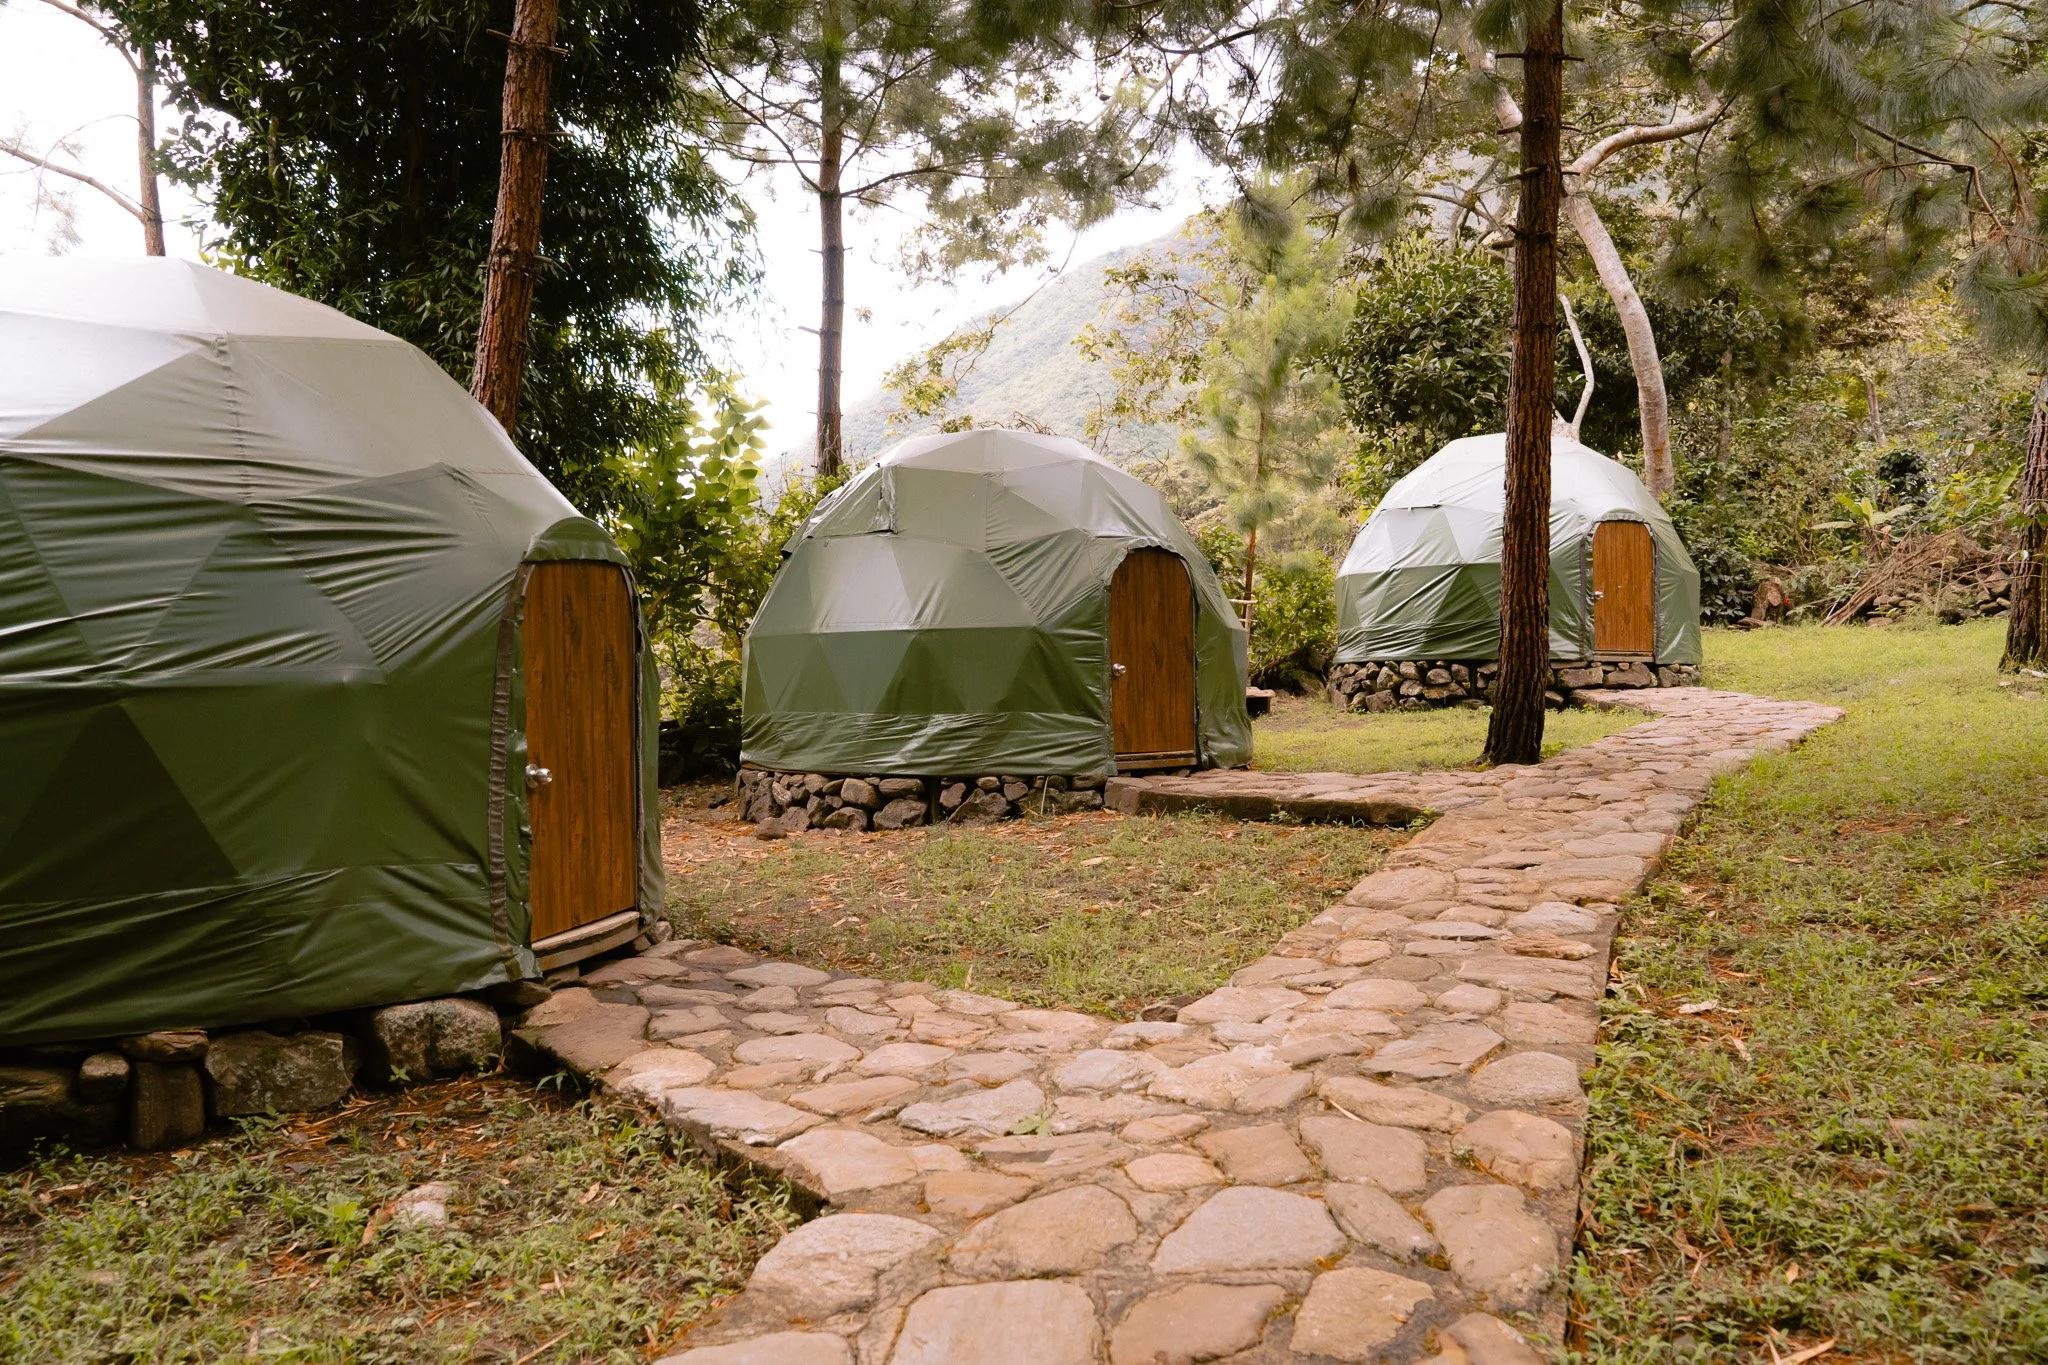
🏨 Lucmabamba – Jungle Domes
Distance: ~11 miles
Hiking time: 5–6 hours
Elevation: ~6,500–9,500 ft
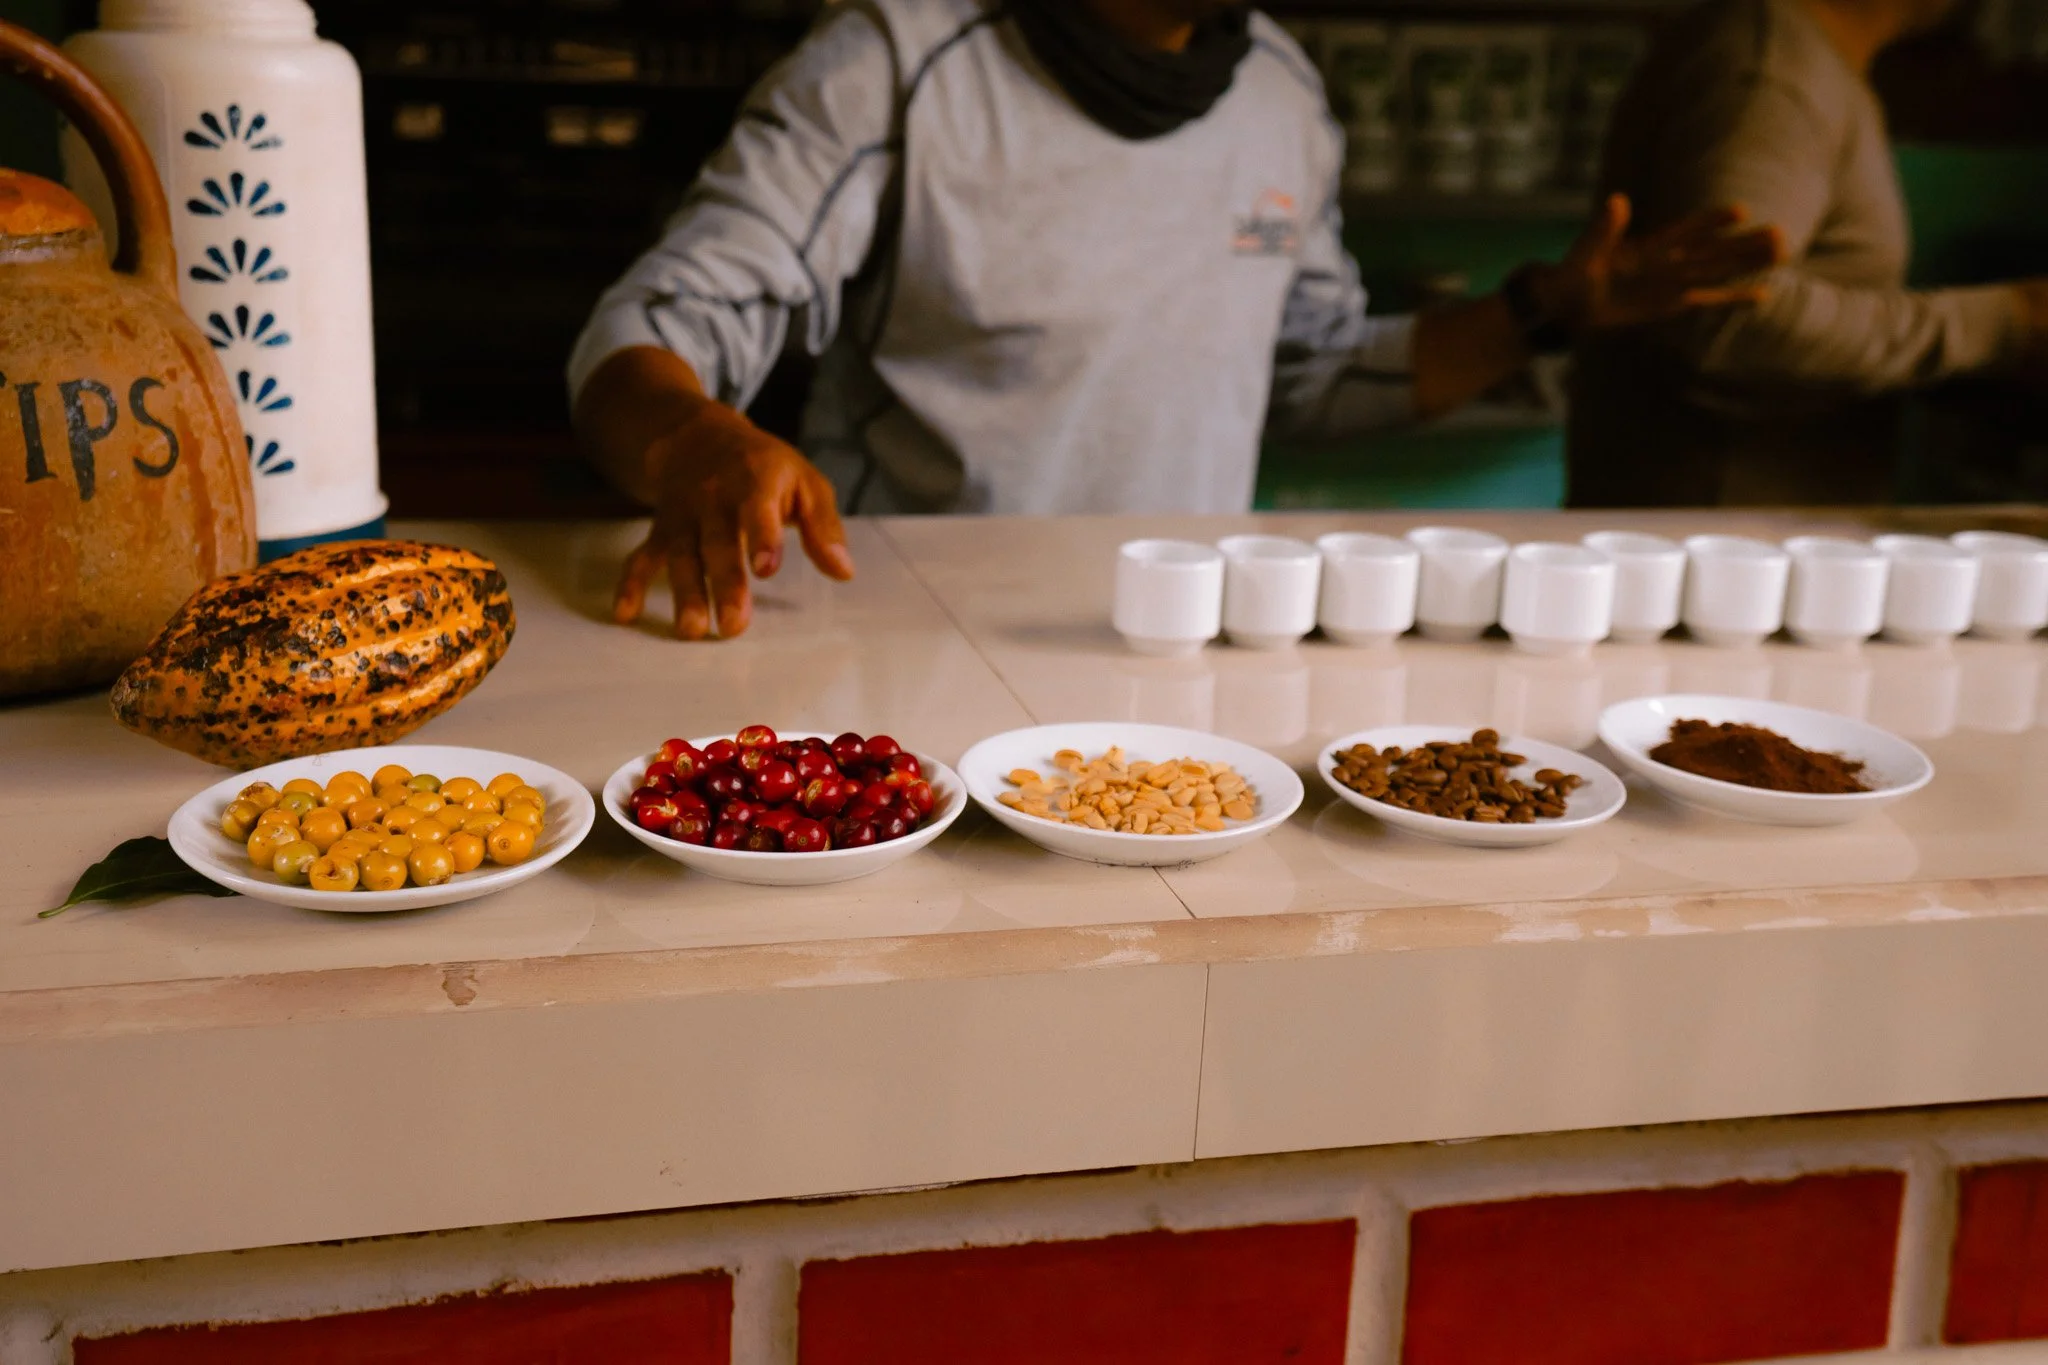
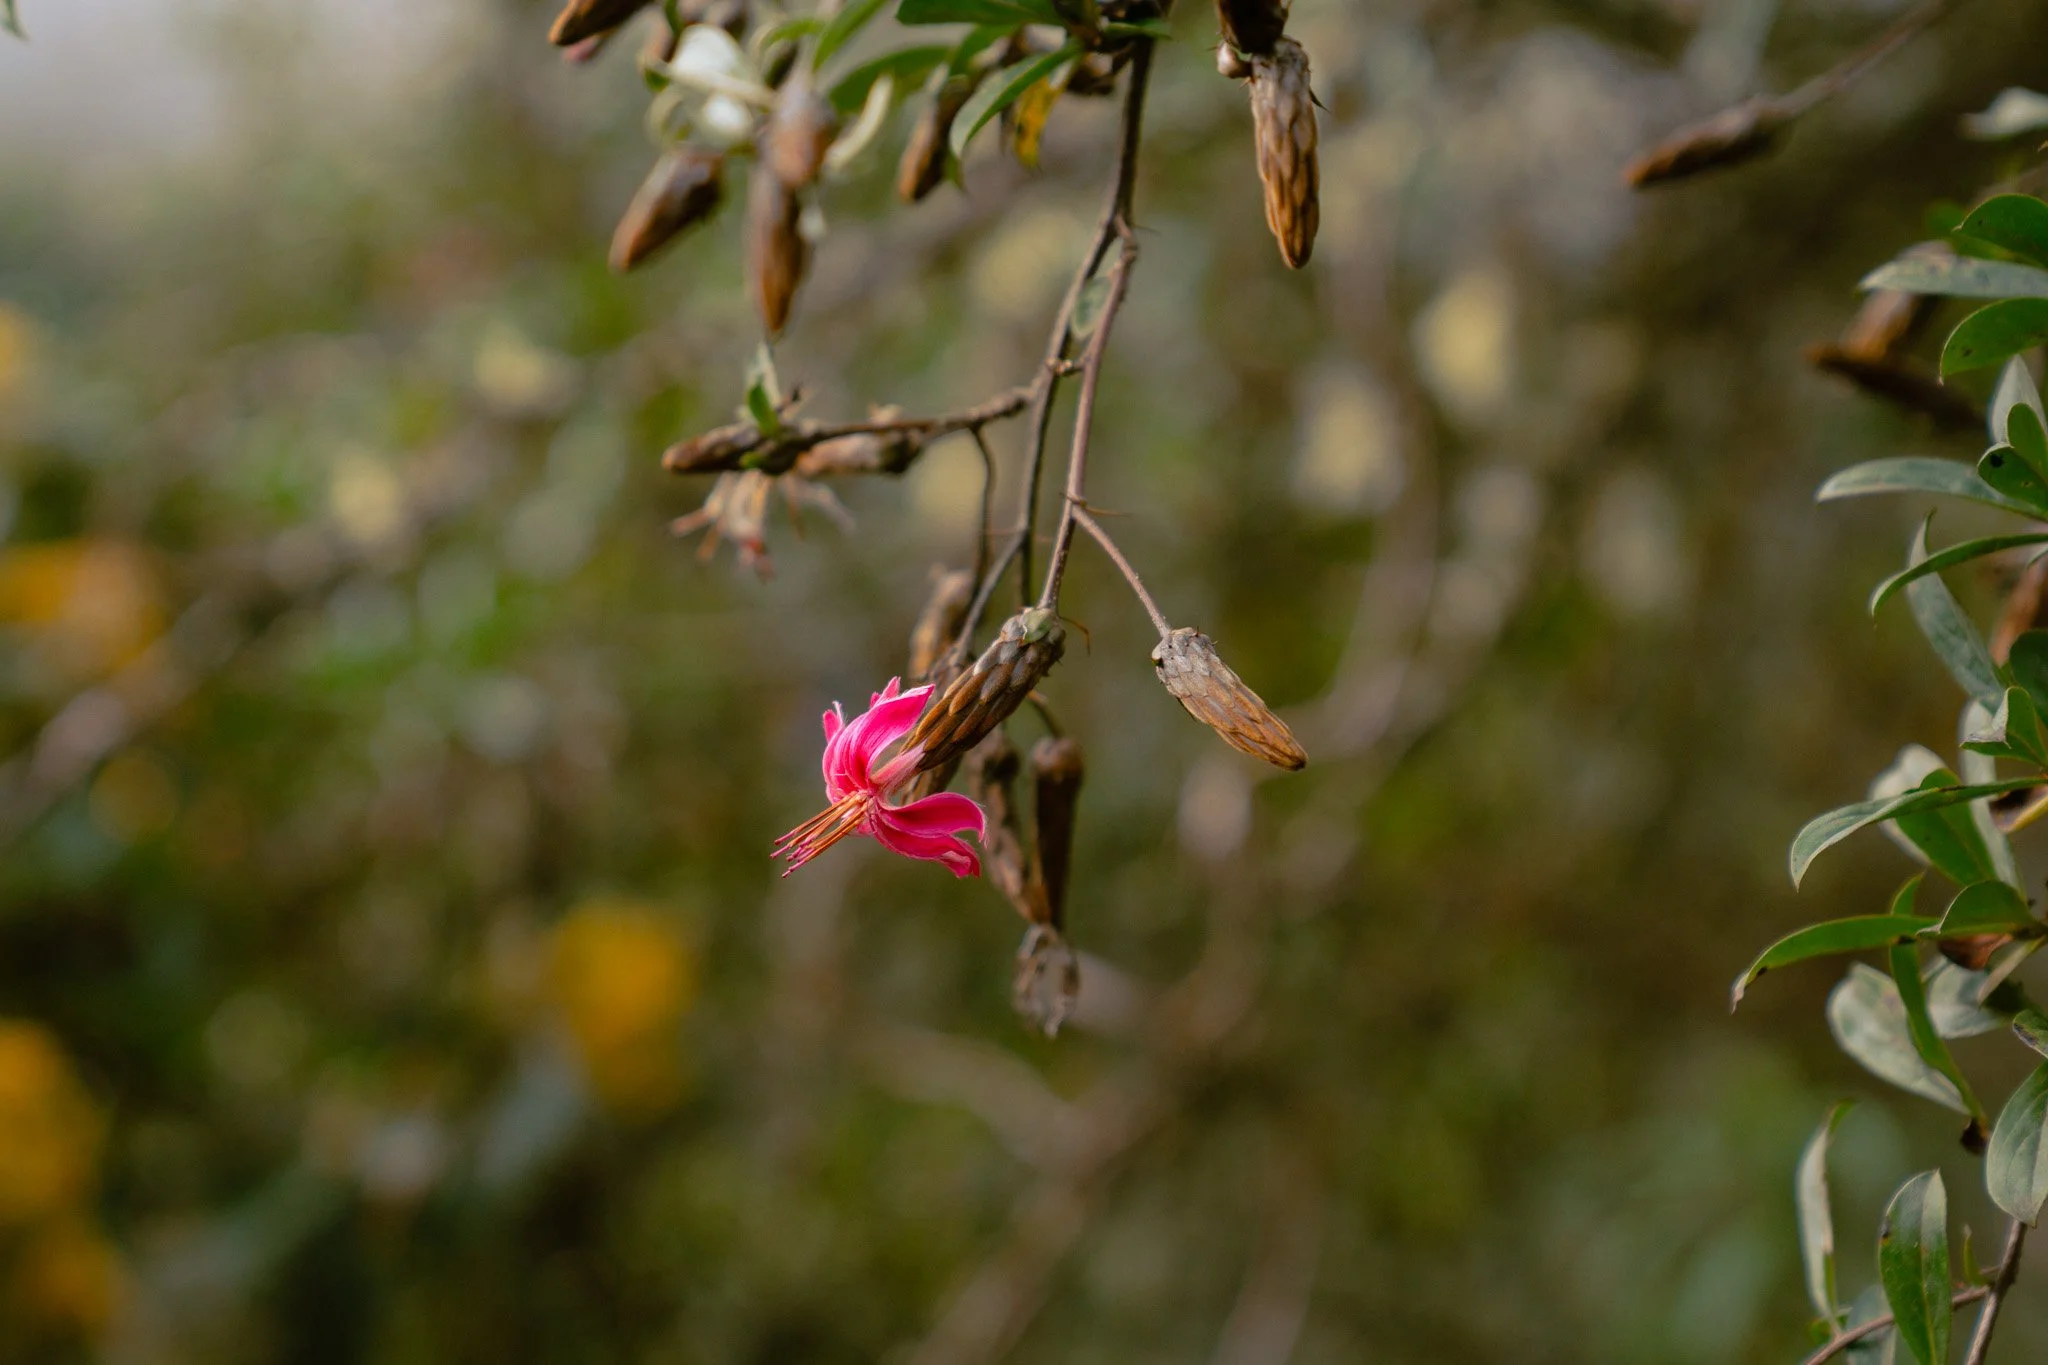
By this point, we completely left the high alpine terrain behind and continued to hike through a lush cloud forest and jungle landscape. The air became warmer and more humid, and we started seeing coffee plants, fruit trees, and tropical vegetation along the trail.
This section of the Salkantay route passes through small farming communities, and we started seeing crops growing along the trail — like avocados, cacao, passion fruit, and coffee. This region is actually one of Peru’s organic coffee-growing areas, and many of the farms here are family-run operations that have been producing coffee for generations.
At one point we stopped at a passion fruit plantation, where our guides showed us how the fruit grows on climbing vines supported by wooden trellises. The fruit looks fairly unassuming on the outside, but when it’s cut open, the inside is filled with bright orange pulp and seeds that taste intensely sweet and tart at the same time. After days of hiking, fresh passion fruit straight from the farm tasted ridiculously good.
We also visited a small coffee farm, where we learned about the traditional coffee-making process used in the region. The farmer walked us through each step, from harvesting the coffee cherries to removing the pulp, drying the beans, roasting them, and finally grinding them by hand. At the end, we got to drink the finished coffee while sitting in the middle of the farm surrounded by jungle-covered mountains.
After leaving the farm, the trail continued downhill through lush vegetation until we reached Lucmabamba, where we spent the night in jungle domes and finally experienced warmer temperatures after the freezing alpine camps earlier in the trek.
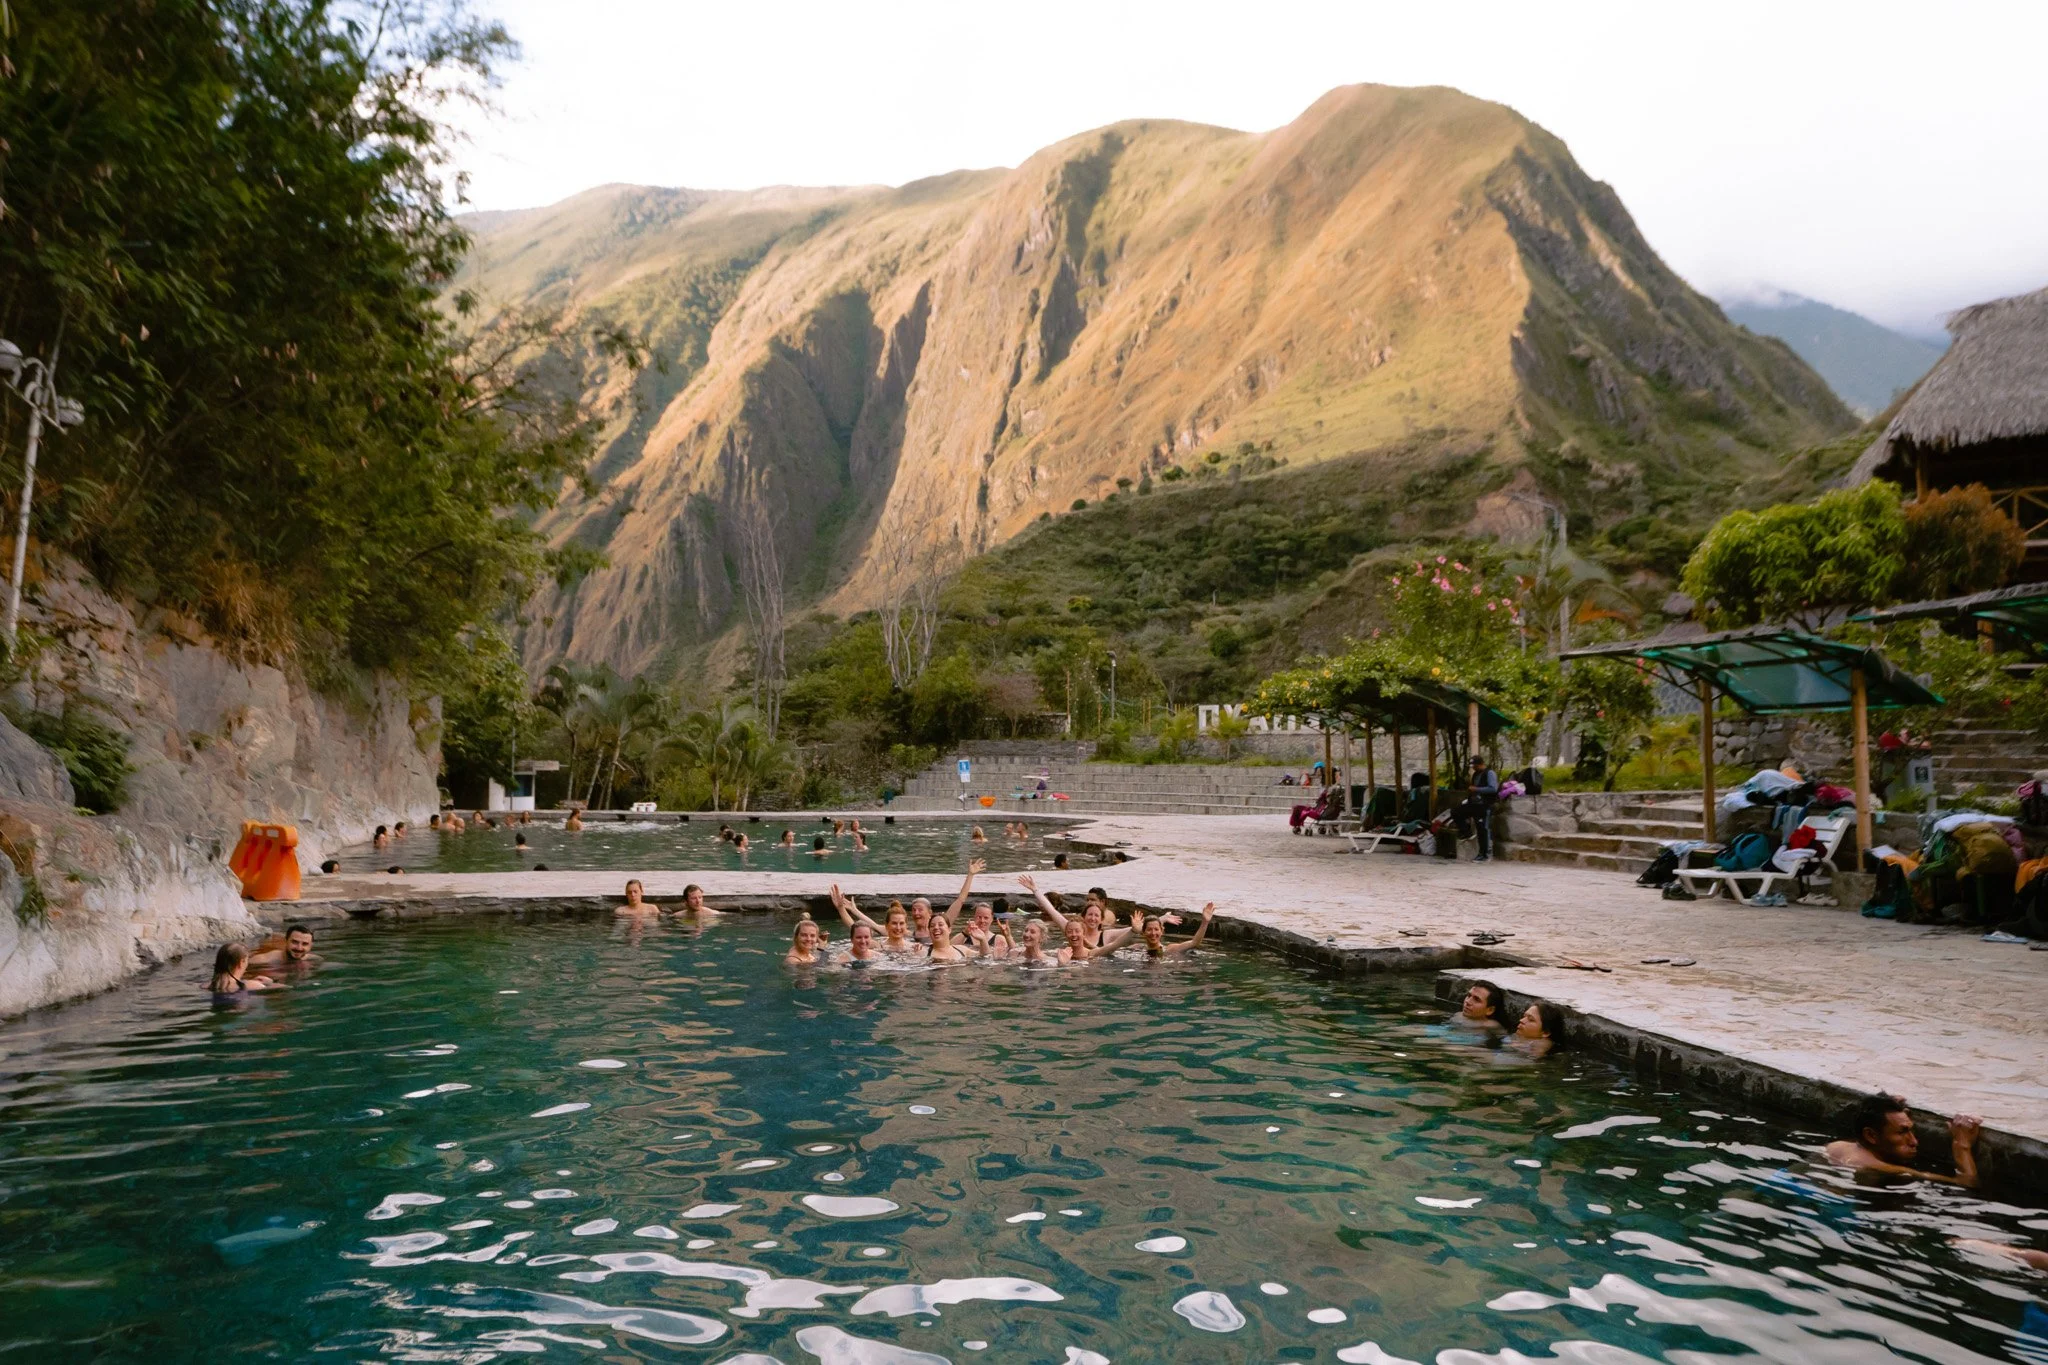
Bathrooms were shared and there were no showers on site, but this was also the day we visited the Cocalmayo Hot Springs, which had some cold public showers available that I took advantage of. Because when hiking through a humid cloud forest, I definitely felt like I needed a good rinse-off!
Day 4: Aguas Calientes
🏨 Aguas Calientes
Distance: ~15 miles
Hiking time: 8–9 hours
Elevation: ~6,700-9,100 ft

Day four began with one last climb before the final descent toward Machu Picchu. And when I say climb, I mean we IMMEDIATELY started ascending up a mountain.
From Lucmabamba (6,562 ft), the trail gradually climbed through lush jungle terrain toward Llactapata Pass, which sits at around 9,186 feet. The climb is steady but manageable, especially compared to the brutal elevation of Salkantay Pass earlier in the trek.
At the top, we were rewarded with something incredibly special: one of the first distant views of Machu Picchu across the valley. I got butterflies thinking about how we were just one day away from seeing one of the Seven Wonders of the World!
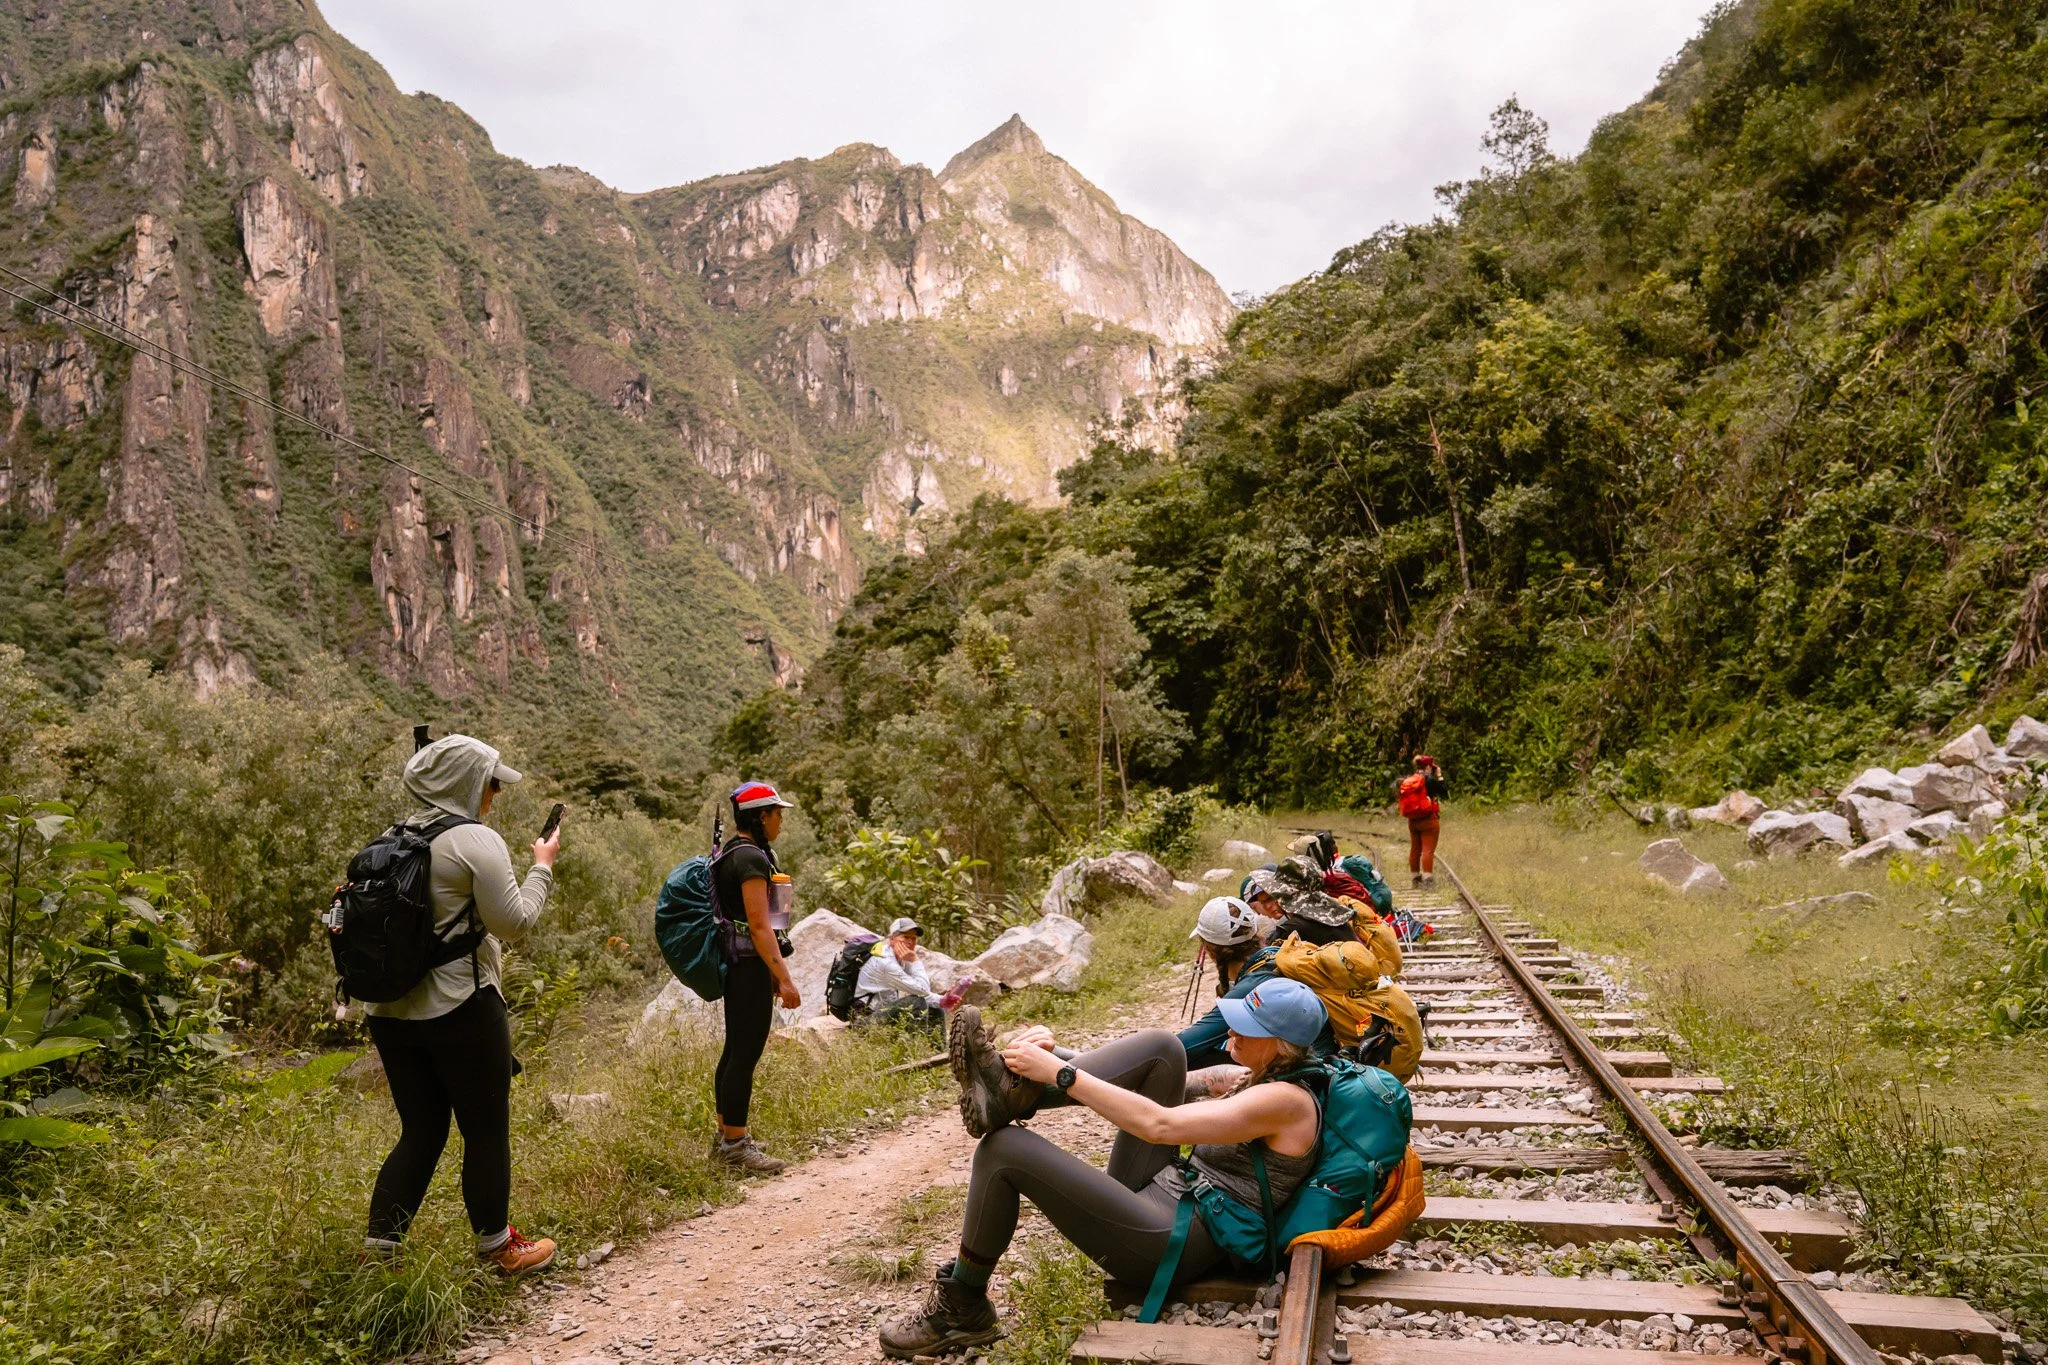
From there, the trail descended toward Hydroelectrica (5,906 ft), where many trekkers stop for lunch. After that, the final stretch of the day follows the railroad tracks along the Urubamba River toward Aguas Calientes, the small town at the base of Machu Picchu. This was an absolute slog, and many folks in our group opted to take the train into Aguas Calientes. If genuinely trekking the full Salkantay Trek is meaningful to you, then I’d keep hiking, but otherwise I will honestly say I don’t think it was super worth it. I would’ve enjoyed a few more hours exploring the cute town of Aguas Calientes instead.
By the time we arrived, we were exhausted but excited. It also felt a bit jarring to be “back in society” after a few days of nothing but wild landscapes and remote huts. We had dinner at an actual restaurant, checked into a comfy hotel, and…I took my first REAL hot shower after several days of trekking. If you know me and how much I love showers and my little skincare routine, you’ll know this was a spiritual experience for me.
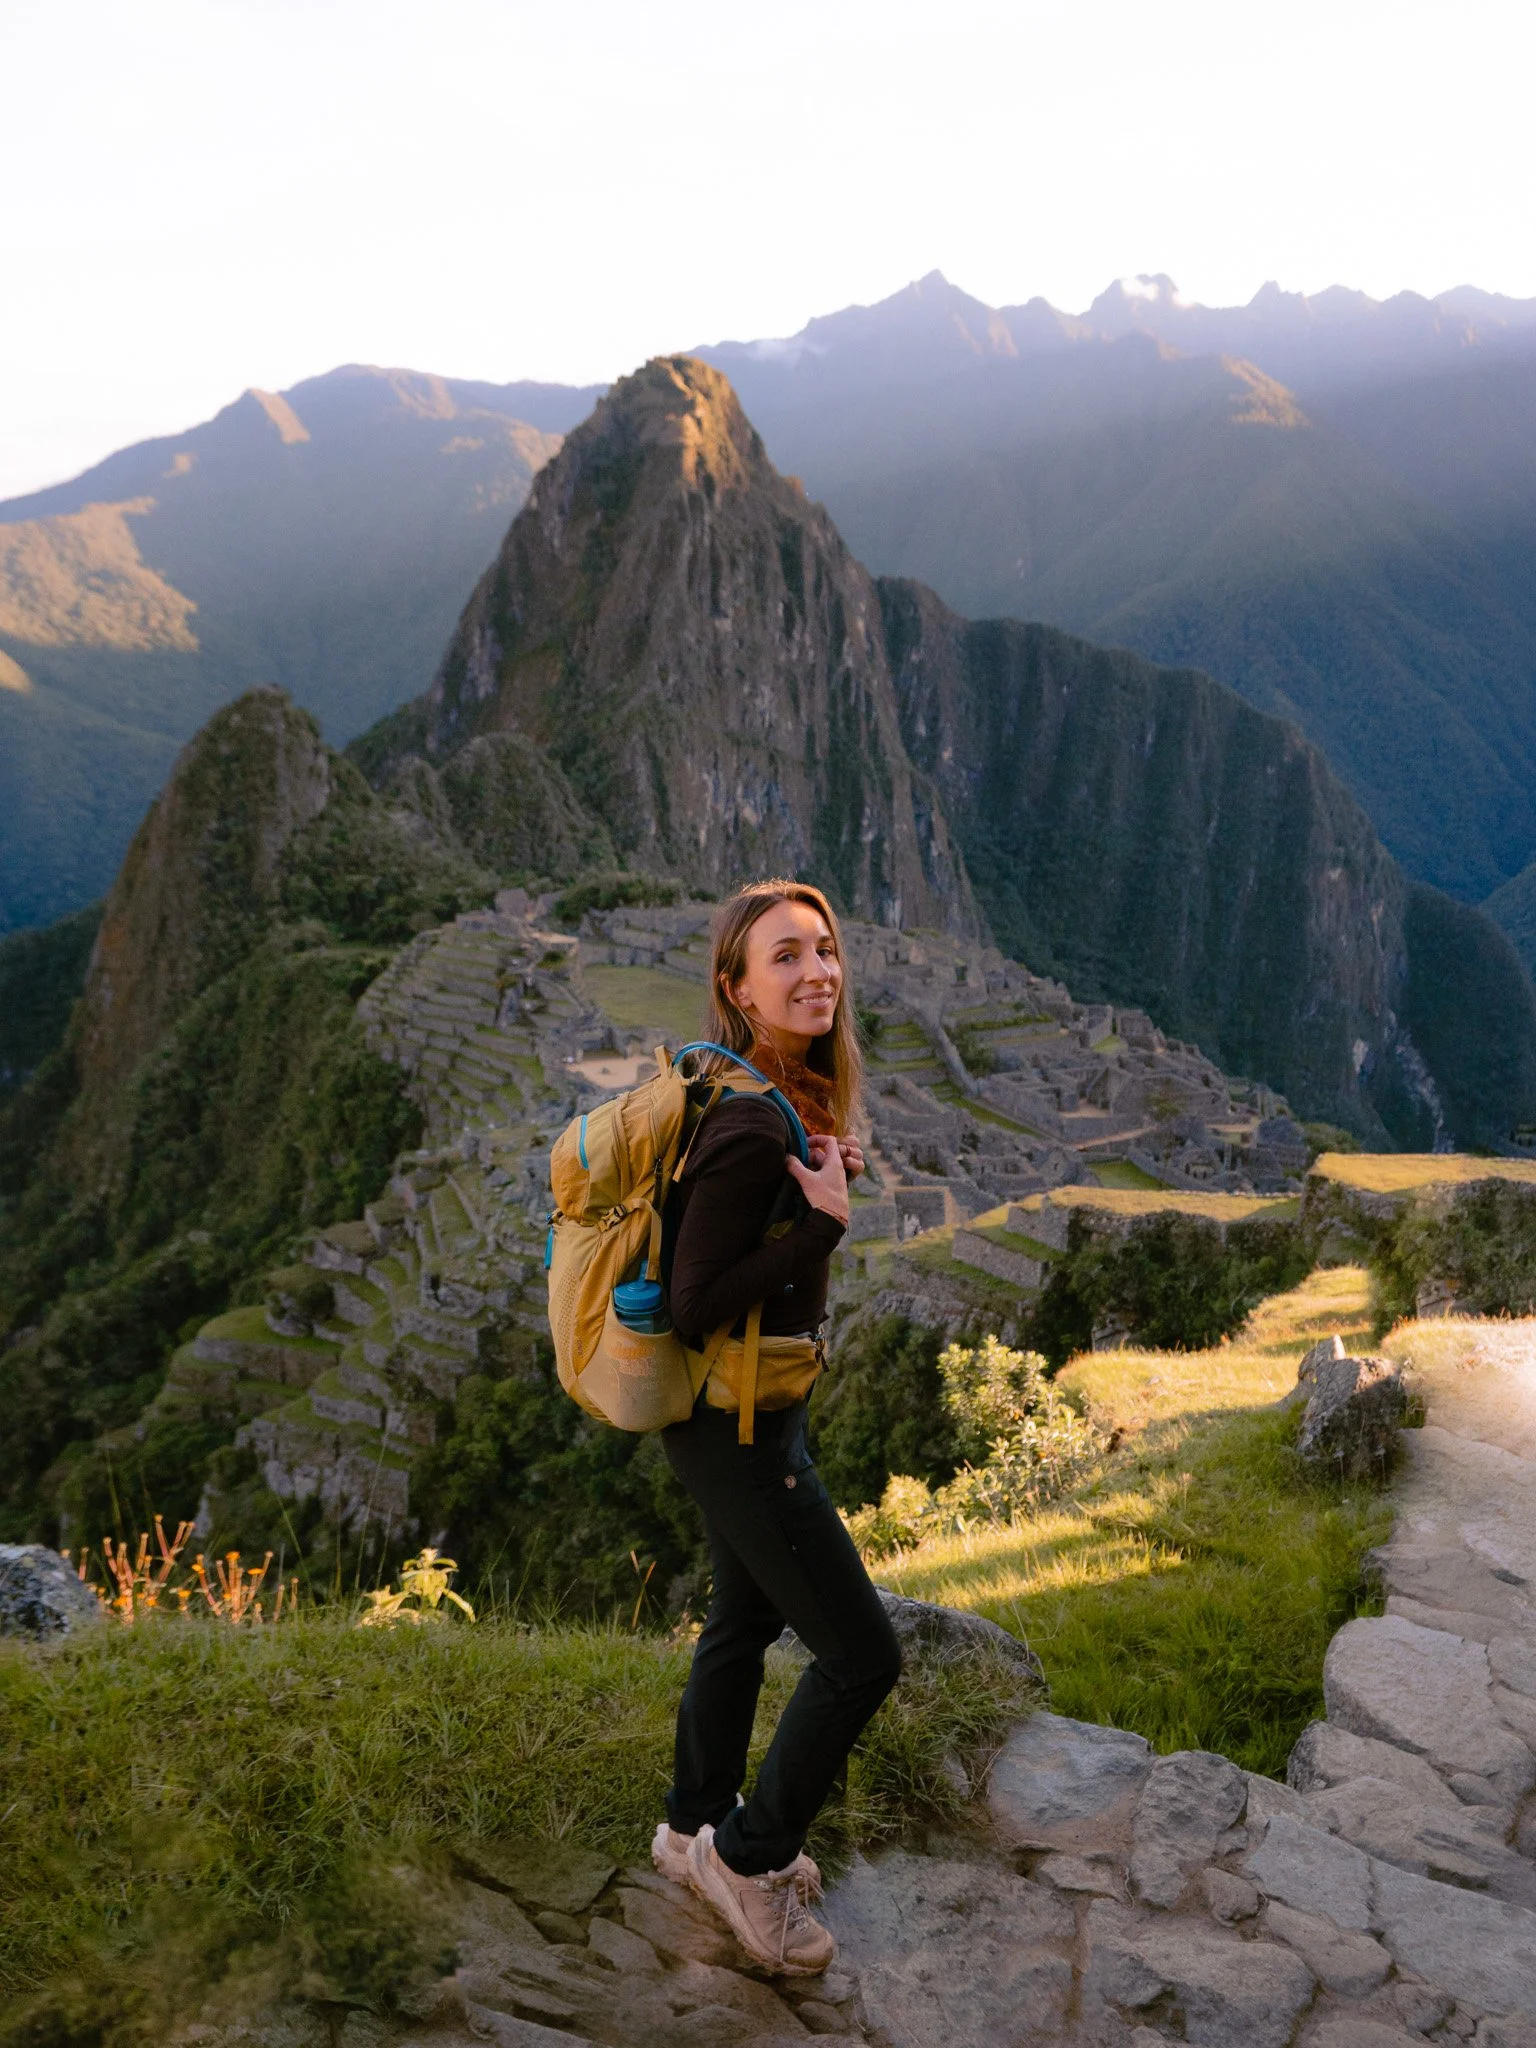
Day 5: Machu Picchu
🏨 Cusco
Distance: ~1.5 miles of walking
Hiking time: 2–3 hours exploring
Elevation: 7,972 ft (Machu Picchu!!)
If you want these views, I highly recommend getting here as early as possible! Less crowds, beautiful sunrise = perfection.
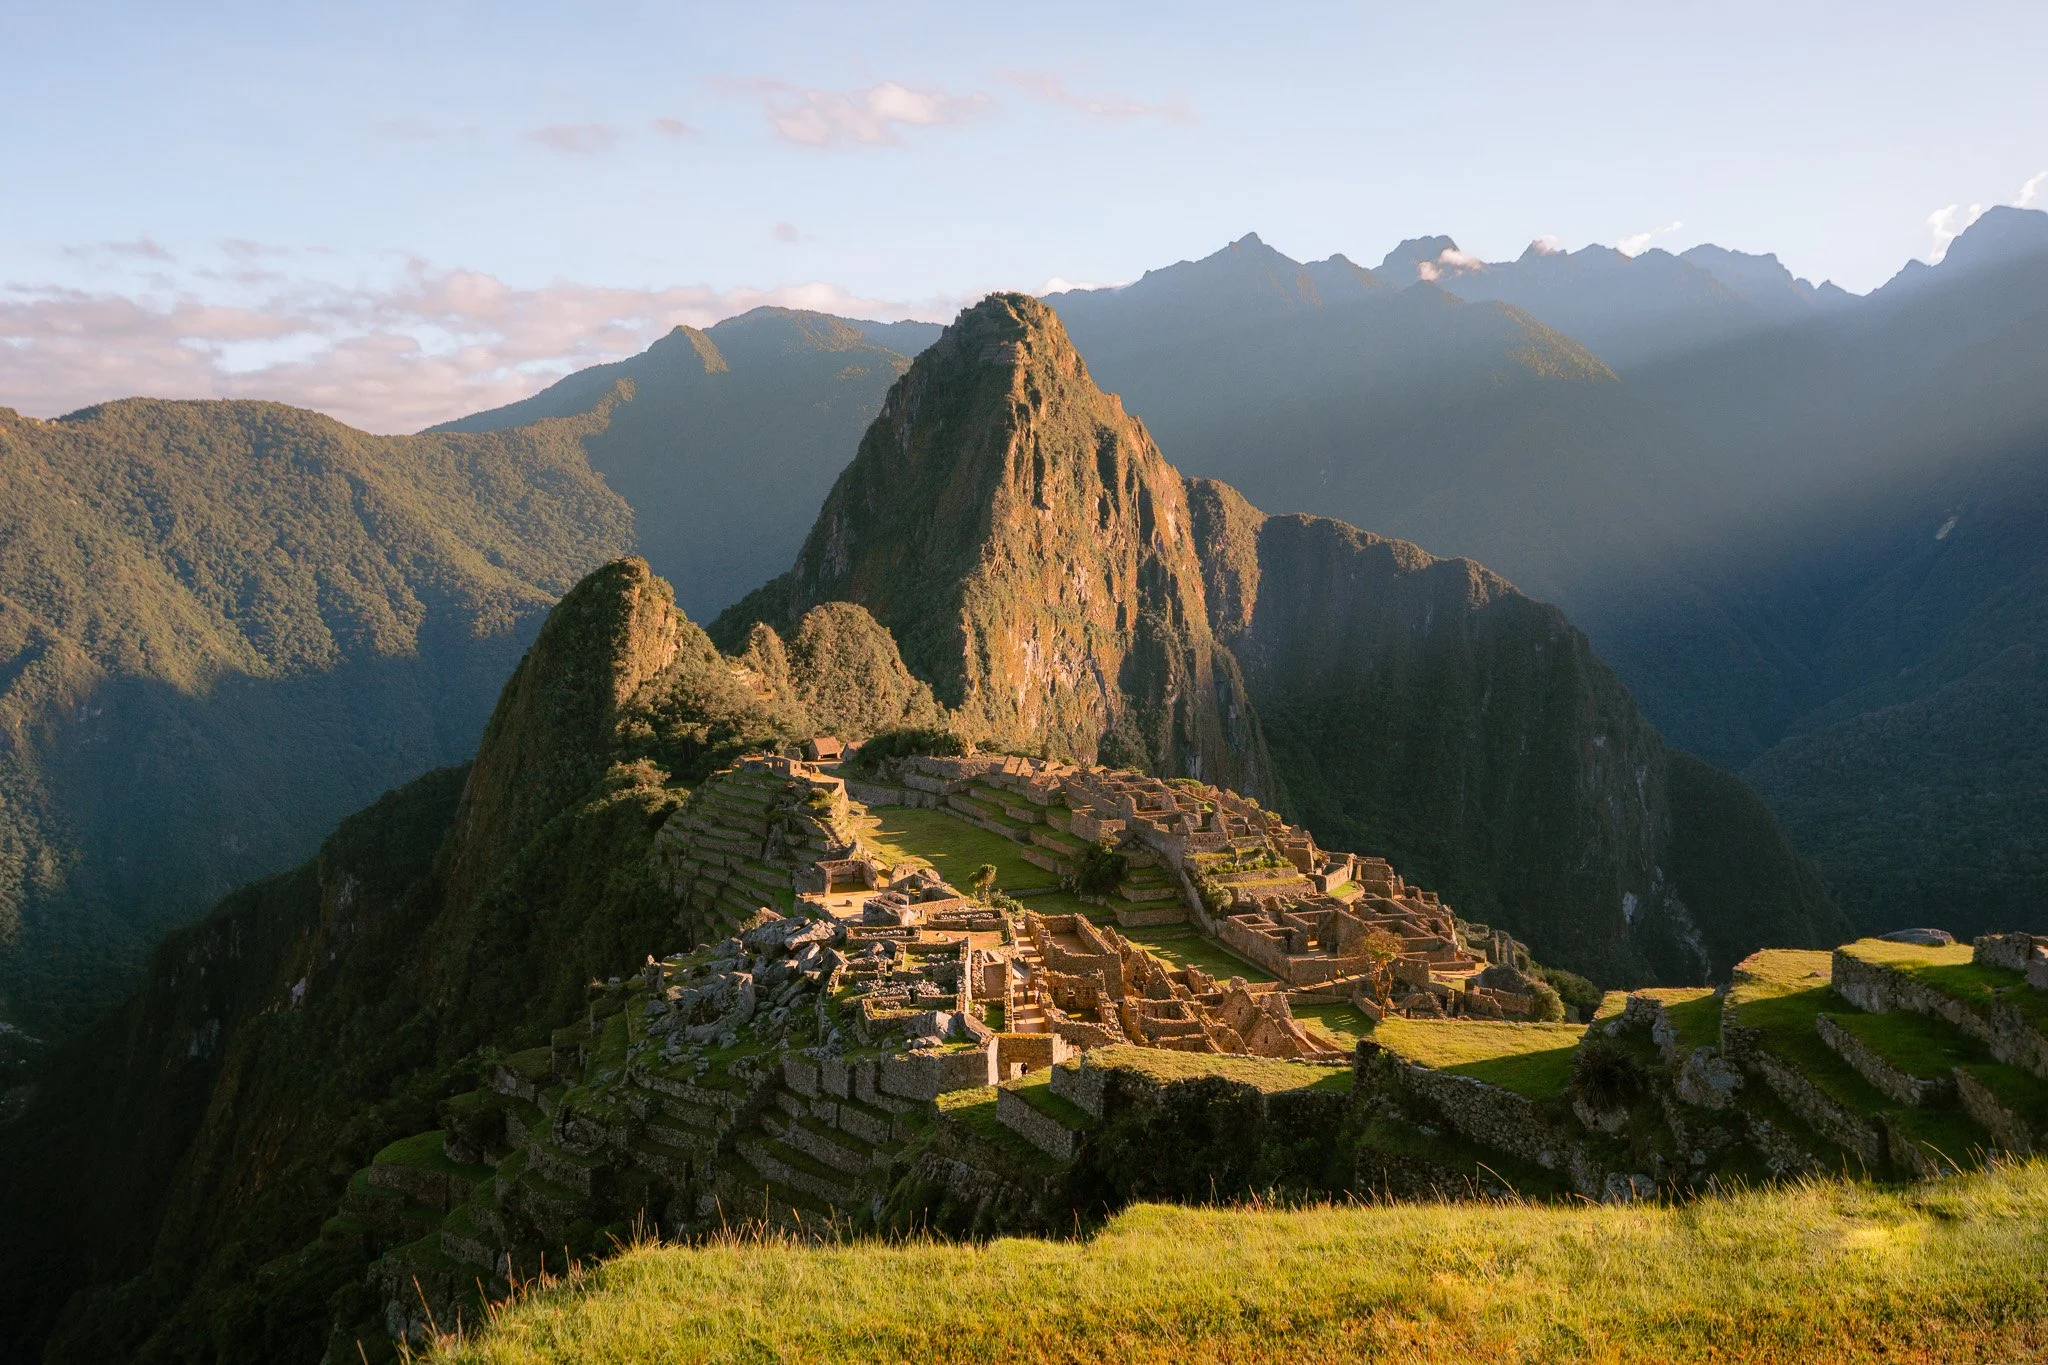
Machu Picchu is one of those places that you might have seen in hundreds of times in photos, but the feeling of actually being there is undeniably magical. I had tears in my eyes watching the sun rays light up the ancient, 15th century terraces that stretched across the mountain ridge, surrounded by steep green peaks and swirling clouds. The setting is breathtaking, the history is fascinating, and there’s something really powerful about finally seeing it in person after spending days moving through the landscapes that lead there.
From Aguas Calientes, most people either hike the steep stair trail up to Machu Picchu or take the shuttle bus that winds up the mountain. Our group opted for the shuttle bus, which leaves every few minutes and takes about 25 minutes to reach the entrance. Because after four days of trekking, no one in our group felt particularly motivated to add another uphill hike before sunrise…so we hopped on a 5am bus to get there bright and early.
Once we arrived at Machu Picchu, the scale of this UNESCO World Heritage Site was immediately impressive. We explored with our guide before having some free time to wander on our own, snapping photos (spotted an adorable chinchilla) and observed the mischievous llamas wandering freely.
One of the optional add-ons you can book when purchasing Machu Picchu tickets is Huayna Picchu, the steep mountain that rises behind the famous postcard view of the ruins. This permit is limited and requires a separate ticket, but if you’re up for the climb, it’s absolutely worth it. The hike is steep and narrow in places, but the views from the top are incredible. Looking down over Machu Picchu from above gives you a completely different perspective of the entire site and the dramatic mountains surrounding it.
After exploring the ruins and finishing the Huayna Picchu hike, we returned to Aguas Calientes for lunch and some celebratory Pisco Sours before taking the train back through the Sacred Valley and eventually returning to Cusco.
And just like that, the trek that began high in the Andes finally came to an end! Since Cusco is a bit of a journey from Aguas Calientes, I’d highly recommend giving yourself a 1-2 night buffer in Cusco, just in case of travel shenanigans. For example, we got stuck in some CRAZY traffic and road closures on our return trip due to a festival that was going on in Ollantaytambo.
My Best Tips for Trekking in Peru
Early morning group photo before setting off to hike up and over Salkantay Pass. Vibes were high!!
1. Take Acclimatization + Altitude Seriously
I cannot stress this enough. Even coming from Colorado, the altitude hit me way harder than I expected. Give yourself at least 2–3 days in Cusco before the trek, drink electrolytes constantly (even if you aren’t thirsty), and don’t plan anything strenuous right away. Headaches, nausea, and fatigue are all normal, but pushing through too quickly is not the move. I’d also suggest avoiding alcohol right before and during the trek, especially if you don’t want to exacerbate possible altitude sickness.
You can also talk to your doctor about getting Diamox, a prescription medication recommended for rapid ascents above 8,000 feet. It helps prevent symptoms like headaches, nausea, and dizziness and I’ve had several friends swear by it.
Lastly, when your guides offer you coca tea, definitely drink it. This is a traditional Andean remedy used to prevent and alleviate symptoms of altitude sickness — it helped me a lot.
2. Go Slow and Check Your Ego at the Door
This is not the place to prove how fit you are. You will see people of all fitness levels moving at their own pace, and the ones who do best are the ones who slow down. Tiny steps, steady breathing, and patience will get you much farther than trying to power through. Altitude humbles us all.
3. Pack for Every Season
The Salkantay Trek throws everything at you: cold alpine mornings, hot and humid jungle afternoons, rain, wind, and intense sun…maybe even snow (mainly at the top of Salkantay Pass). Layers are everything. I was constantly adding and removing gear throughout the day.
4. Bring More Snacks Than You Think You Need
Even though we were well-fed (honestly, the food was incredible), having your own snacks can be nice especially when your appetite is weird from altitude. Think protein bars, electrolytes, candy (looking at you, Nerds Gummy Clusters), anything that feels easy to eat. That said, our guides offered us snacks every morning of the Salkantay Trek.
5. Don’t Skip Electrolytes
Water alone is not enough. Electrolytes made a noticeable difference in how I felt, especially with altitude headaches and general fatigue. I brought packets and used them constantly. I recommend having a 3L hydration bladder (I like this one from Gregory) and then a Nalgene for my water with electrolytes.
6. Mentally Prepare for Day 2
Day 2 over Salkantay Pass is the hardest day by far. It’s long, high, and physically demanding. Knowing that ahead of time helped me pace myself and hydrate hydrate hydrate. But I promise, the moment you reach the top makes every step worth it.
7. Use the “Support” Options if You Need Them
There is zero shame in riding a horse for part of the climb or taking the train on the final day. This trek is about the experience, not suffering for the sake of it. Listen to your body.
8. Bring Cash (Small Bills!)
You’ll want cash for things like snacks, bathrooms, hot springs, tips, and small purchases along the way. ATMs are not accessible once you’re on the trek (although a lot of remote spots did have tap to pay which was crazy!)
9. Embrace the Lack of Comfort
This is about as luxurious as a backpacking trip might get, but don’t expect hot showers every night or a fancy bed. Showers may be cold or nonexistent, bathrooms are basic, and sleep can be rough at altitude. Once you accept that, it actually becomes part of the adventure.
Furthermore, the bathroom situation was a little touch and go! We had our own roll of toilet paper on the trail because many bathrooms or outhouses did not have toilet paper. Also, be sure to have some coins on hand because using bathrooms on trail often cost between 1-2 Peruvian Soles.
10. Be Present…It Goes by Faster Than You Think
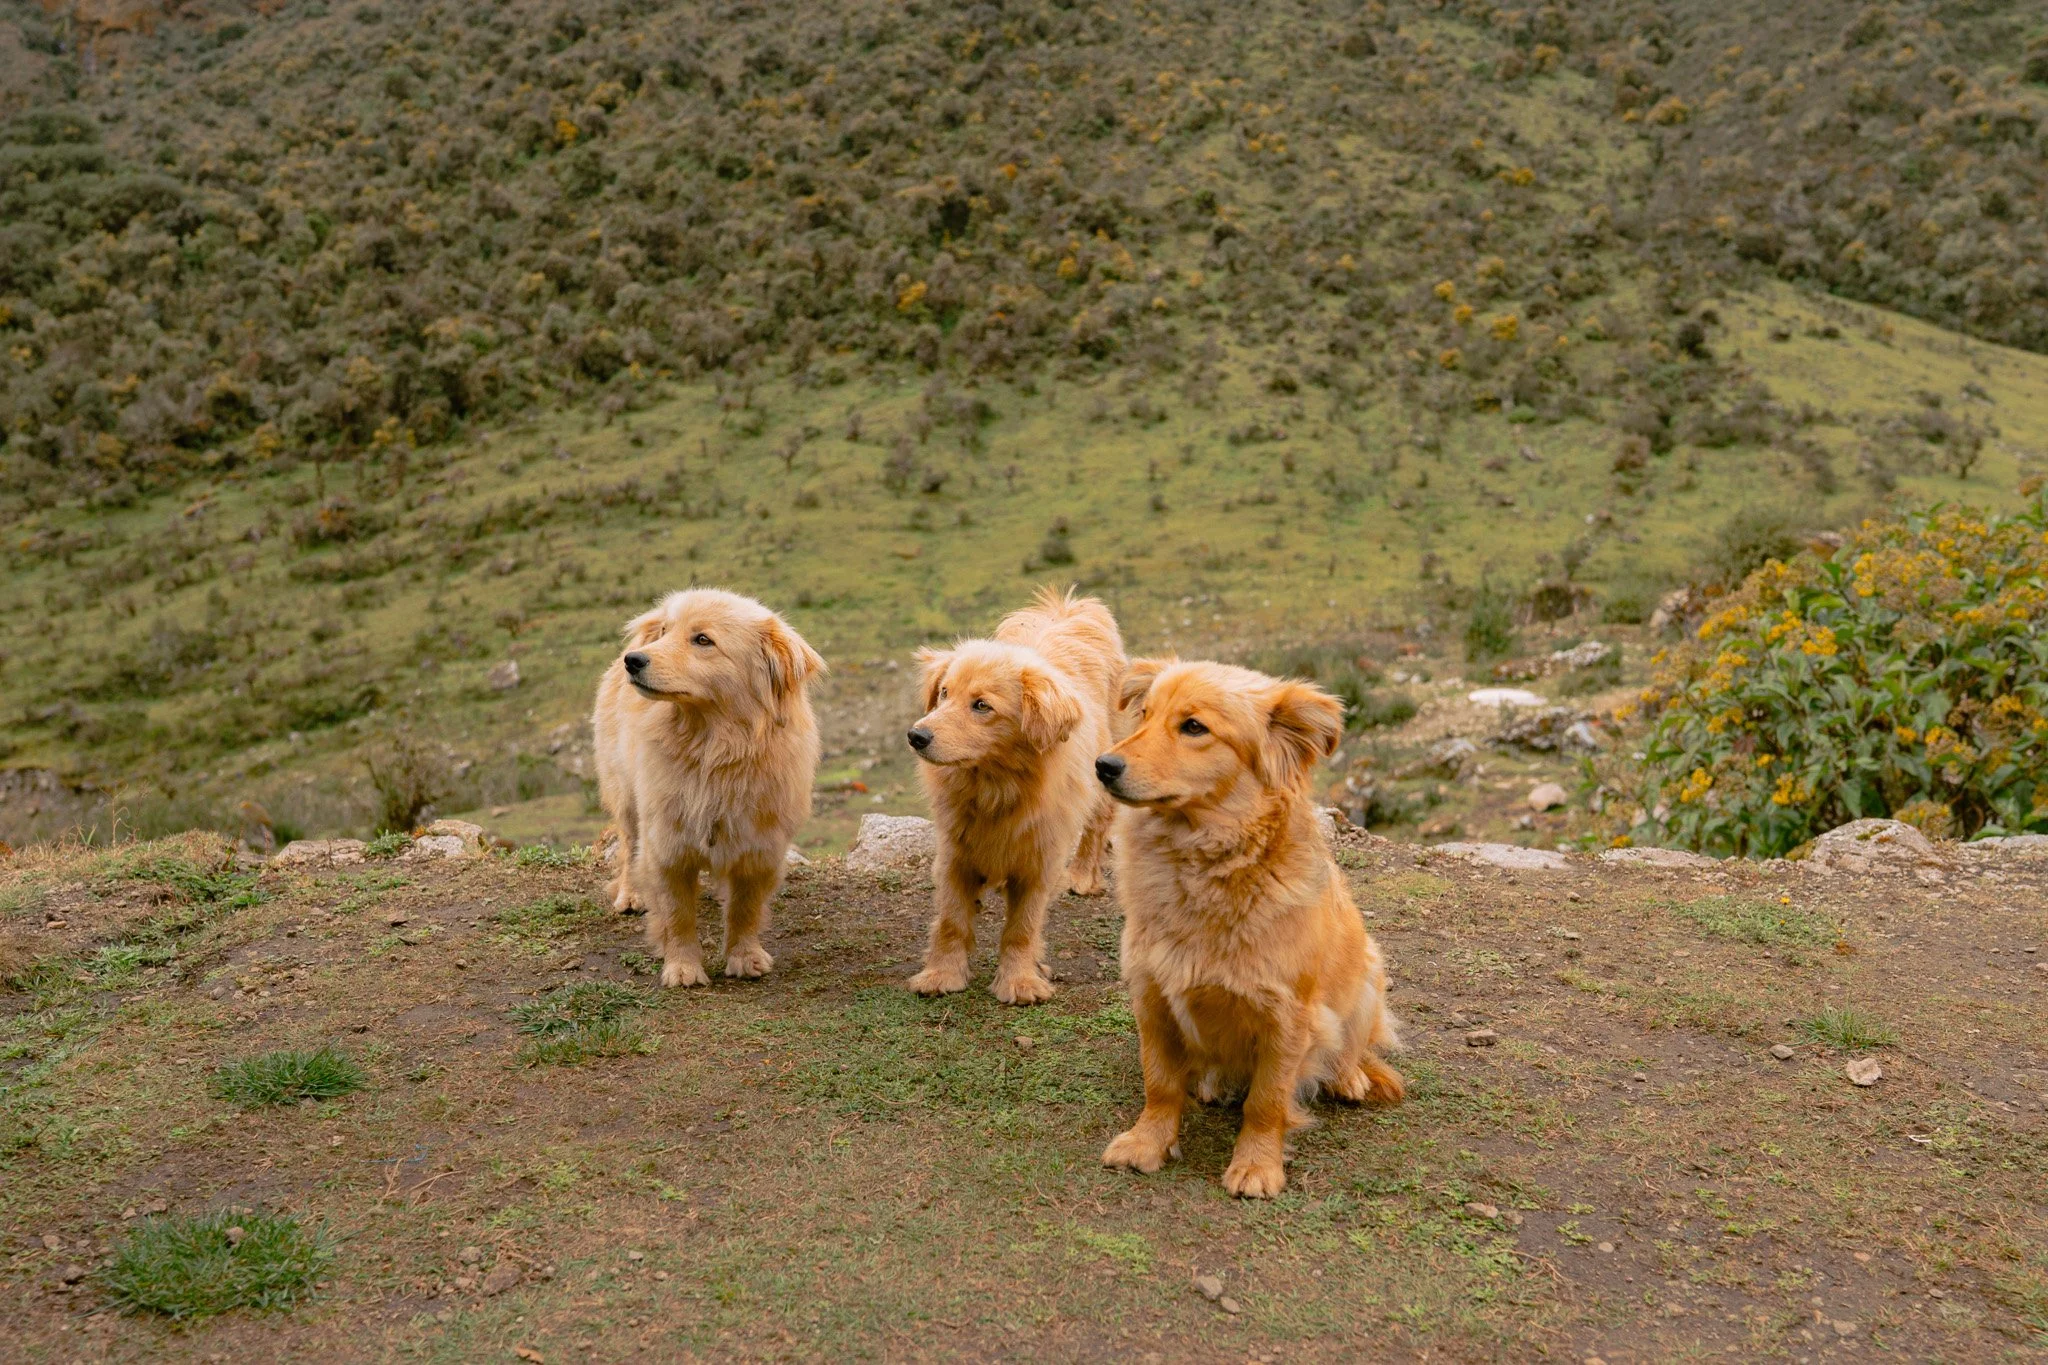
There were moments I was uncomfortable, tired, and questioning my own strength and ability to do a trek like this…and then suddenly it was over. Try to look past those moments where yes, things will inevitably be difficult. Instead, be present: those moments where you and your group will laugh together, struggle together, play games after dinner and of course…pet all the cute dogs.
It’s one of those experiences that stays with you long after you leave, and as I write this years after my trek, I welcome each and every memory that comes rushing back to me.
It also has me thinking…maybe it’s time for another trip to Peru? :)
I hope you found this trip report helpful! Leave a comment and share your thoughts or shoot me a DM on Instagram @dashaslens if you have questions. Happy adventuring!